Client certificates
Client certificates is in preview and may be subject to change. Please contact us to provide feedback.
Client certificates allow Atomic to authenticate itself to your servers when making outgoing HTTPS requests, using mutual TLS (mTLS). This is an additional layer of security beyond standard TLS. Rather than only the server proving its identity, the client (Atomic) also presents a certificate that your server can verify.
You can attach a client certificate to a webhook subscription or a Send Request step in an Action Flow to ensure that requests from Atomic are accepted only by your intended endpoint.
Managing client certificates
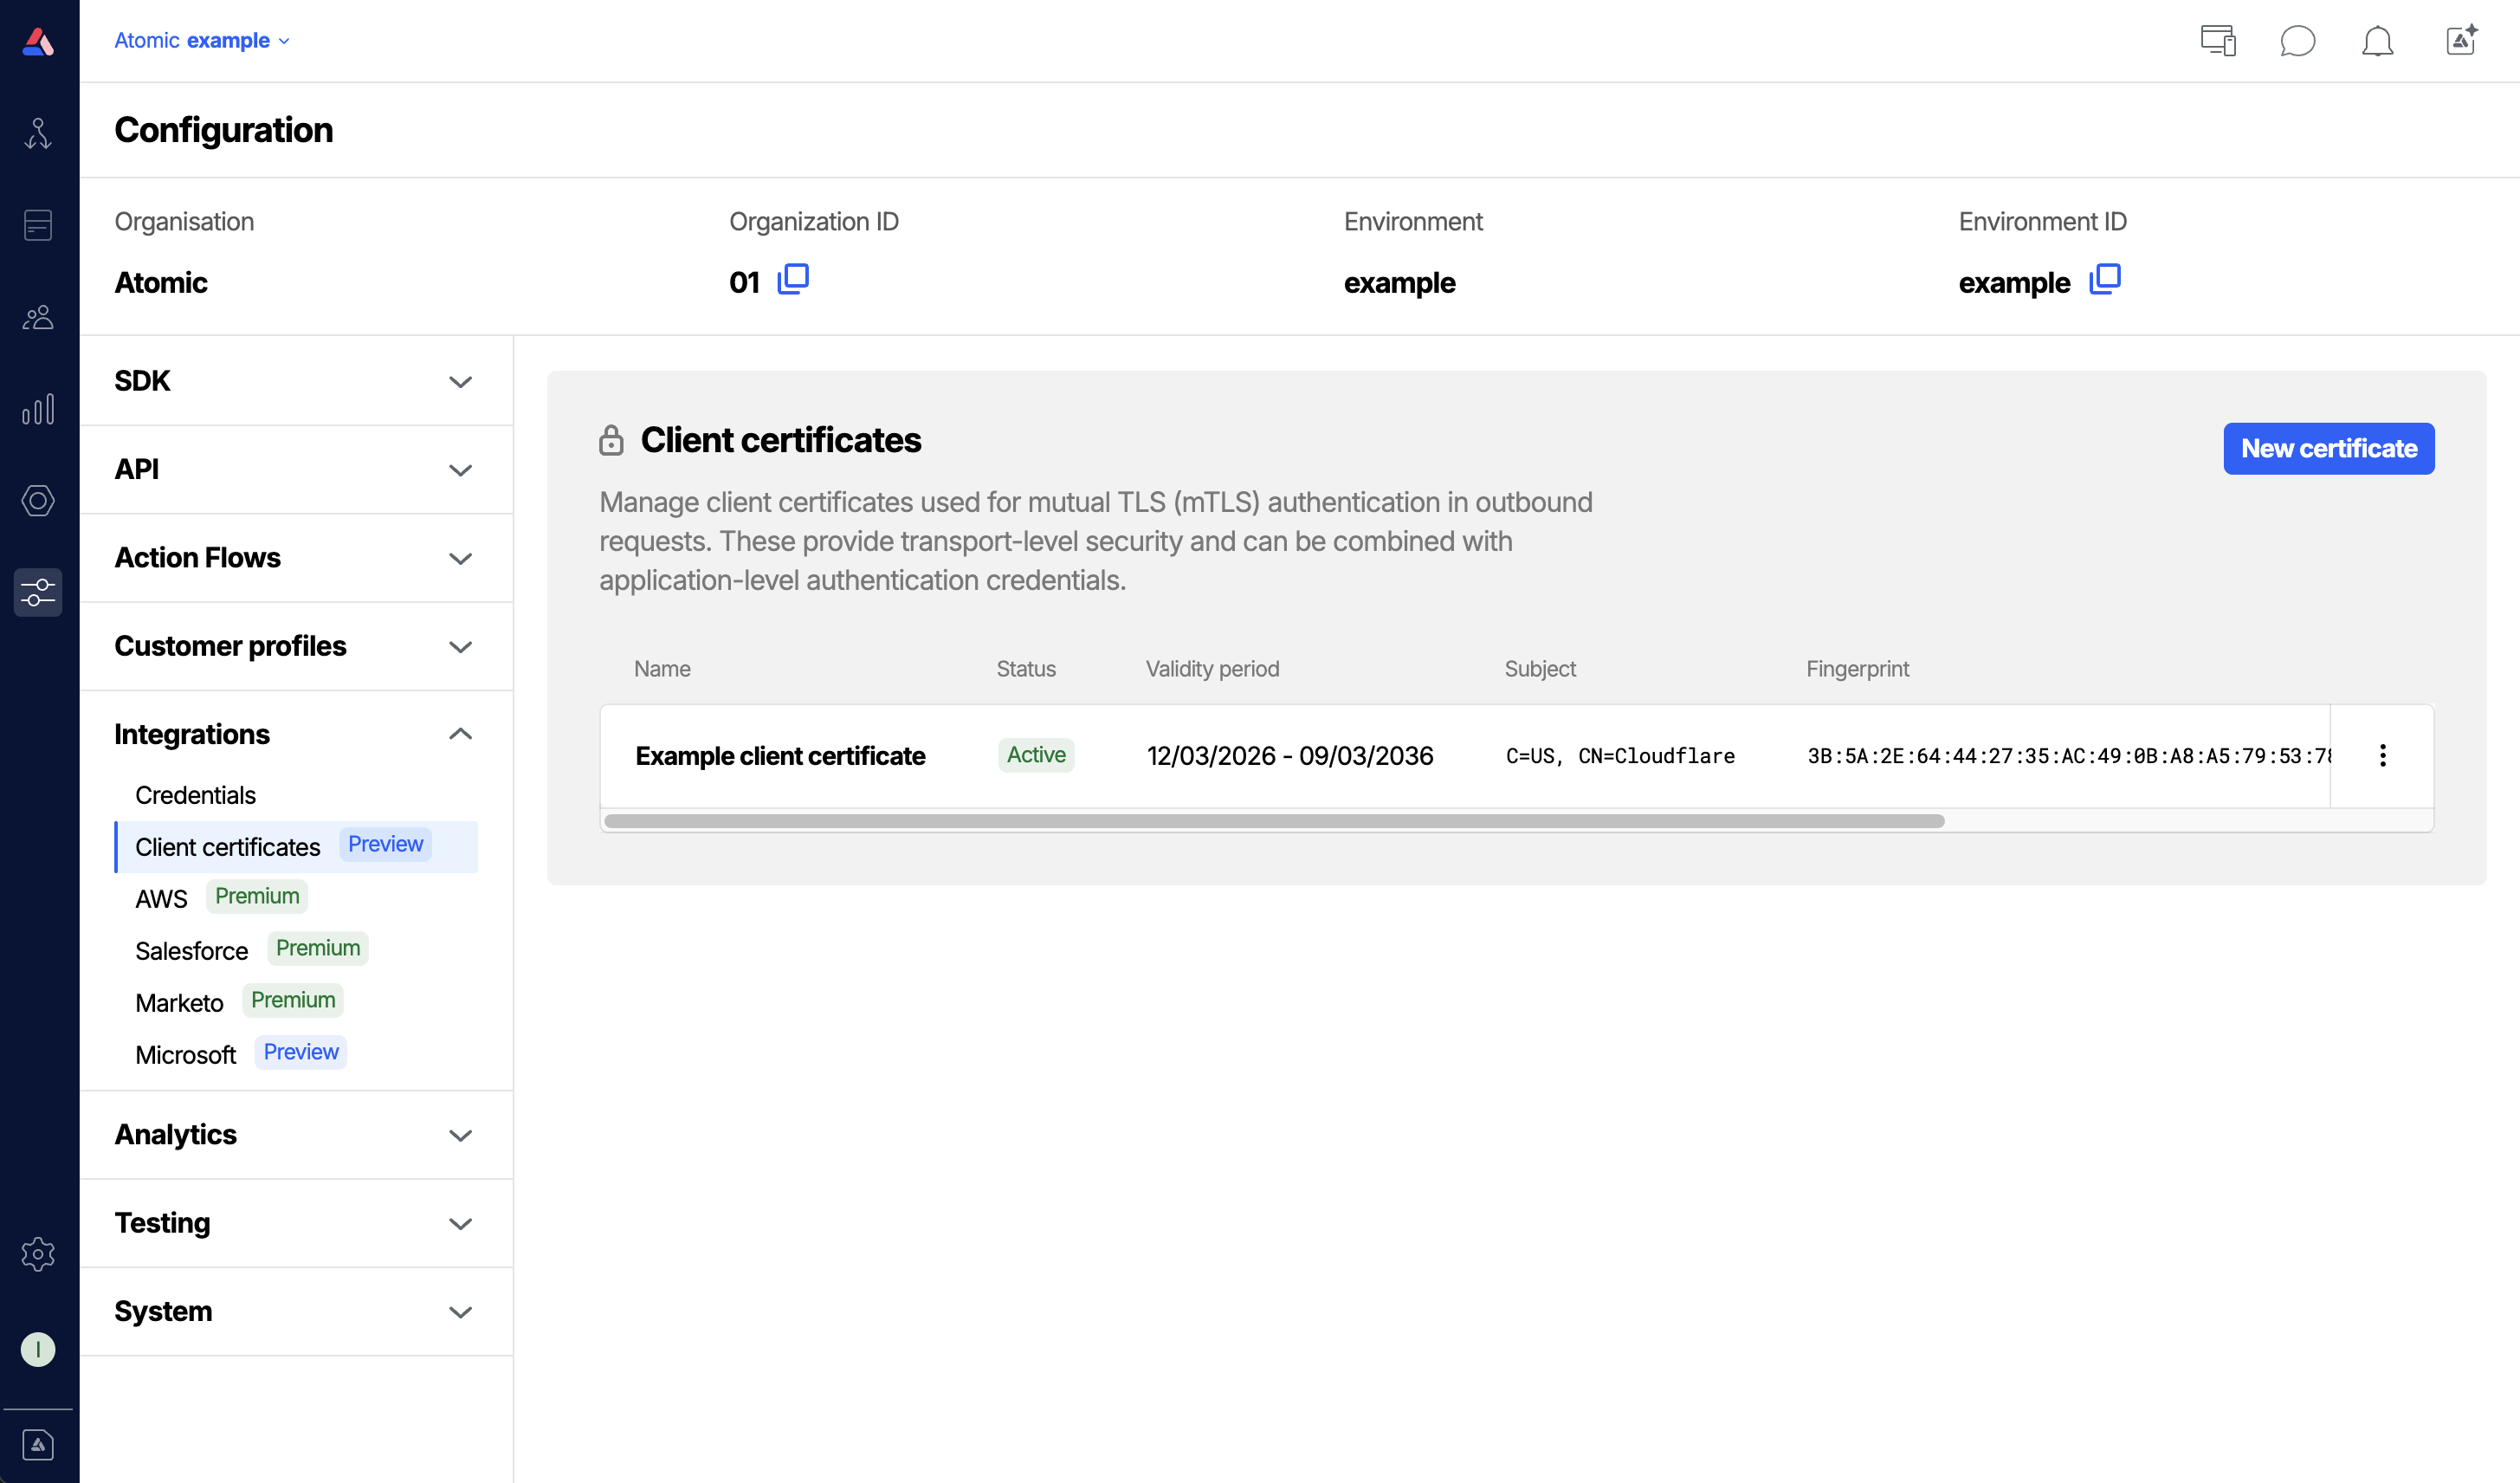
Client certificates are managed in the Configuration section of the Workbench. From here you can add, replace, enable, disable, and delete certificates.
Access to client certificates is controlled by a specific permission. See the Permissions guide to configure this permission for your Workbench members.
Add a certificate
- From the Configuration section in the Workbench sidebar, choose Client certificates.
- Click New certificate.
- Fill in the certificate details (see Certificate fields below).
- Click Save
Certificate fields
- Name: a friendly label to help you identify this certificate in the Workbench. Shown alongside the certificate in webhook and Send Request configuration.
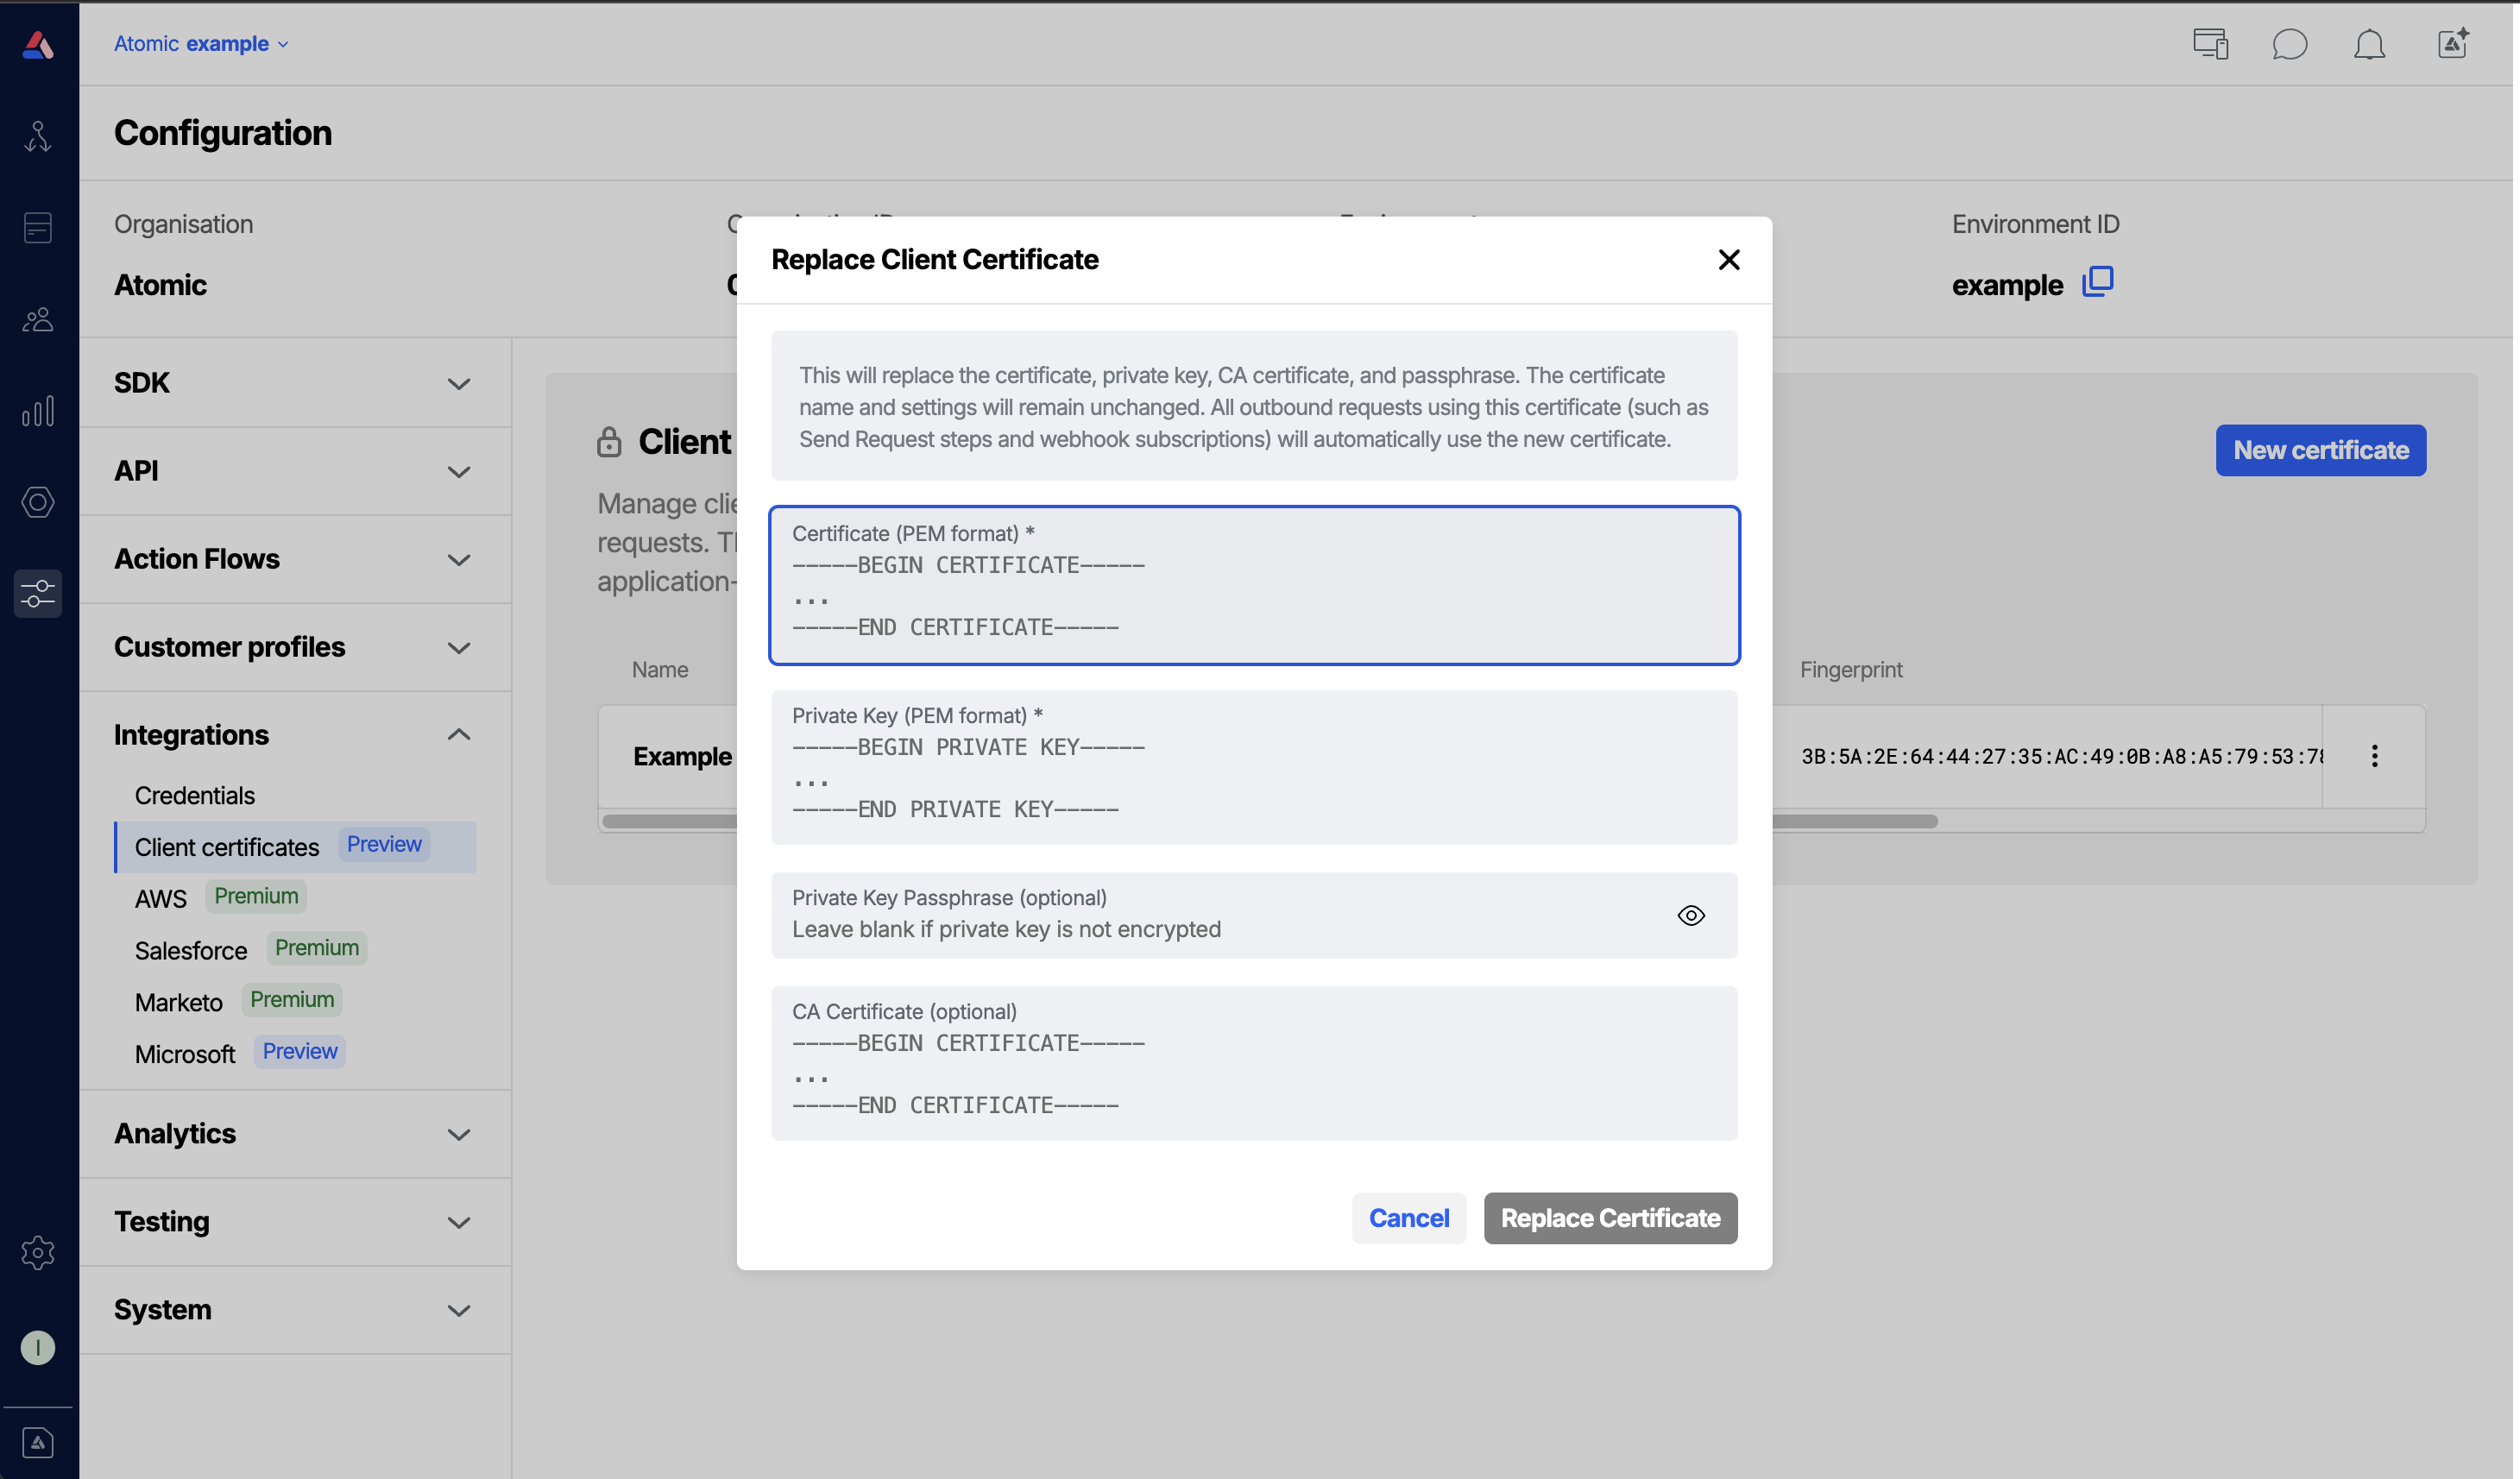
- Certificate (PEM): the client certificate in PEM format. This is the certificate that will be presented to your server during the TLS handshake.
- Private key (PEM): the private key corresponding to the certificate, in PEM format.
- Passphrase: (optional) if the private key is encrypted, provide the passphrase used to decrypt it.
- CA certificate (PEM): (optional) one or more CA certificates in PEM format. Use this if your server requires Atomic to present a full certificate chain. You can paste multiple certificates one after another to supply an entire chain.
- Server name (SNI): (optional) overrides the server name sent during the TLS handshake. Useful when the hostname in your URL differs from the certificate's Common Name, or when routing through a reverse proxy.
- Allow insecure: (optional) disables TLS certificate verification for this connection. Use this only in development or testing scenarios and is not recommended for production environments.
Certificates and keys must be provided in PEM format. PEM files typically start with -----BEGIN CERTIFICATE----- or -----BEGIN PRIVATE KEY-----.
Replace a certificate
When a certificate expires or needs to be rotated, you can replace its key material without reconfiguring the webhook subscriptions or Send Request steps that reference it.
- Click the Replace certificate option for the certificate to change.
- Provide the new certificate and private key. You may also update the passphrase and CA certificate at this time.
- Click Save. Existing references to this certificate will immediately begin using the new key material.
Disable or re-enable a certificate
Disabling a certificate prevents it from being used for outgoing requests without removing it from your configuration.
- To disable, click Disable in the certificate's menu.
- To re-enable, click Enable in the same menu.
Outgoing requests that reference a disabled certificate will not present a client certificate during the TLS handshake, and may be rejected by your server.
Delete a certificate
To permanently remove a certificate, click Delete in the certificate's menu. Any webhook subscriptions or Send Request steps currently referencing the deleted certificate will no longer present a client certificate.
Using client certificates
Webhook subscriptions
When creating or editing a webhook subscription, you can select a client certificate to use for that webhook subscription's outgoing requests.
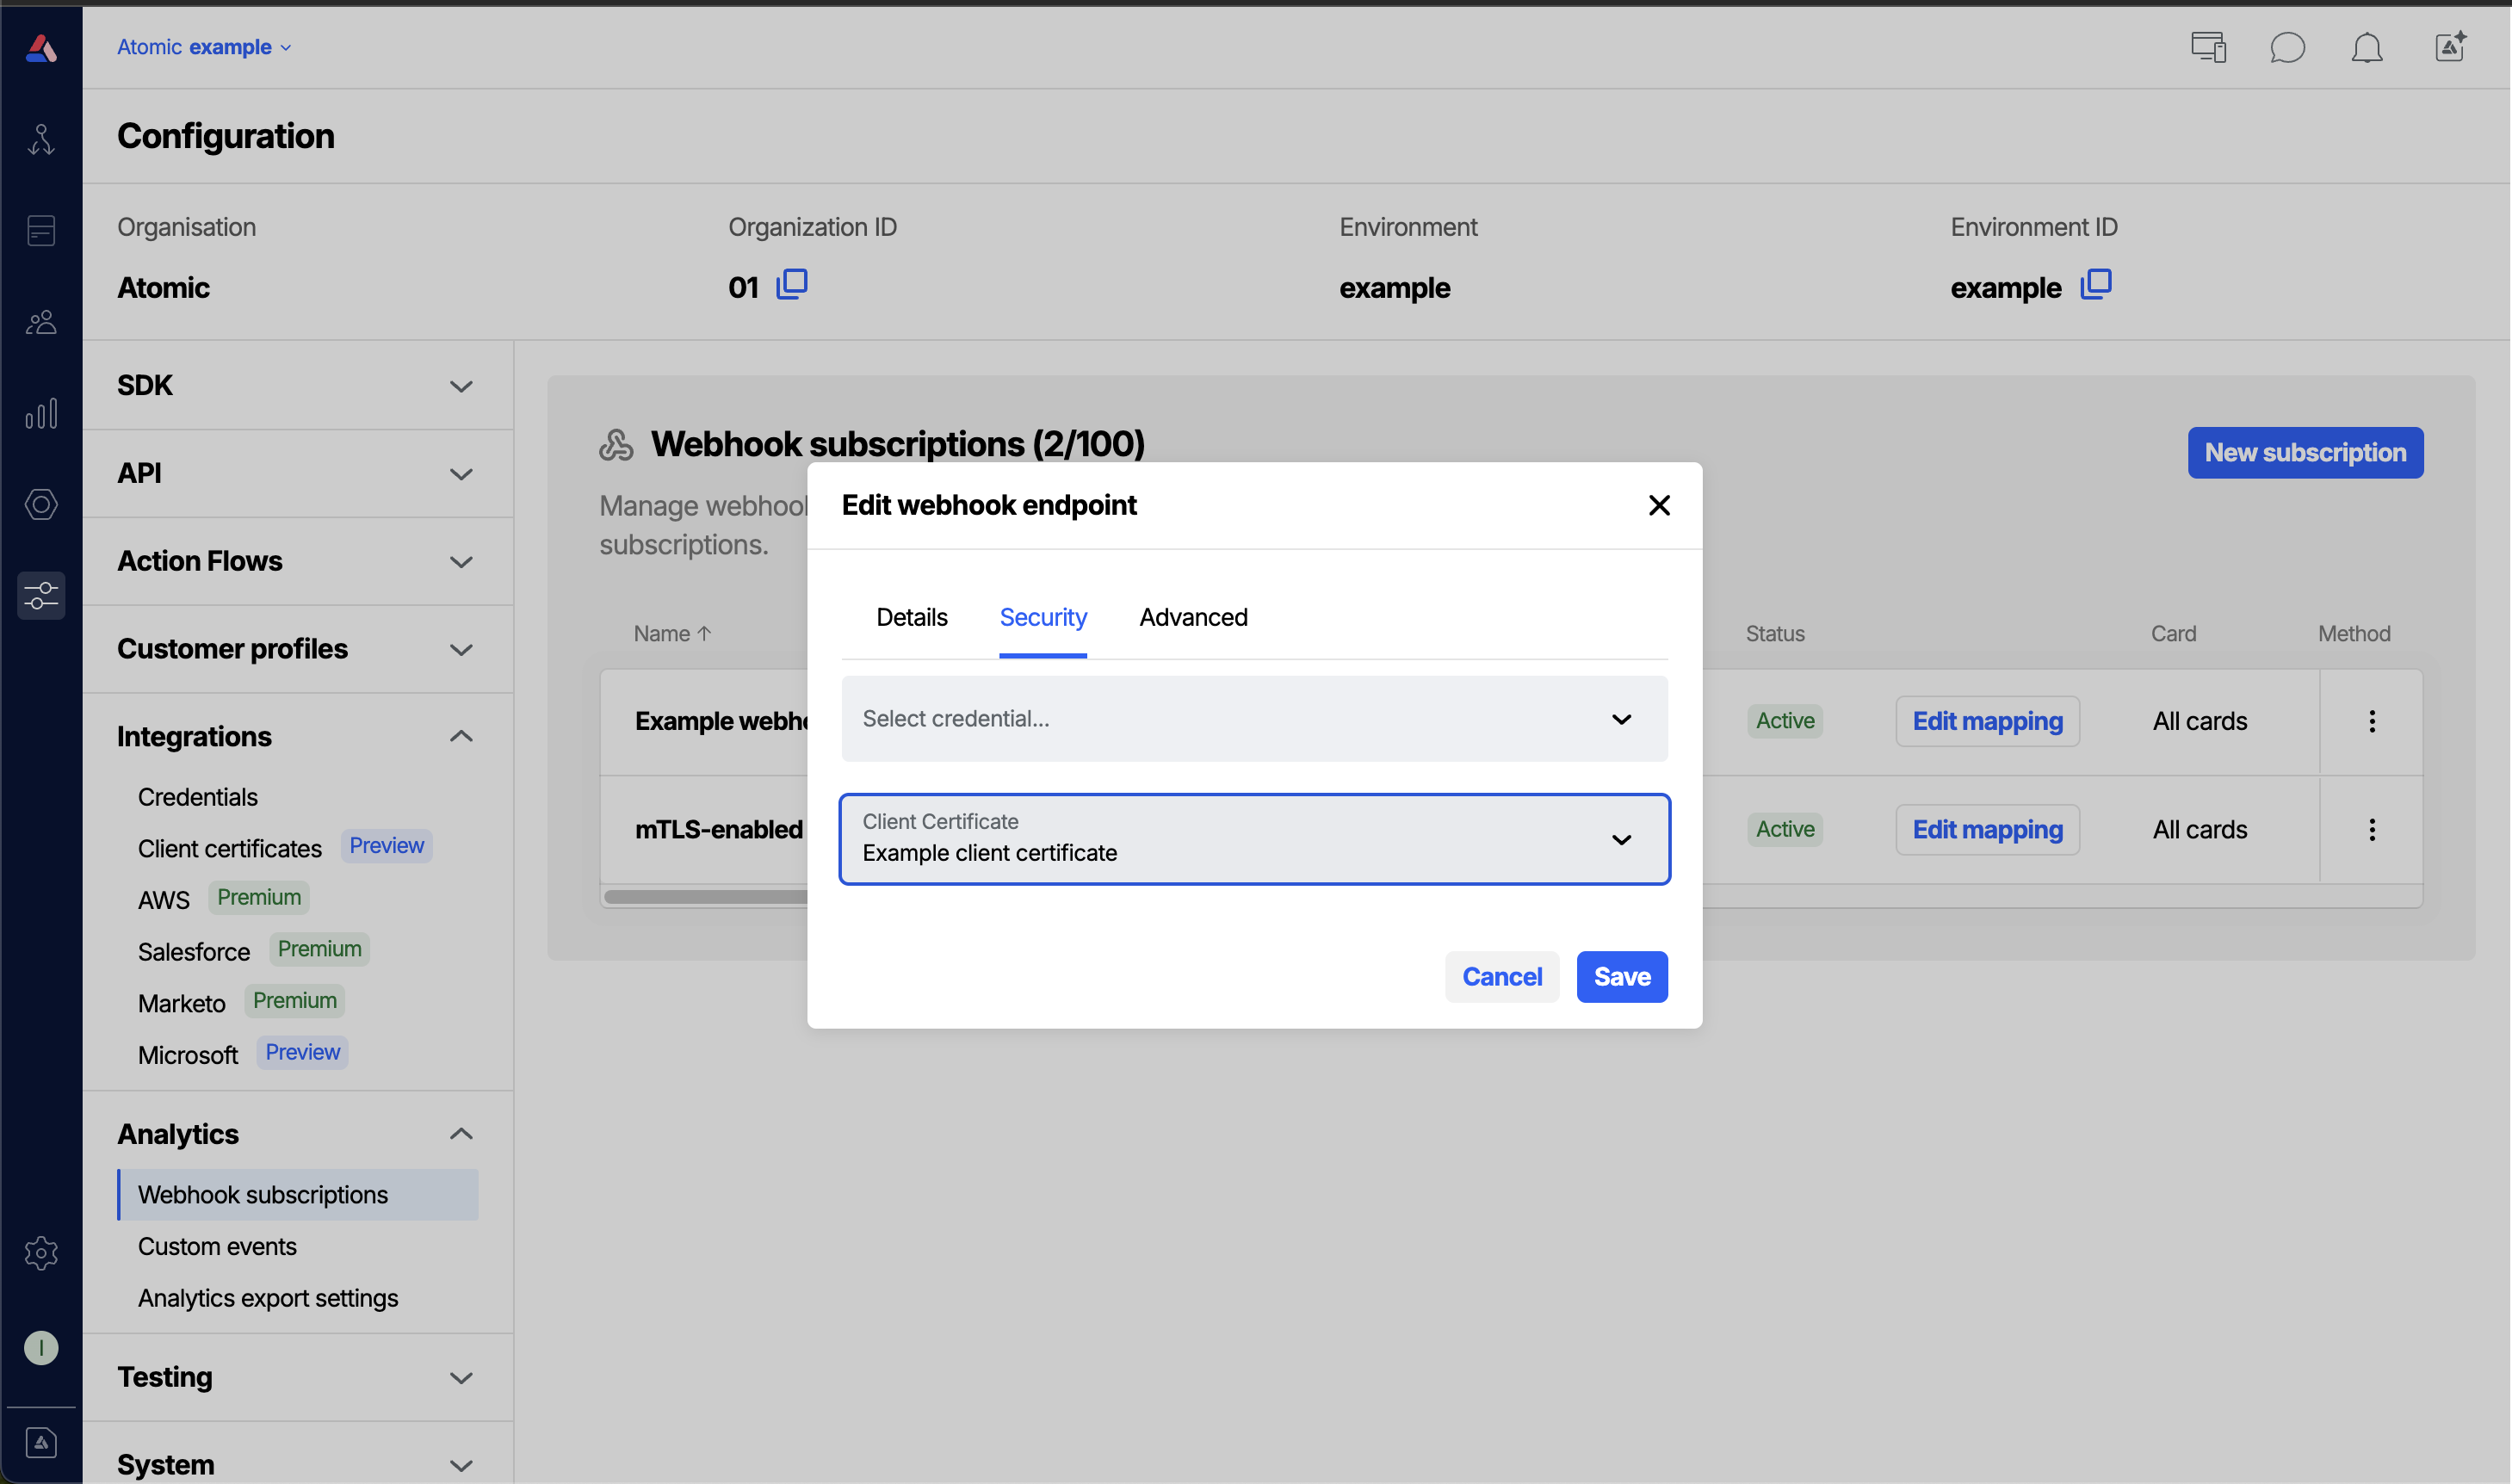
- Go to Configuration > Webhook subscriptions and open or create a subscription.
- In the Client certificate field, select the certificate you want to use.
- Save the webhook subscription. Atomic will present the selected certificate on every outgoing request for that webhook subscription.
See the Webhooks guide for full details on configuring webhook subscriptions.
Send Request steps in Action Flows
You can also select a client certificate for individual Send Request steps within an Action Flow.
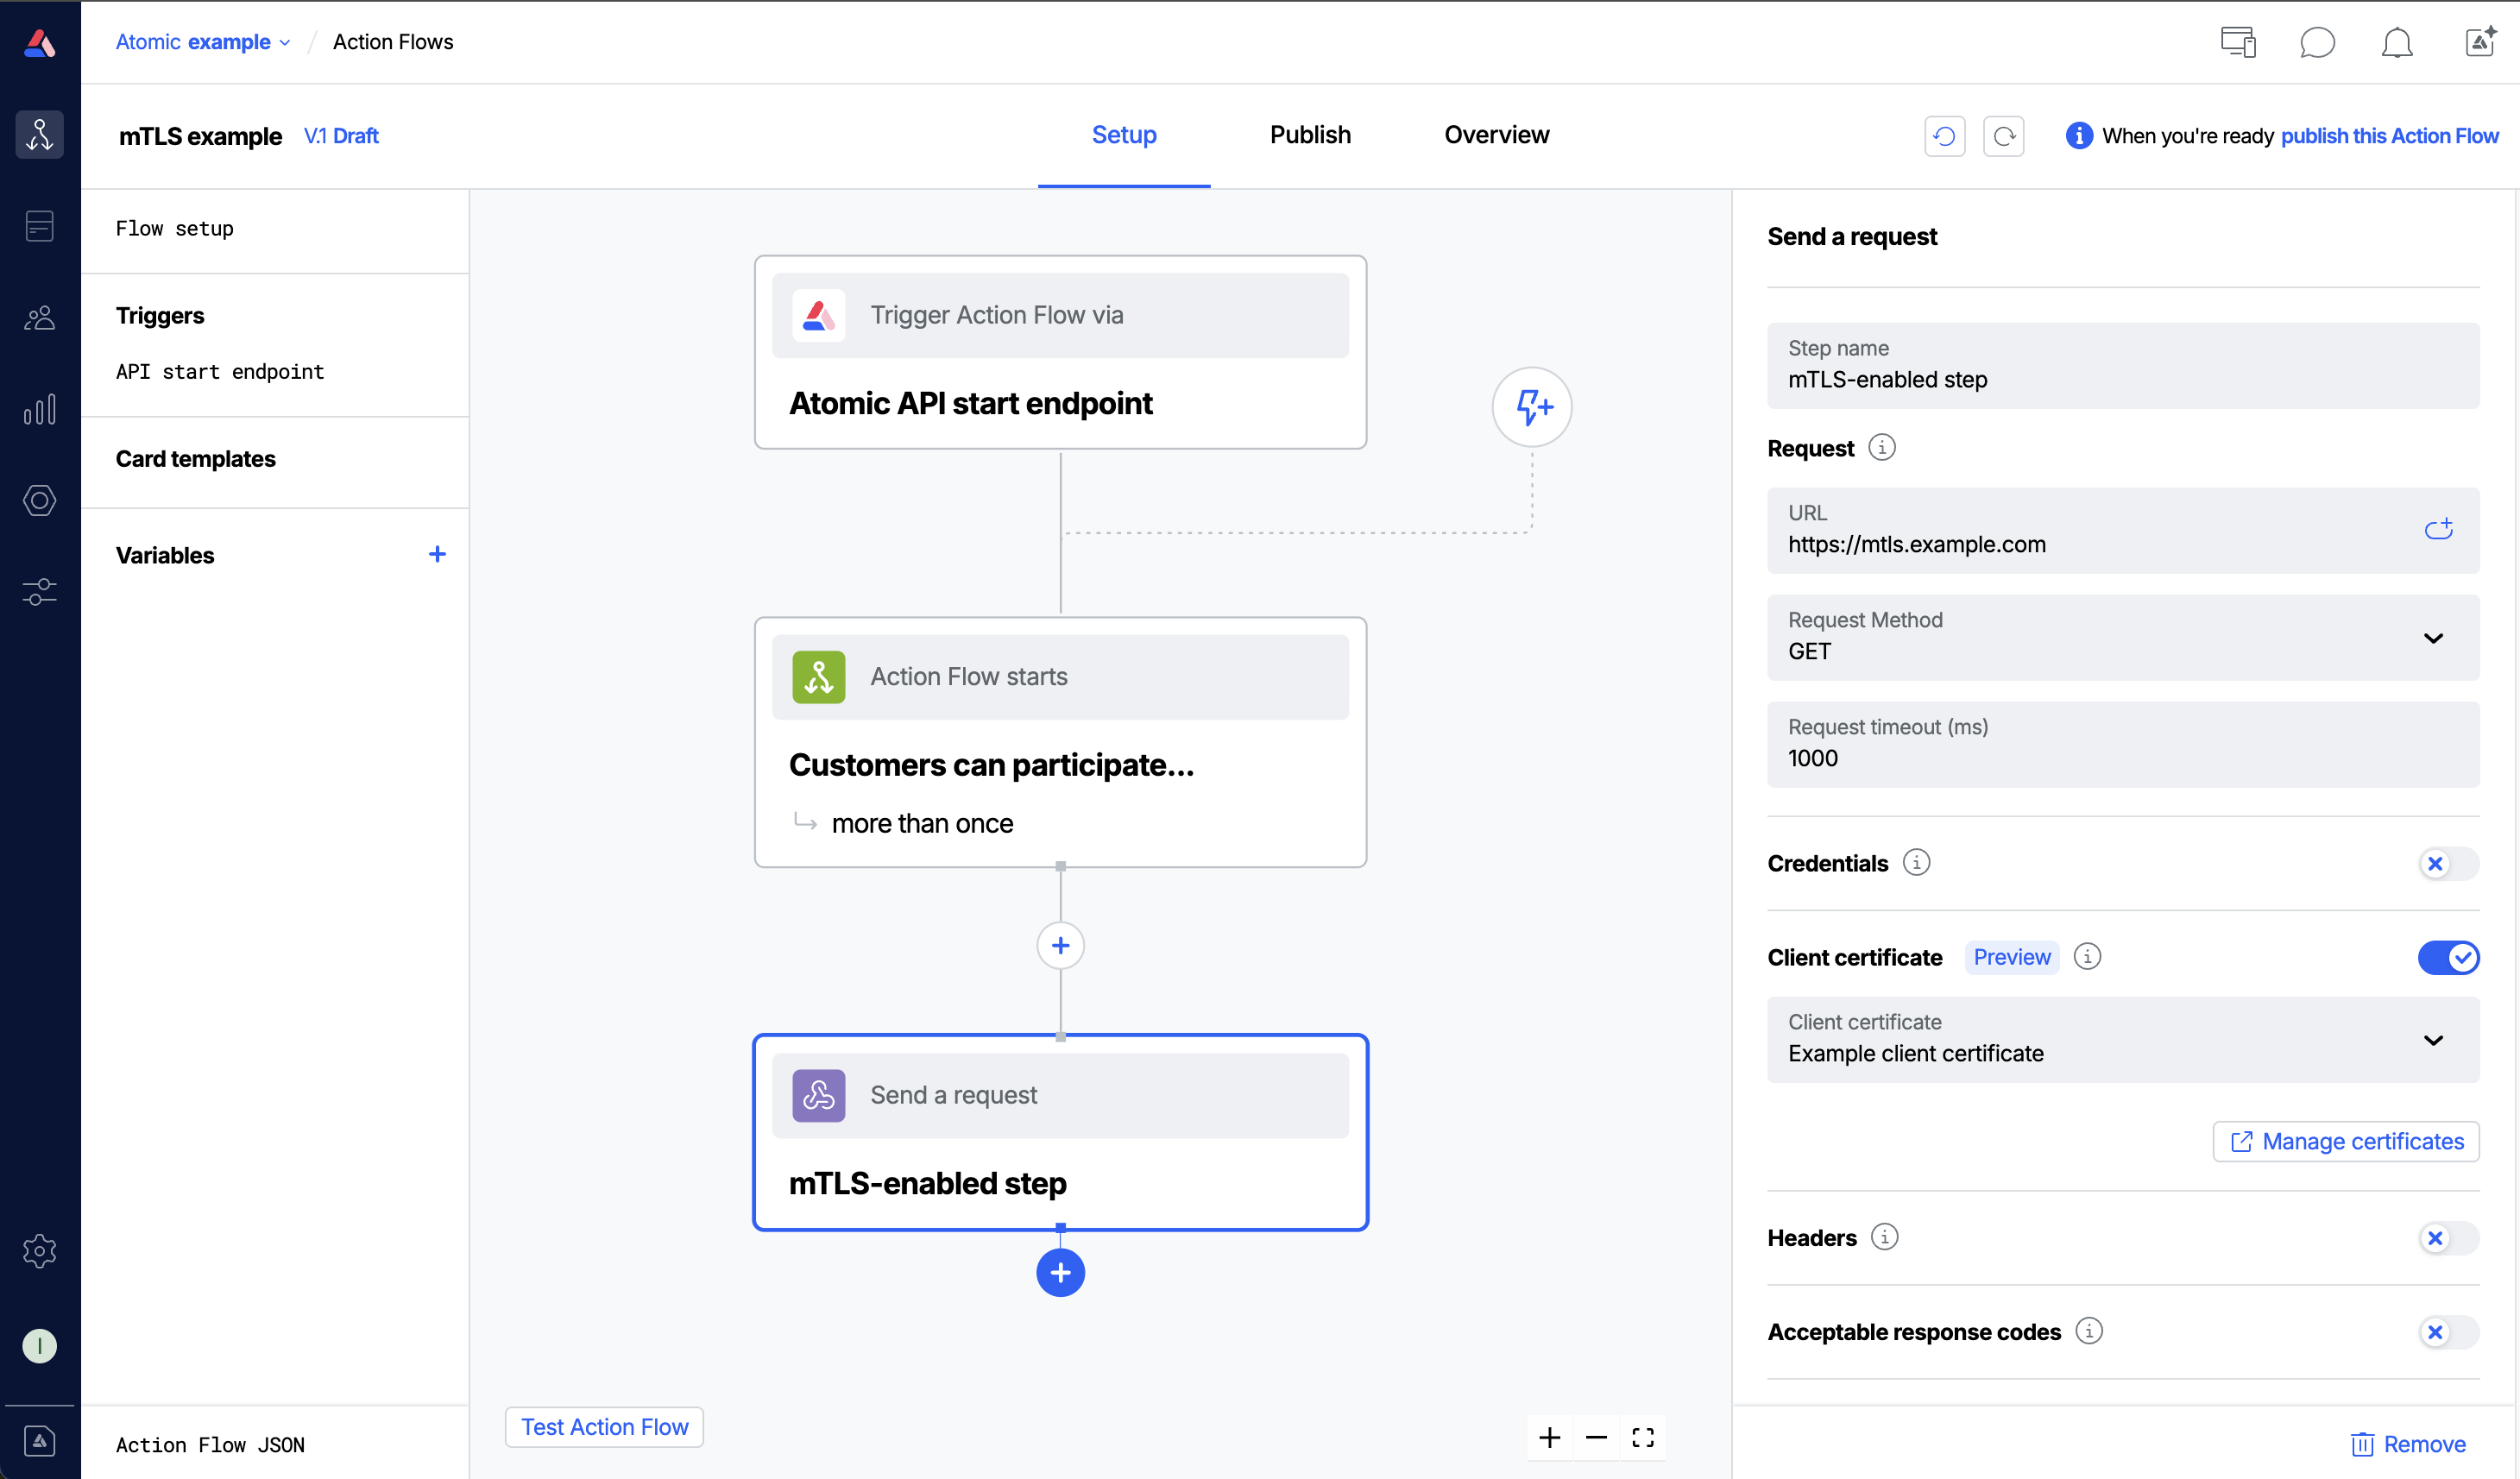
- Open or create a Send Request step in an Action Flow.
- In the Client certificate section, select the certificate to use.
- The certificate will be presented on each request this step makes.
Troubleshooting
When a request fails due to a certificate or TLS problem, the error is shown in the webhook subscription logs or in the Action Flow analytic events. The table below maps the error messages you may see to their likely causes and fixes.
| Error message | Likely cause | What to do |
|---|---|---|
| TLS protocol error occurred. This may indicate a mutual TLS configuration issue. | The server rejected the TLS handshake. A common cause is a missing or incorrect Server name (SNI) as the server may require a specific hostname during the handshake that differs from the URL. | Set the Server name (SNI) field on the certificate to match the hostname your server expects. |
| Hostname does not match the certificate. Check the server name (SNI) configuration. | The certificate's Common Name or Subject Alternative Names do not match the hostname being connected to. | Set the Server name (SNI) field to override the hostname sent during the handshake, or ensure the certificate is issued for the correct hostname. |
| Certificate has expired. | The client certificate has passed its Not After date. | Replace the certificate with a renewed one using the Replace certificate action. |
| Certificate is not yet valid. | The client certificate's Not Before date is in the future. | Check that the certificate's validity period is correct, or wait until the certificate becomes valid. |
| Unable to verify certificate signature. | The server could not verify the certificate against a known CA. | Provide the full certificate chain in the CA certificate (PEM) field, including any intermediate CA certificates. |
| Unable to verify the certificate chain. Ensure the CA certificate is configured correctly. | One or more intermediate CA certificates are missing from the chain. | Add the missing intermediate certificates to the CA certificate (PEM) field. Multiple certificates can be pasted one after another. |
| Certificate is not trusted. | The server does not trust the CA that issued the client certificate. | Ensure your server is configured to trust the CA that signed the client certificate. |
| Self-signed certificate detected. | The server's own certificate is self-signed and cannot be verified. | For development/testing only: enable Allow insecure to skip server certificate verification. Do not use this in production. |