Webhooks
You can register one or more Webhook subscriptions to receive analytics events created by the Atomic platform. A maximum of 100 Webhook subscriptions can be created per environment.
Events available in webhooks include our standard analytics events, and can also include your customers individual card response values if required.
Webhook payloads are in the shape of our analytics events, but you can change the shape of the event payload using JavaScript to map it to your required shape.
Webhook requests are signed by Atomic originating from a static IP address, and can be sent to authenticated API endpoints using credentials that you save in the Workbench. Once configured, credentials can be reused between more than one webhook subscription, as well as when making API requests via Send Request steps in Action Flows.
Webhooks requests that fail are retried a number of times using an exponential back-off approach. A webhook subscription will be automatically paused after we detect failed requests that were not eventually be delivered.
Creating a webhook subscription
From the Webhook subscriptions configuration tab you'll see all existing subscriptions, and their active status.
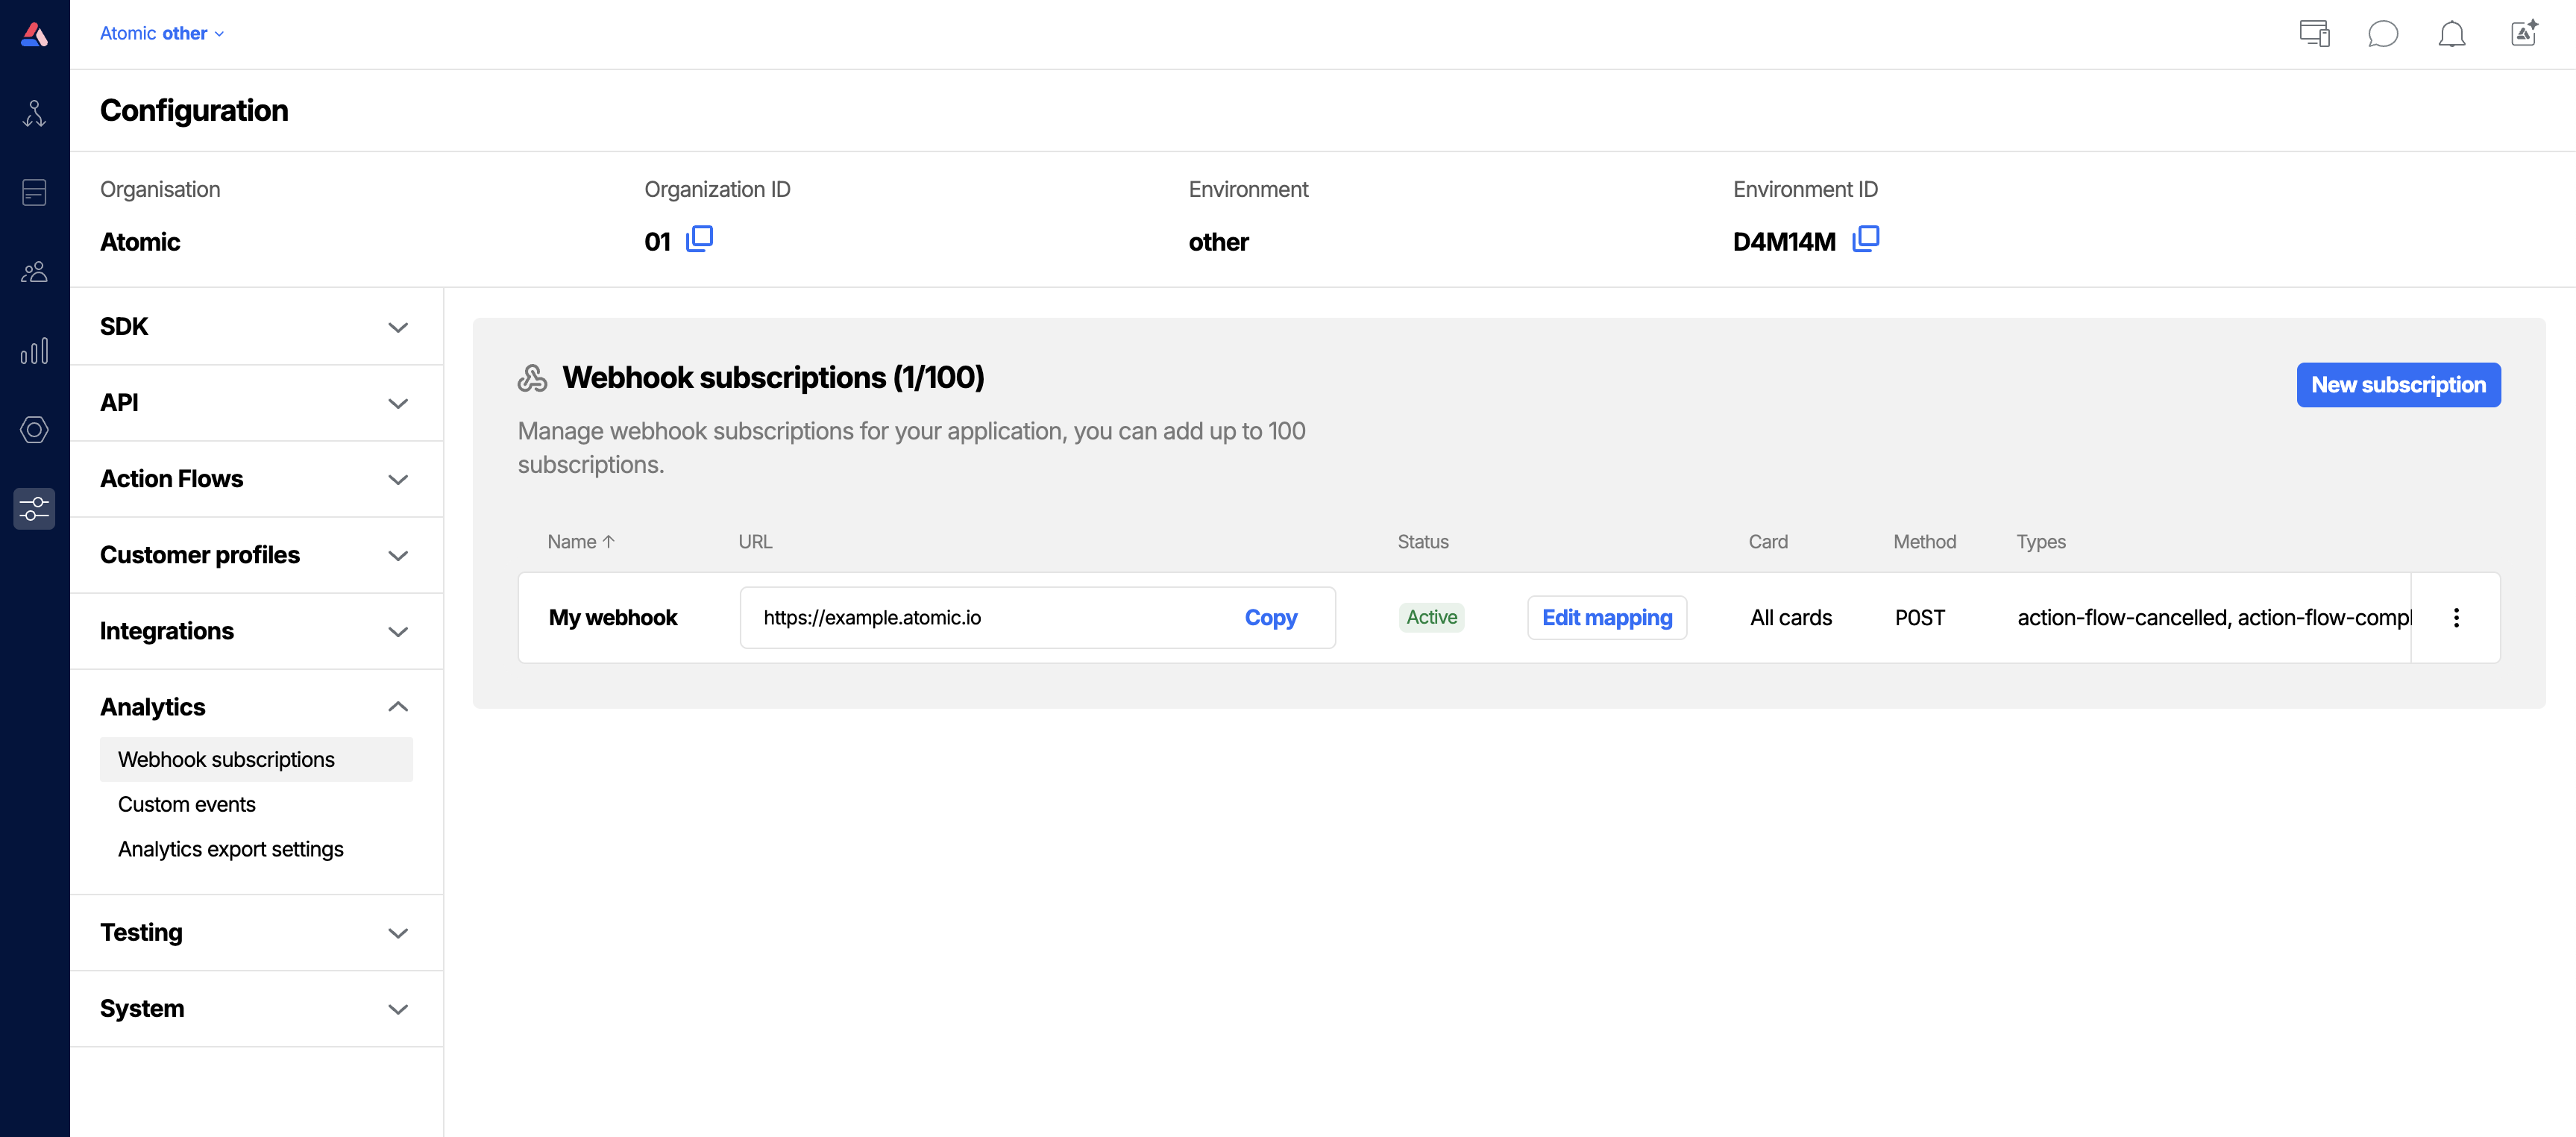
Create and manage webhook subscriptions from the Subscriptions configuration tab
Before you start: If this webhook subscription will be sending requests to an endpoint that requires authentication, create a credential before setting up your subscription. Once created, you can reuse the credential on multiple subscriptions if needed.
- To create a subscription, click New subscription.
- Select card - (optional) choose a specific card to only get events scoped to that card, or leave this empty to receive events relating to all cards and Action Flows. Note: once saved, this setting cannot be edited.
- Enter webhook name - (required) give your subscription a name that will help you distinguish one from another in your list.
- Select event types - (required) choose the specific events you want to receive. You can edit this setting later if required.
- Request method - (required) if the default request method (POST) isn't what you need, you can change it to a PUT. If you need to make a different request type, consider using a Send Request step within a specific Action Flow, which supports a wider range of request types.
- URL - (required) enter the URL you want to send events to. Just testing? Consider using a service like webhook.site to generate a temporary URL to send events to, then use that in your webhook subscription.
- NOTE: If you use a custom port (ie. not 443) in your webhook URL, please get in touch.
- Headers - (optional) if you need Atomic to send headers with the request, set them here. Note, authentication will typically be handled with a saved credential. Headers may be useful in situations where you need to hard-code a particular header to satisfy the receiving systems requirements.
- Credential - (optional) if the webhook requests are going to be sent to an endpoint that requires authentication, you choose one of your saved credentials here.
- Max retries - (required) The maximum amount of times to retry a failed event, can be set to 0 to disable retries (default: 23).
- Include test events - (optional) choose whether or not you want the webhook to send test events to your target endpoint (default: enabled).
- Auto-disable - (optional) choose whether or not you want the webhook to become disabled after all available retries for a given event have been exhausted (default: enabled).
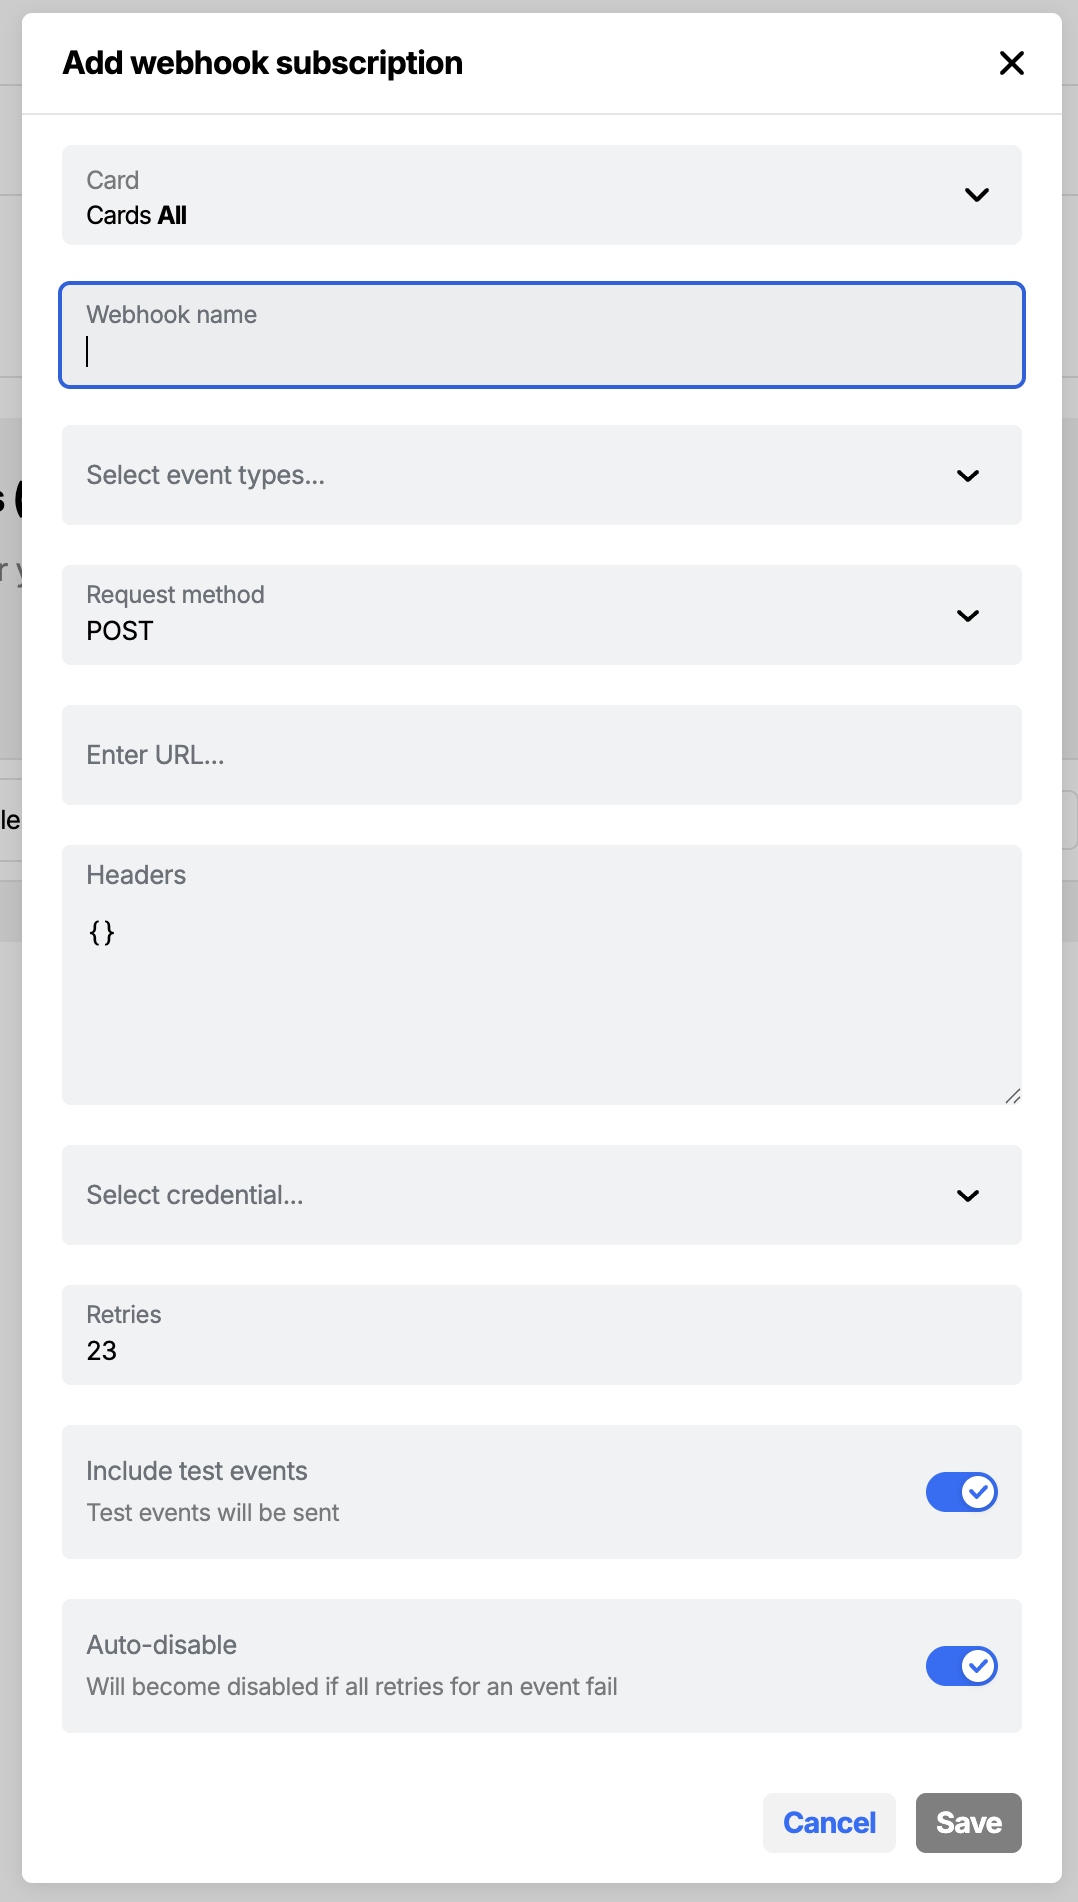
Click New subscription to define a new webhook subscription
Create a mapping to change the shape of your webhook payload
Now that you've created a webhook subscription, you can optionally create a mapping that alters that shape of the event payload. Click Edit mapping on the subscription you want to modify, then write JavaScript that creates the shape you need. In the mapping editor, the left colum shows an example of the data available to your mapping script. You can reference data with dot notation. You will write the mapping in the center column, and the right column will show you feedback and an example of the payload your mapping will create. Stuck? contact support and we can help.
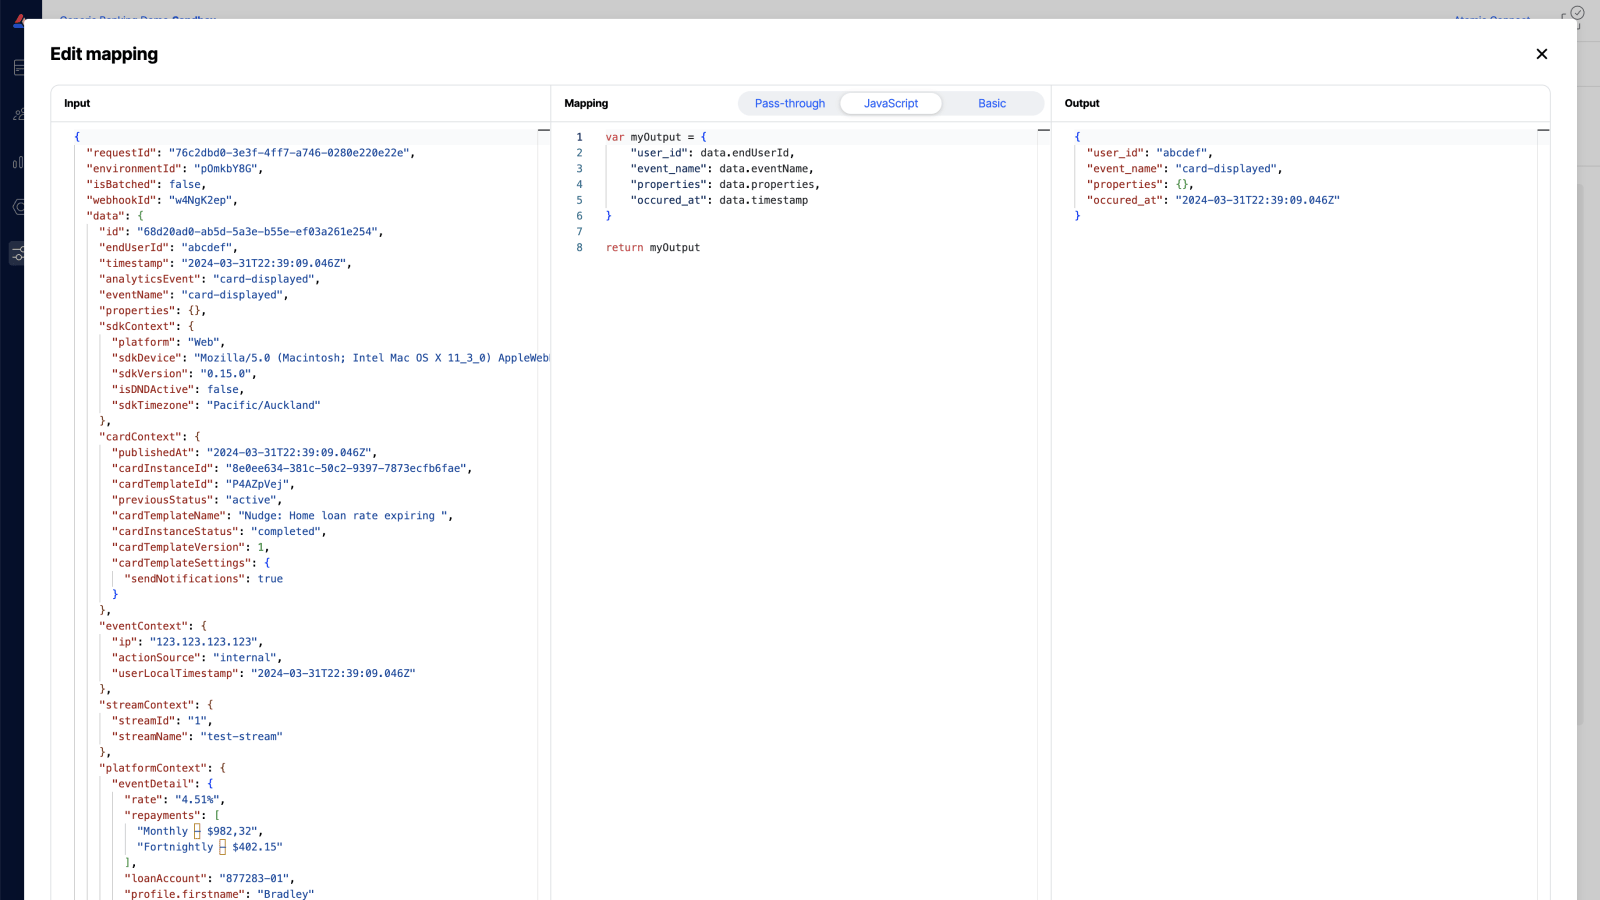
Create a different payload shape for your webhook using JavaScript in our mapping editor
Verifying webhook payloads
Webhook requests are signed with an associated secret; your system should verify that the request originates from Atomic, and hasn't been tampered with, by checking the provided signature can be recreated using the payload and secret. Each webhook request has a vnd.io.atomic.signature header which contains the signature. Your system should use a timing-safe comparison function rather than comparing the raw strings, to avoid timing attacks.
Example payload verification in node.js, using createHmac and timingSafeEqual:
import crypto from 'crypto'

const secret = '<secret associated with this webhook>'
const body = '<request body>'
const requestSignature = '<vnd.io.atomic.signature header value>'

const signature = crypto
  .createHmac('sha256', secret)
  .update(body)
  .digest('base64')

if (
  signature.length === requestSignature.length &&
  crypto.timingSafeEqual(Buffer.from(signature), Buffer.from(requestSignature))
) {
  console.log('payload is safe')
} else {
  console.log('payload is unsafe')
}
Webhook delivery retries
If your webhook endpoint is not available, or if it returns an http error status, then we will retry sending the request again after a short delay. This delay will back off exponentially with each successive failure, for up to 4 hours - depending on your Max retries setting.
Updates which cannot be sent to your system are saved internally as analytic events and can be retrieved via the batched data API endpoint. Read how this can be achieved in the analytics overview.
If a webhook endpoint fails to return an http success code for consecutive attempts over your Max retries setting, it will be automatically disabled if Auto-disable is enabled. Disabled webhooks can be re-enabled in the Workbench.
We guarantee at-least-once delivery of webhooks, so in rare cases you may receive a payload twice. Your system should be idempotent or de-duplicate incoming events as needed using the unique id provided with each webhook payload.
Webhook authentication
A number of authentication methods can be configured for Webhooks via the Atomic Workbench - see credentials.
Webhooks can also use client certificates if the endpoint requires mutual TLS. Client certificates can be added to the Client Certificates section for an environment, and then assigned to a webhook subscription by editing it.
Webhook request log
The Webhook request log is in beta and may be subject to change. Please contact us to provide feedback.
In the overflow menu of the webhook subscriptions list there is an option to view the subscription's logs - "View logs". Clicking this option will open a new tab showing details of the requests triggered by this webhook subscription. Selecting one of the log entries will populate the screen with information including the target URL and the request and response data. Request and response data is redacted for requests that are not marked as being a test (triggered by the Send test button).
Analytics export settings
The data available in webhooks is determined in part by settings you can control for your Environment, these include:
- Test card events (Whether test card events are included. If they are, they will be clearly marked as tests).
- Request payload (whether any data originally sent in event triggers should be returned back in analytics).
- Card response data (whether the responses for forms by customers interacting with cards should be available at all analytics events). Note: it is common to enable this, but then use Webhook mapping to remove unwanted data from individual subscriptions.
Learn how to view and edit these settings in the Analytics export settings article.