API keys and paths
This page covers the OAuth2 credentials for Atomic's server-to-server REST APIs. If you are integrating a mobile or web SDK and looking for the apiKey value the SDK expects, see SDK API keys instead.
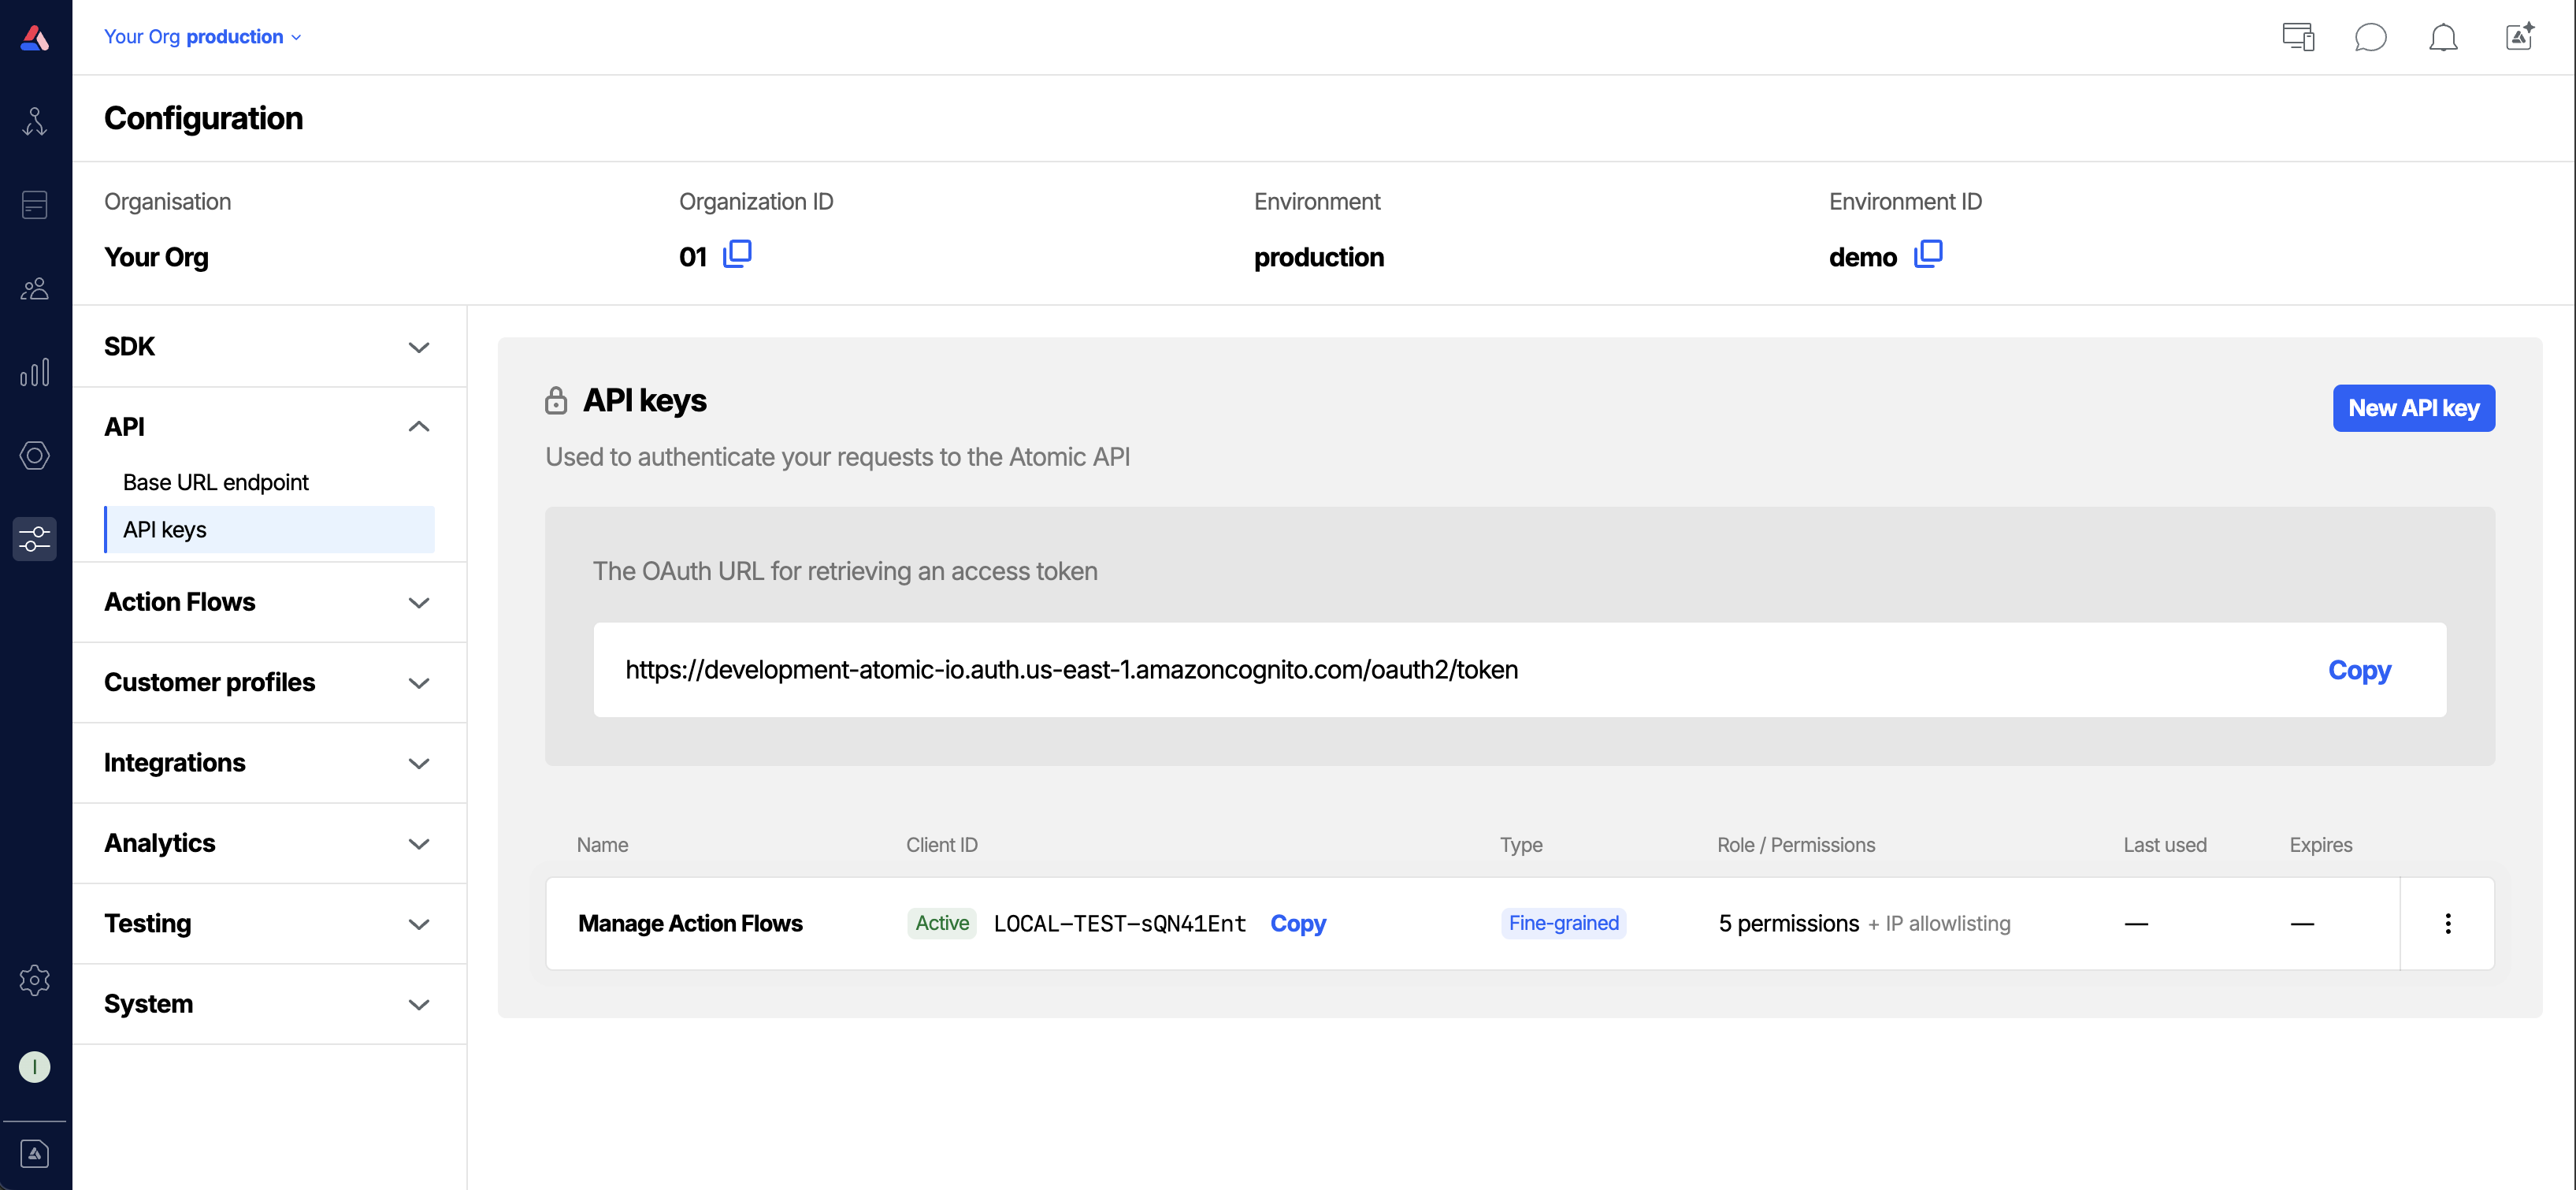
All requests to Atomic's authenticated APIs follow the OAuth2 client credentials pattern. You'll need to create a Client ID and Client Secret for your integration, and use these to fetch an access token from the authentication endpoint before making requests to the API.
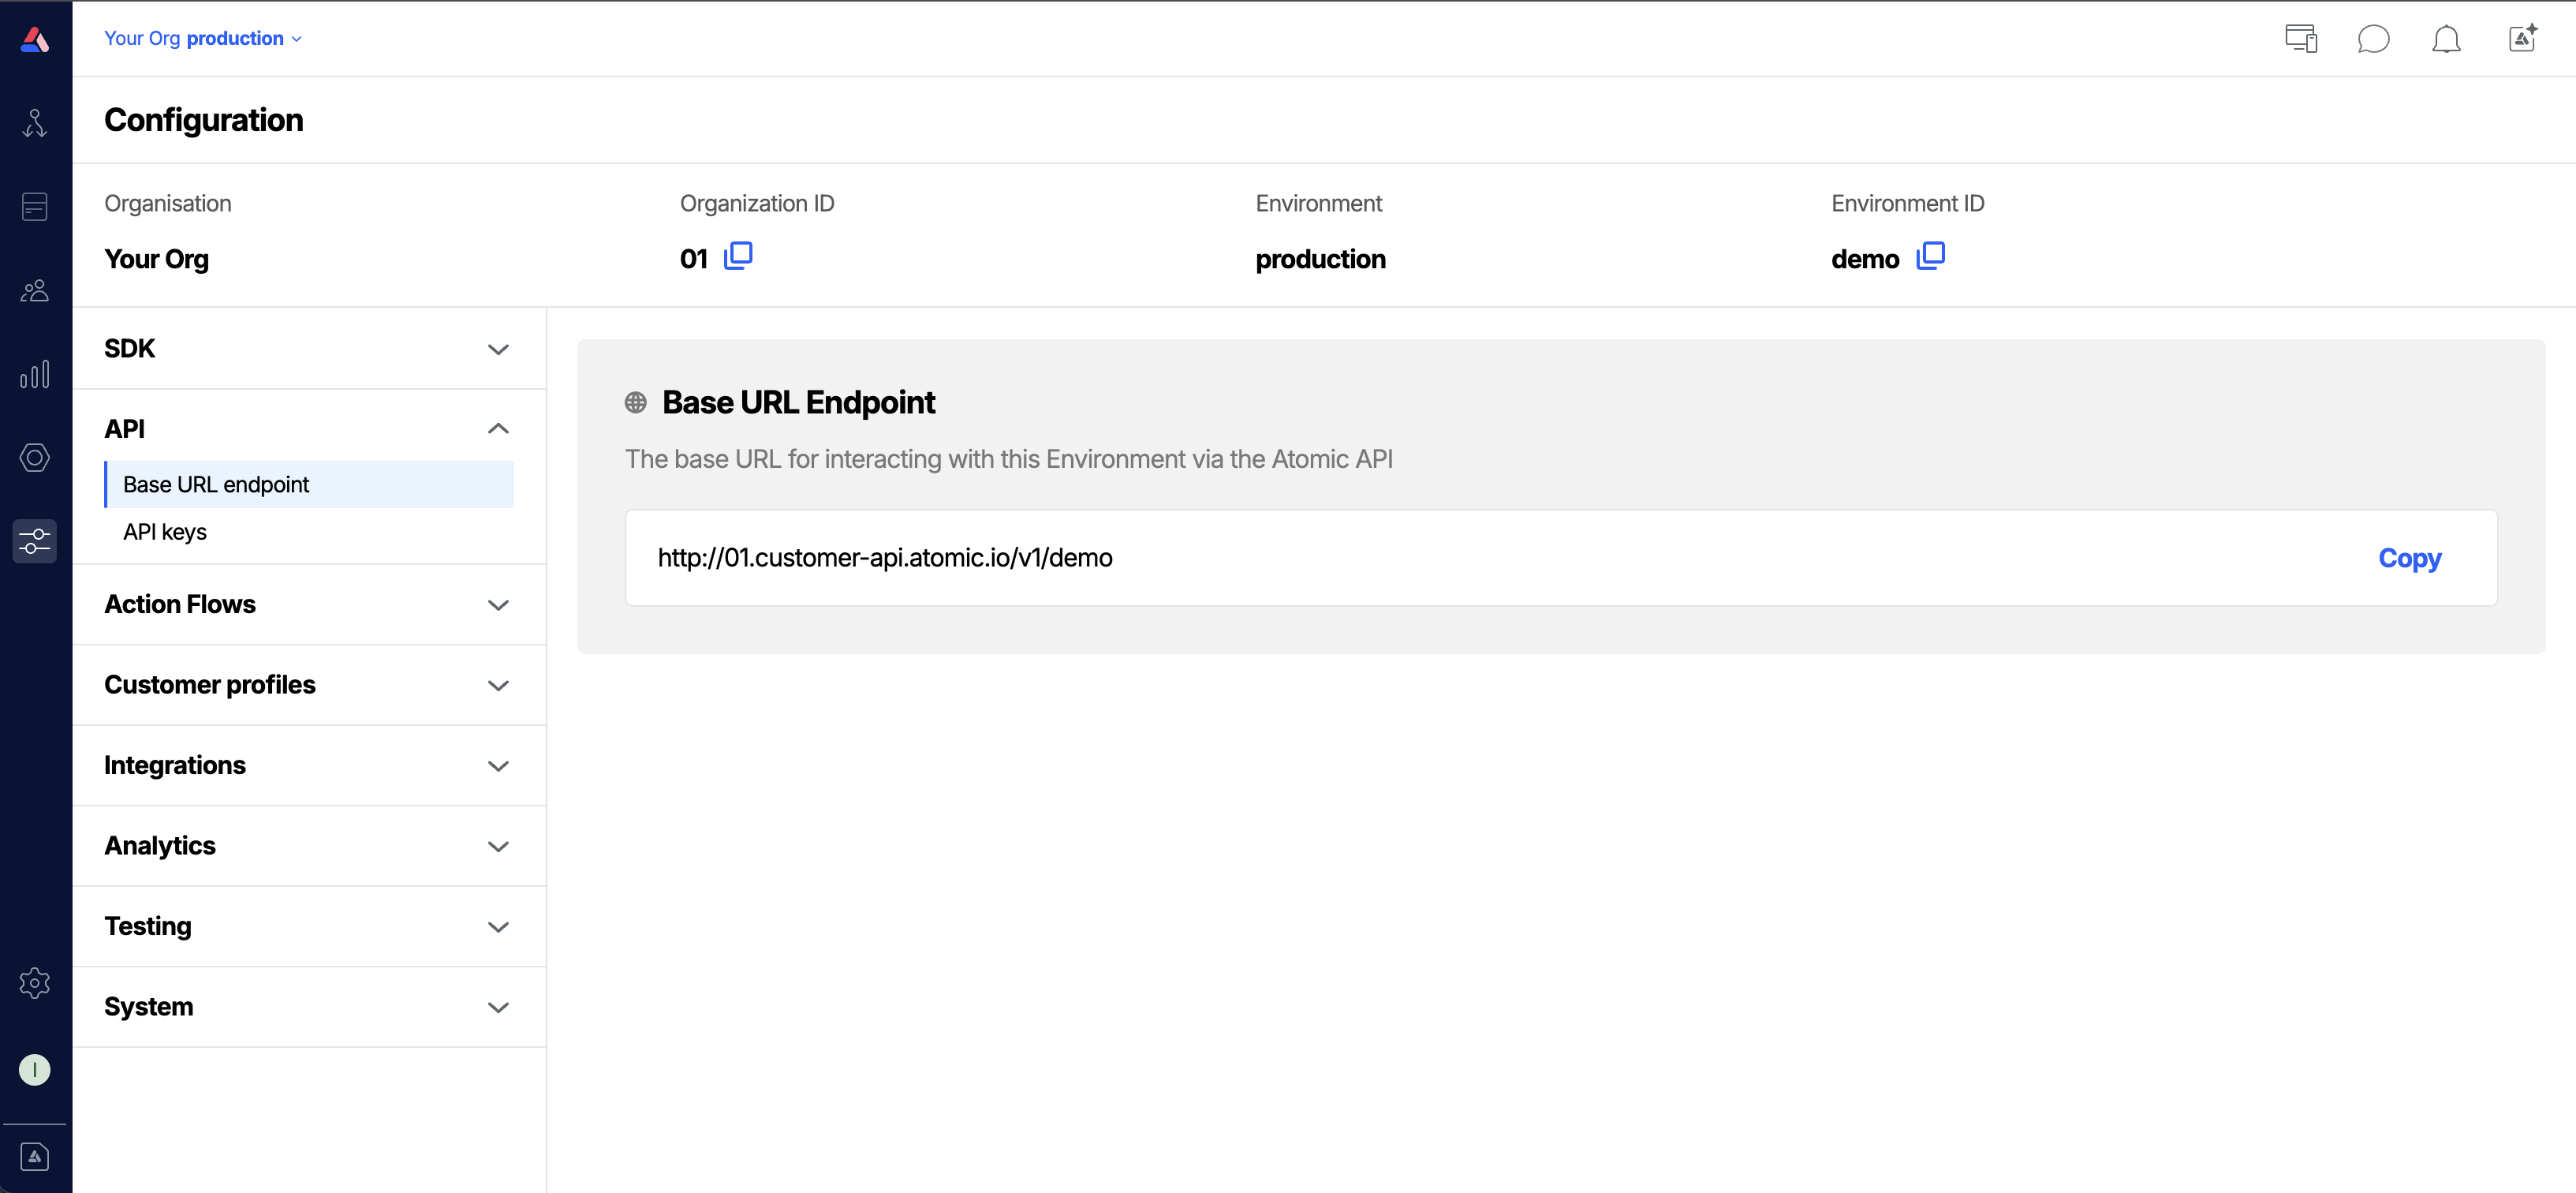
Once you have your access token, you'll make requests to Atomic's APIs using a base URL that is unique to your environment.
Find your Base URL Endpoint
The base URL for interacting with your environment via the Atomic API can be found in the Base URL endpoint tab of the configuration area.
Managing API keys
The Authentication controls section is where you create and manage your API credentials. Each credential has a Client ID and a Client Secret. Together these are used to obtain access tokens for making authenticated API requests.
Access to this workbench resource is controlled with a specific API keys permission. See the Permissions guide to configure this permission for your workbench members.
There are two types of API credential:
- Fine-grained: you choose exactly which operations the key is permitted to perform, and optionally restrict it to specific IP addresses and set an expiry date. Use these for all new integrations.
- Legacy: a broader role-based key. Legacy keys are still supported, but you should prefer fine-grained keys for new integrations.
Creating an API key
- From the Configuration section in the workbench sidebar menu, choose API keys. Alternatively, open the command palette and type API keys.
- Click New API Key.
- Enter a Name for the credential. Choose a name that reflects what this key is for, for example the system or service that will use it (e.g.
salesforce-production,data-pipeline). - Choose the permissions the key should have. You can select a preset to get started quickly, then adjust individual permissions as needed. At least one permission is required.
- Optionally, set an Expiry date. This expiration cannot be changed unless the key is rotated. Once the key reaches its expiry date it will stop working and any requests using it will fail. If your organization has [configured a maximum key lifetime, an expiry date is required and cannot exceed that limit.
- Optionally, configure an IP allowlist to restrict which IP addresses can use this key.
- Click Add. Your Client ID and Client Secret are displayed. Copy the Client Secret now, as it will not be shown again.
Creating a legacy API key
Legacy API keys use a role to define access rather than individual permissions.
Use fine-grained API keys for new integrations where possible. This option will not be available if legacy API keys have been disabled by your organization.
- From the Configuration section in the workbench sidebar menu, choose API keys.
- Click New API key.
- Give it a name that reflects who or what will use it.
- Select Legacy as the key type.
- Select a Role. The role you need depends on the API operations you're calling (see API credential roles for details)
- Click Add. Copy the Client Secret as it will not be shown again.
IP allowlisting
IP allowlisting restricts an API key so it can only be used from specific IP addresses. Requests from any other address will be rejected, even with a valid access token.
To configure an allowlist when creating or rotating a credential, enter one IP address or CIDR range per line in the IP allowlist field. Both IPv4 addresses and IPv4 CIDR notation are supported (e.g. 203.0.113.42 or 198.51.100.0/24).
If you need Atomic's own infrastructure to be able to use the credential, such as using the Atomic step types, check Allow Atomic IPs. This adds Atomic's infrastructure addresses to the allowlist automatically alongside any addresses you specify.
Rotating an API key
Rotating an API key generates a new Client Secret and immediately invalidates the previous one. Any integration still using the old secret will start failing.
- In API keys, find the credential you want to rotate.
- Open the menu for the key and select Rotate.
- Choose an expiry date for the new API key. If your organization has configured a maximum key lifetime, an expiry date is required and cannot exceed that limit.
- Confirm the rotation. Copy the new Client Secret as it will not be shown again.
Organization-level settings
Organization administrators can configure two policies in the organization settings that apply to all credentials in the environment:
- Block legacy key creation: prevents any new legacy API keys from being created. Existing legacy keys continue to work.
- Maximum API key lifetime: requires all new API keys to have an expiry date, and sets an upper limit on how far in the future that date can be set.