Sync data back from Atomic to Salesforce Marketing Cloud Data Extensions
Using Action Flow send-request step
Within an Action Flow you can sync user input from an Atomic card back in to Salesforce Marketing Cloud.
To do so complete the following steps:
Create API credentials in SFMC
Follow the guide here to do so.
When adding the component, ensure you select:
- Component type:
API Integration - Integration type:
Server-to-server - Set Server-to-Server Properties step: select the components you would like to edit.
This should produce the following API configuration
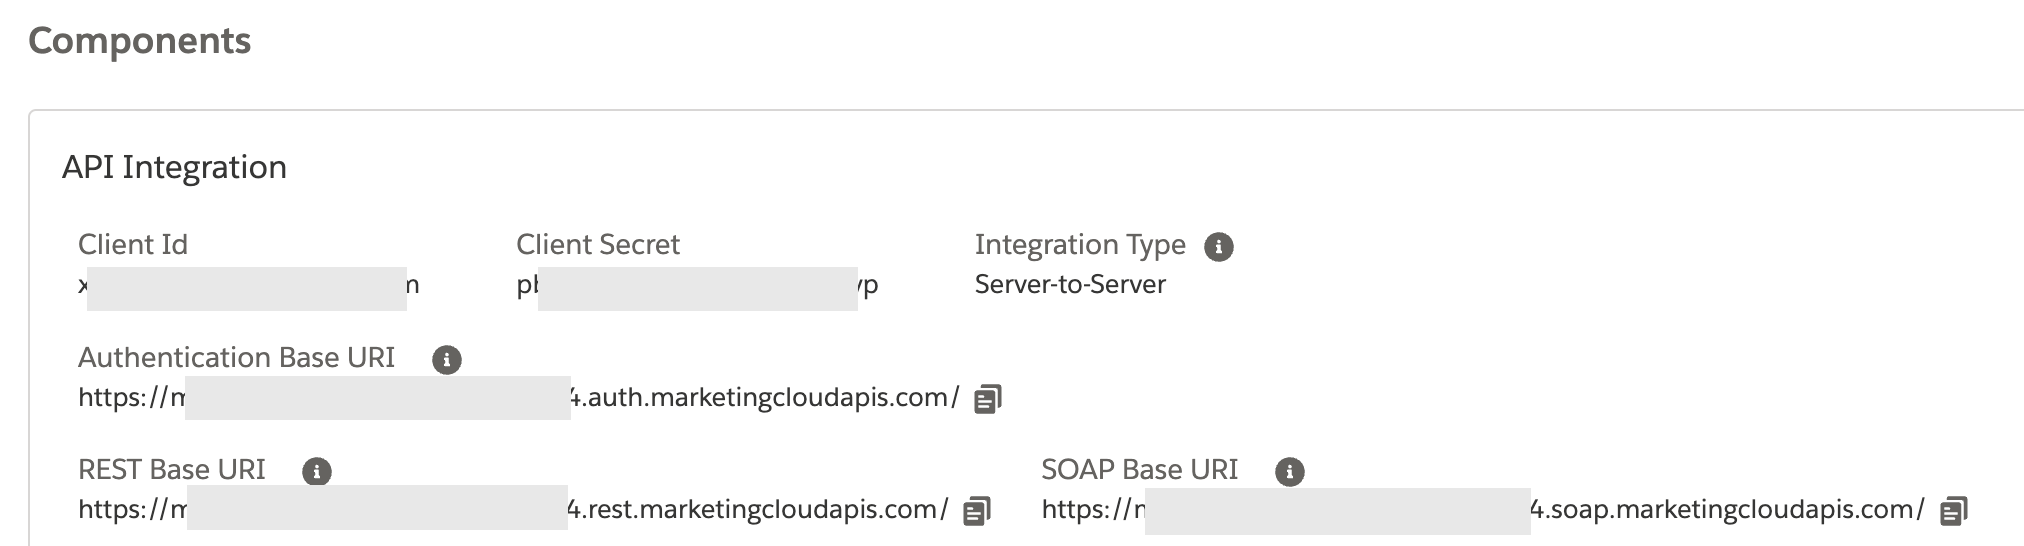
In Atomic configure the authentication options
Under Configuration > Integrations > Credentials Add a new credential
- name: 'SFMC'
- Credential type: 'Client credentials'
- Client Id:
client Idfrom your API configuration in the previous step - Client secret:
client secretfrom your API configuration in the previous step - Identity URL:
Authentication Base URIfrom your API configuration in the previous step withv2/tokenadded to the end- i.e.
https://<your-endpoint>.auth.marketingcloudapis.com/v2/token
- i.e.
- Enter scope: leave this blank
- Request scheme: 'Body parameters'
- Save!
Configure you Action Flow to send data to the API
In this example we have a single card that gathers some information about the user, this then sends that data to a data extension in Salesforce Marketing Cloud.
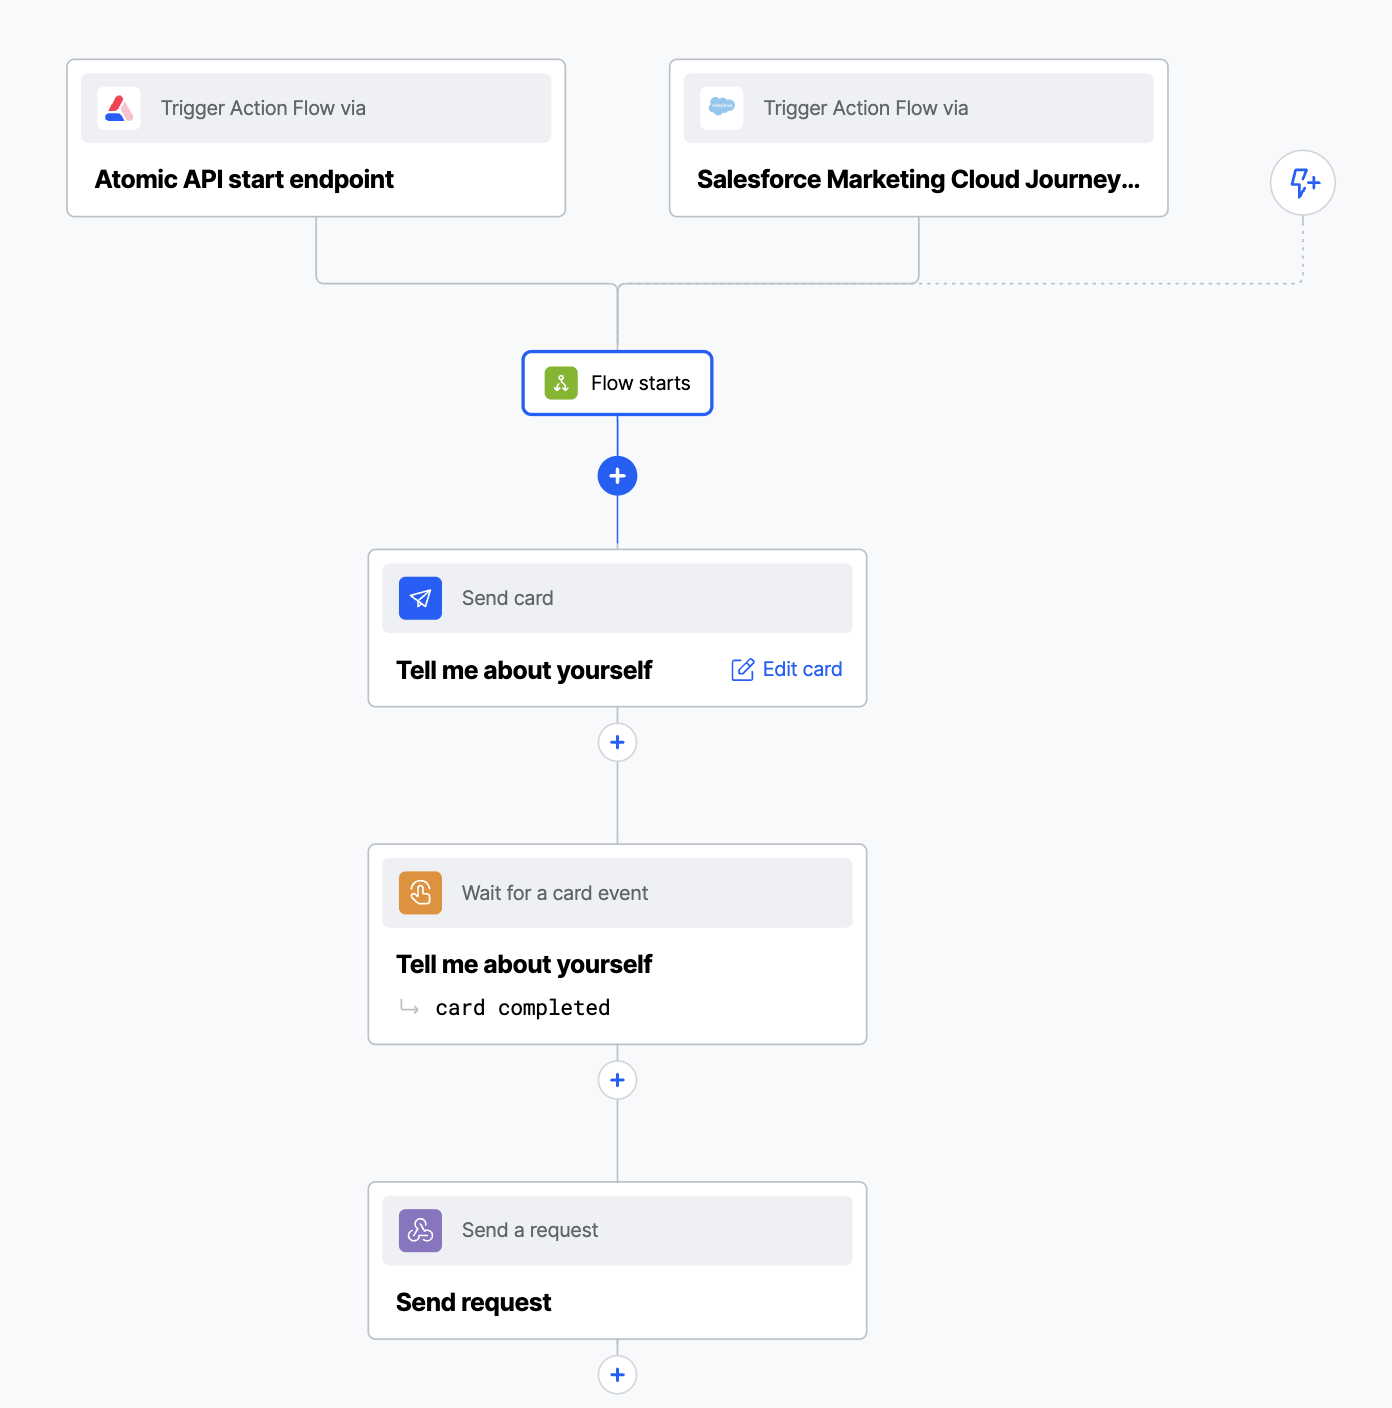
In this example we have a simple card that captures some data about the user
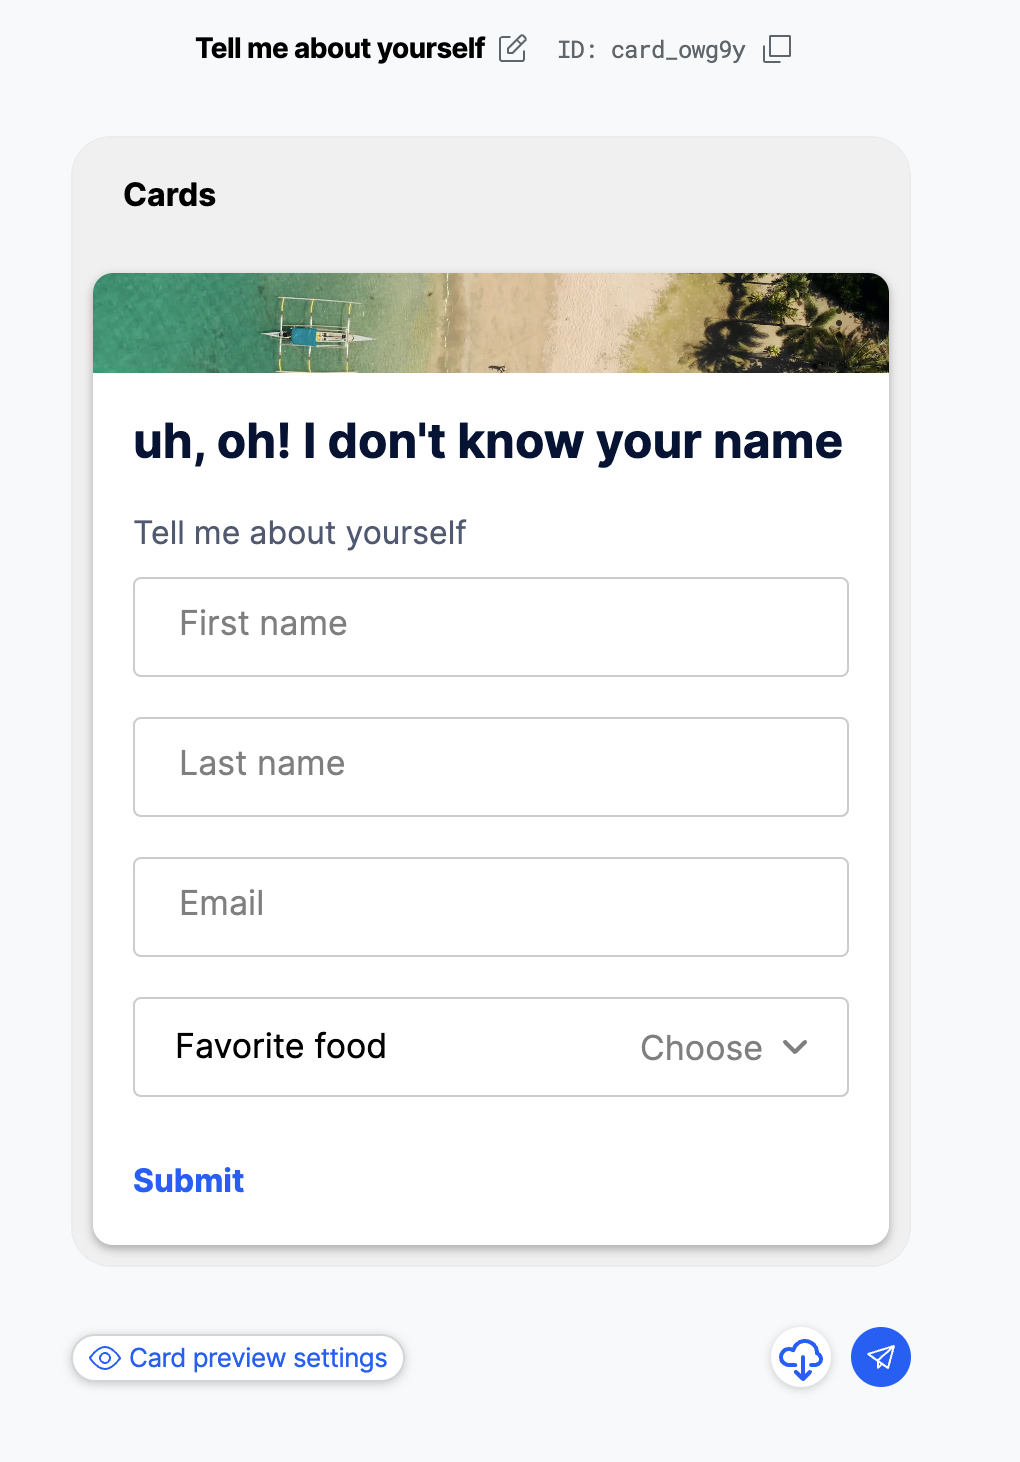
Once the card is completed the Action Flow uses a send-request step to send the data the Salesforce Marketing Cloud REST API.
In the Atomic Workbench, add a Send a request step to your Action Flow, and give it the following properties:
- URL:
REST Base URIfrom your API configuration in the previous step plus the target API endpoint- In this example we have
https://<your-endpoint>.rest.marketingcloudapis.com/data/v1/async/dataextensions/key:<key>/rowsin order to target a specific data extension in Salesforce Marketing Cloud. As per the Salesforce Marketing Cloud API documentation.
- In this example we have
The key is the External Key for the Salesforce Marketing Cloud data extension that you wish to update the card response data with. Data extensions are in the Contact Builder area of SFMC. They must contain a Primary Key that is included in the request from Atomic, in this example the primary key is endUserId.
- Method: PUT
- Credentials:
SFMCas created in previous step.

The final piece of set-up required for the send-request step is mapping the data to the expected format required by Salesforce Marketing Cloud. This is managed by scrolling down in the send-request step settings to Edit Request Mapping. In the example the mapping is:
const myPayload = {
   "items": [
      {
         "endUserId": context.payload.targetUserIds[0],
         "firstName": context.flowSteps.card_event_listener_H8guu.output.card.output.textInput_z3jr7,
         "lastName" : context.flowSteps.card_event_listener_H8guu.output.card.output.textInput_xDeQC,
         "email": context.flowSteps.card_event_listener_H8guu.output.card.output.textInput_bmwXd,
         "favoriteFood": context.flowSteps.card_event_listener_H8guu.output.card.output.dropdown_v9oVQ
      }
   ]
}
return myPayload
You'll need to edit this example payload to match with your inputs.
- Replace the
card_event_listener_H8guuwith the event_listener for your card. - Replace the
textInput_z3jr7,dropdown_v9oVQetc with theField name, which you can find in the card editor by selecting the input field (e.g. dropdown, text input...).