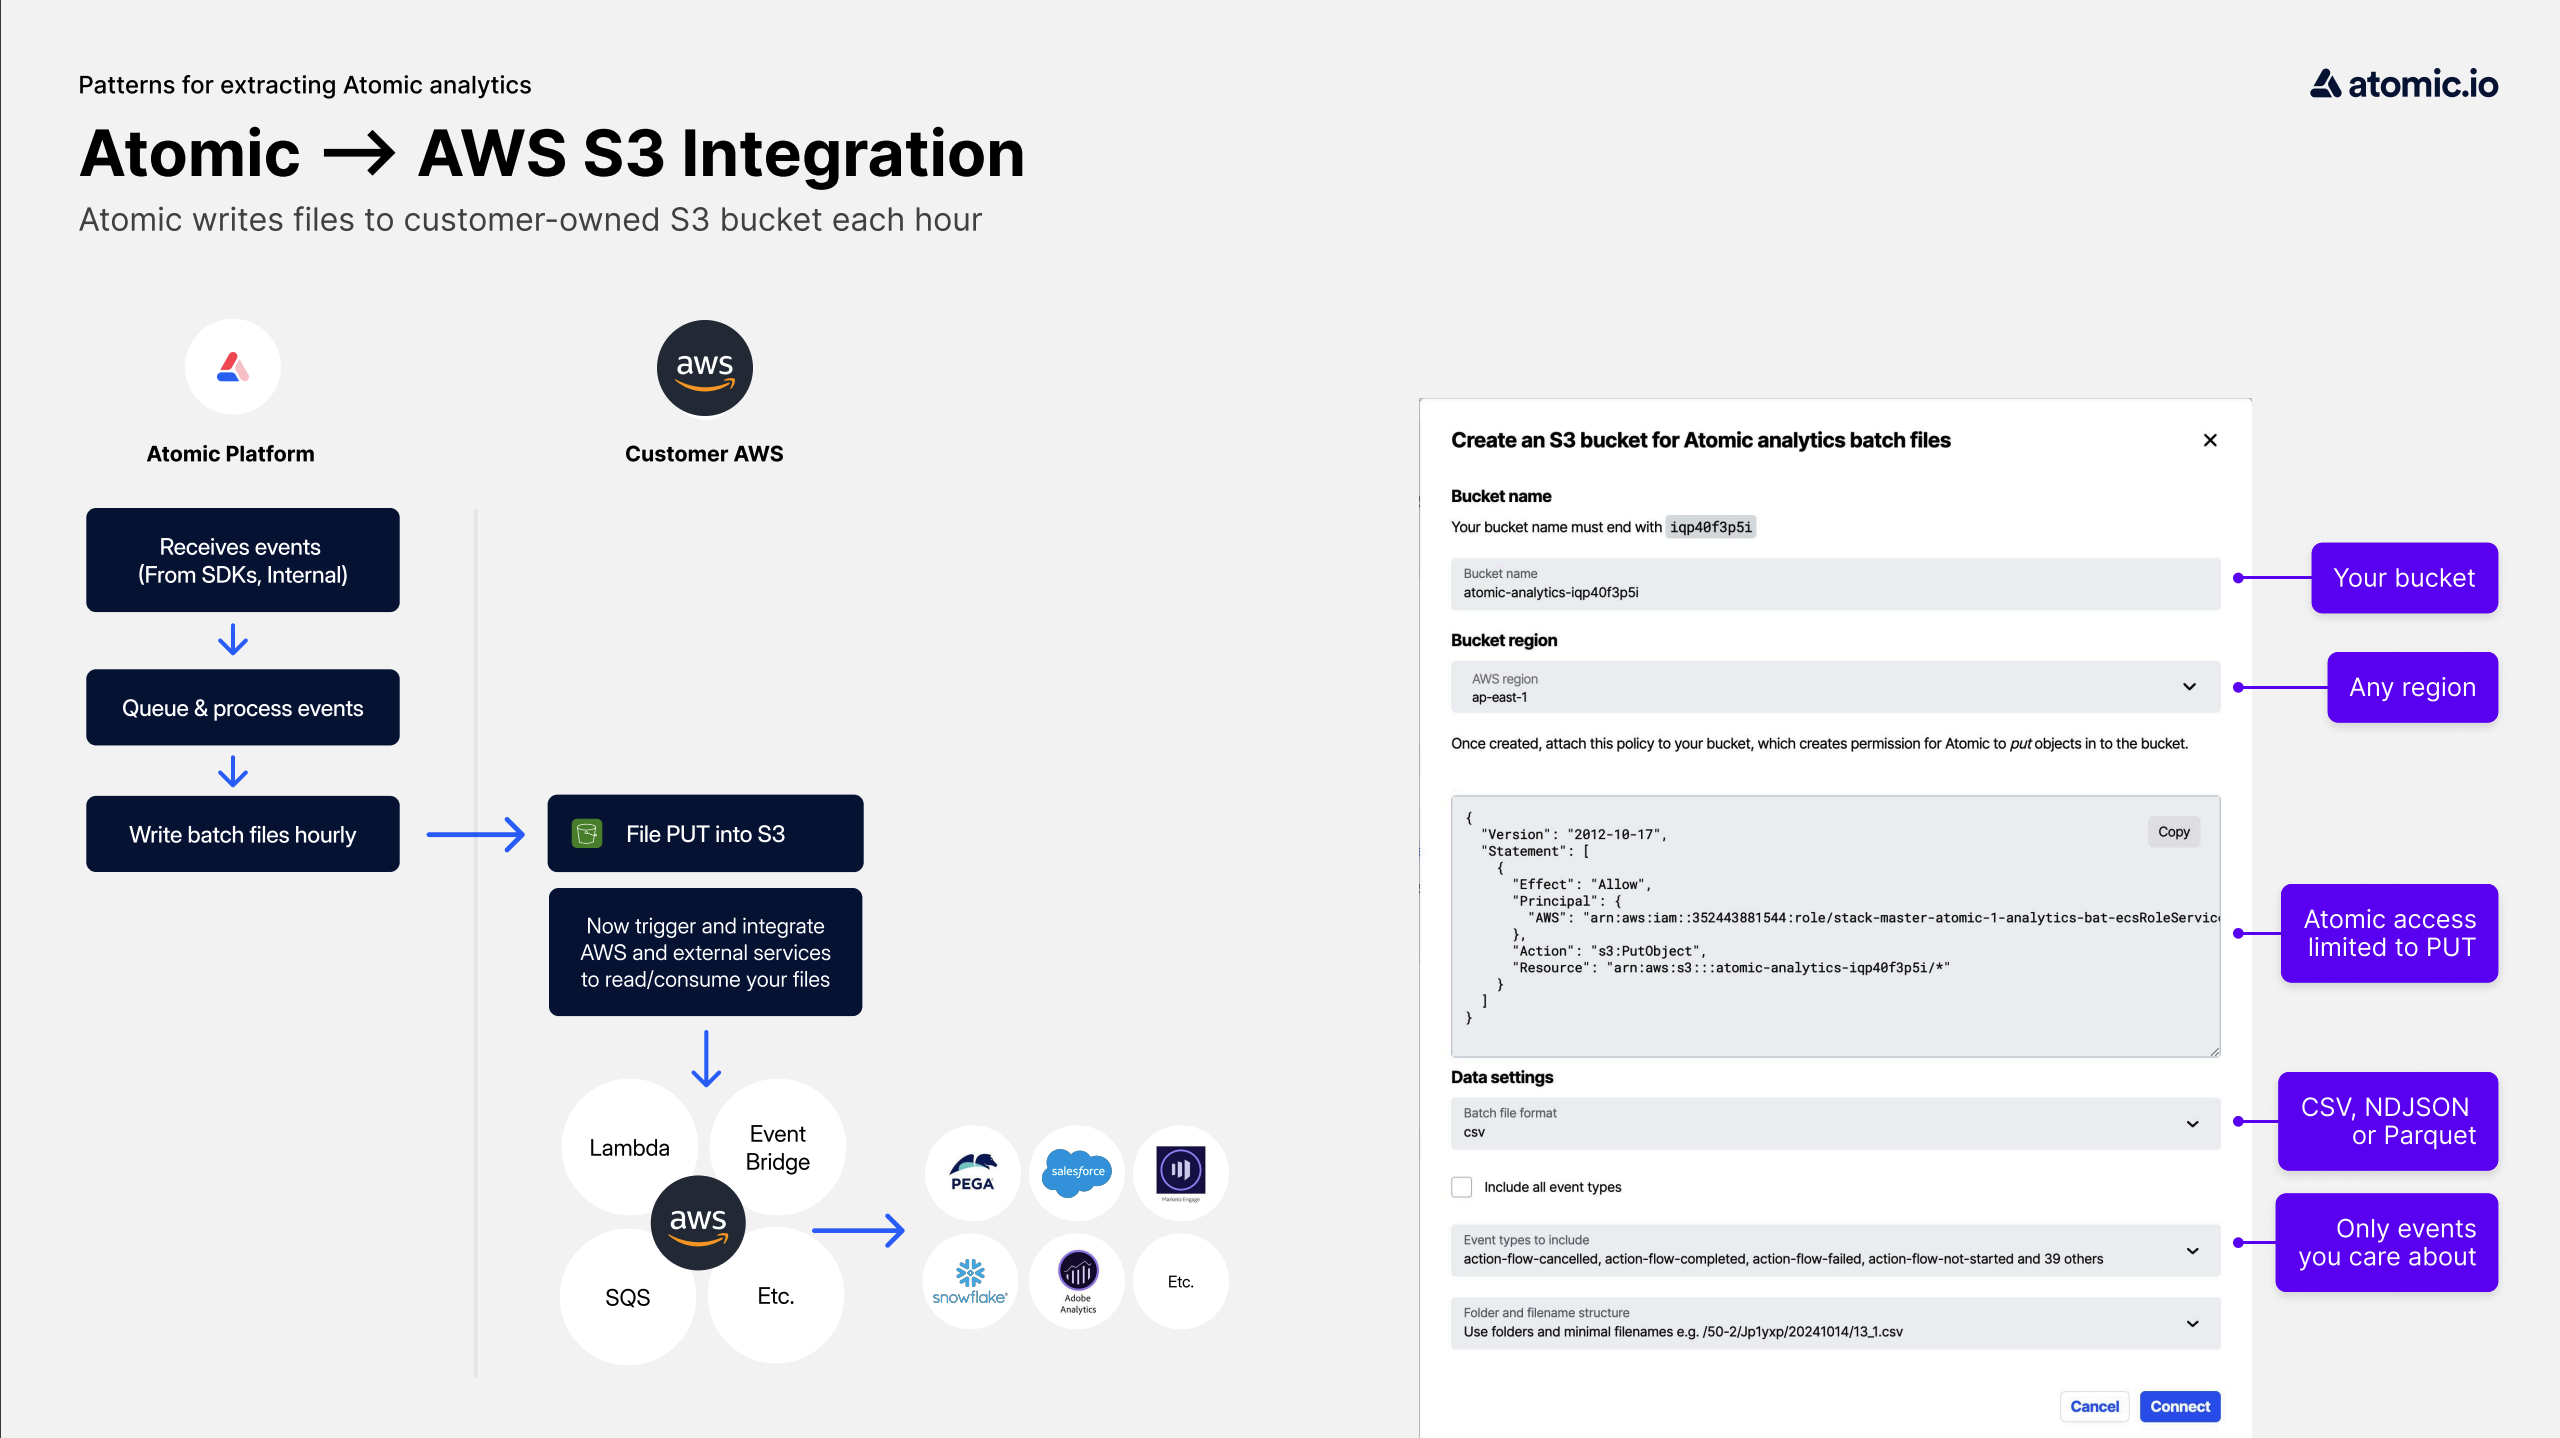
Pushing analytics to S3
Premium feature
Pushing analytics to S3 is a premium feature. Please contact us to have this feature enabled in your organization.
Atomic can be configured to save hourly analytics batch files to an S3 bucket in your AWS account.
This can be configured to send in the following formats:
- newline delimited JSON
- CSV
- Parquet

Steps to connect an S3 bucket with Atomic for saving analytics
- Login to your Workbench environment
- Navigate to Configuration > Integrations > AWS
- Click
Connect bucketin the section titled: Write Atomic Analytics batch files in AWS S3

- Take note of the text next to
Your bucket name must end withas this needs to be used when you create a bucket in S3

- In AWS, create a new bucket appending the text from step 4 on the end of the bucket name.

- Back in Atomic Workbench enter the Bucket name from step 5 and make sure the Bucket region is the same as created in step 5.
Note
The region and bucket name must be exactly the same as the permission policy is dynamic and uses the name supplied.
- Copy the policy from the Atomic workbench to your AWS S3 bucket by selecting the
Permissionstab for your bucket and pasting the policy from Atomic into theBucket policysection, once you have clicked the edit button. - Configure the remaining data settings to suit your needs, including selecting the Analytic events you want to subscribe to.
- Click connect.
This will connect your S3 bucket with Atomic analytics and push analytics files, in the format you selected in the Data settings, every hour.