Customer Insights & Journeys
Microsoft Dynamics 365 Customer Insights & Journeys is a premium feature and in preview and may be subject to change. Please contact us to have this feature enabled in your organization or to provide feedback.
Using Microsoft D365 Connector with Customer Insights and Journeys enables you to call the Atomic Platform to trigger an Action Flow for your enabled customers.
This guide covers the two parts, the Atomic Platform setup usign the Workbench, and the Microsoft Dynamic 365 setup using Powertools and the Customer Insights and Journeys application.
Atomic Workbench setup
To be able to use the Connector, you need to setup an integration point which will enable an endpoint for the Microsoft platform to call.
Configure Customer Insights & Journeys Integration
At least one Microsoft integration provider needs to be created before you can configure a trigger on an Action Flow.
- Login to your Workbench environment.
- Navigate to Configuration > Integrations > Microsoft.
- In the Customer Insights & Journeys section, click
Add integration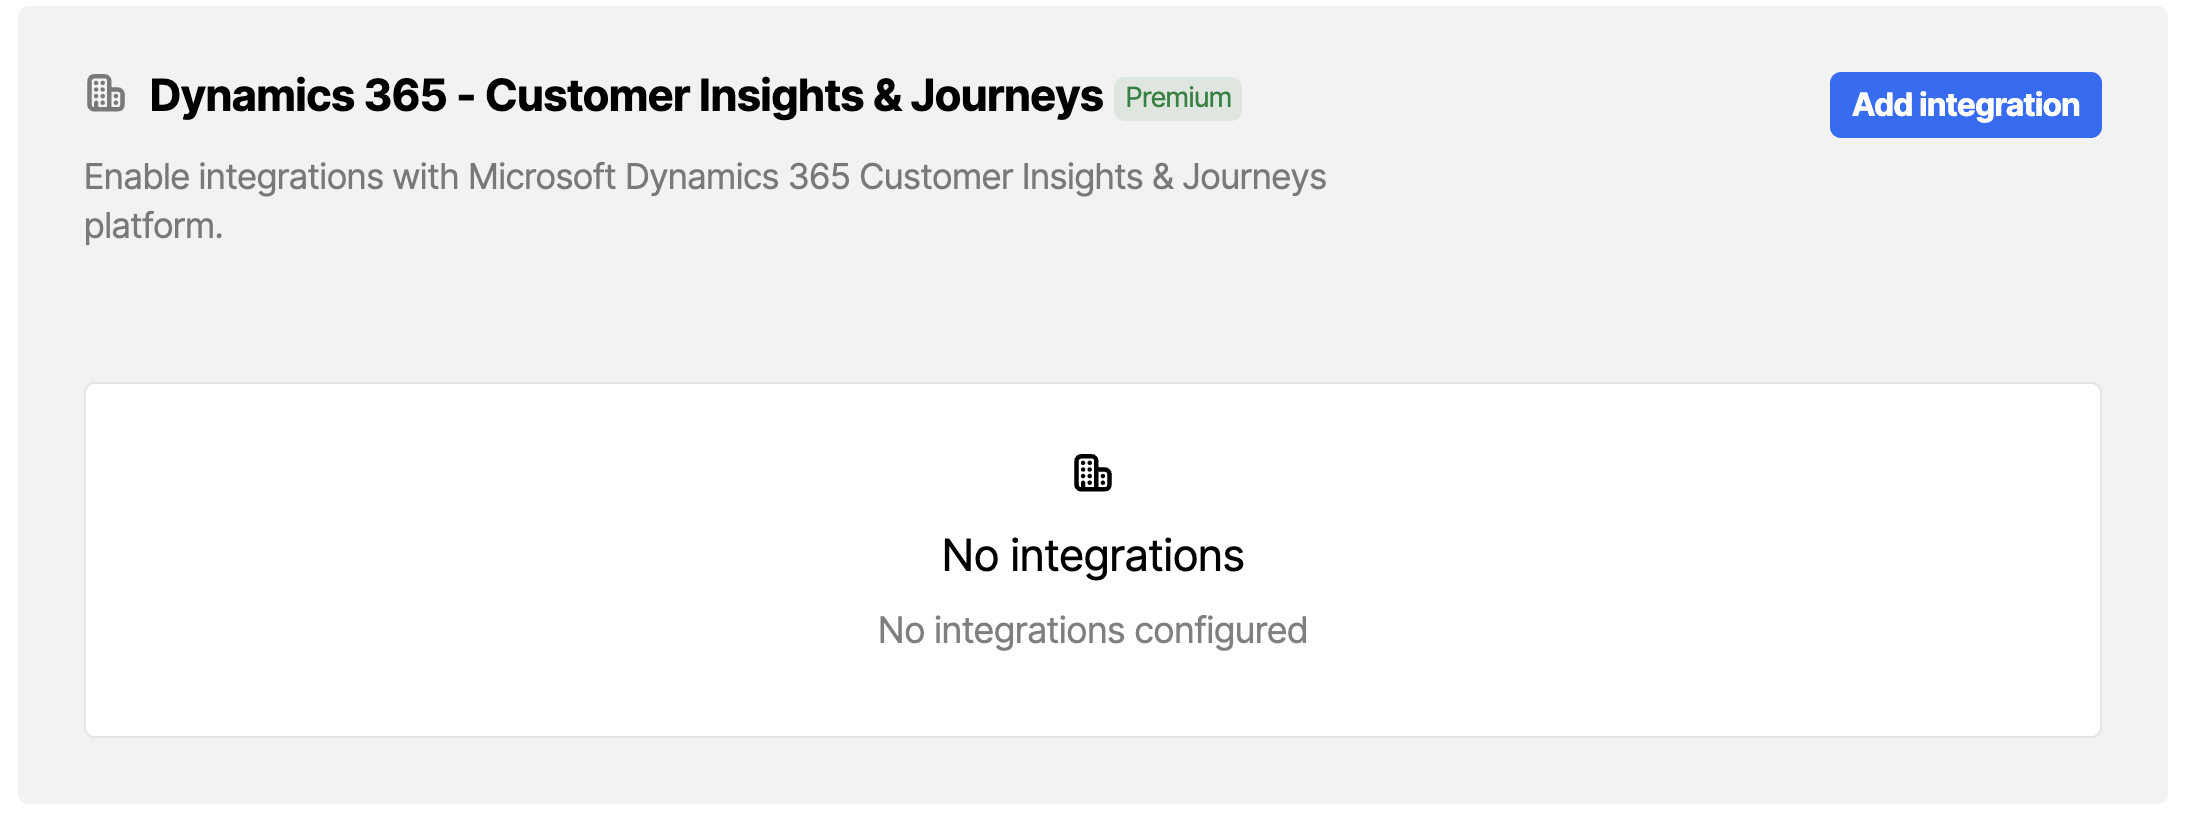
Microsoft integration configuration in the Workbench - Give the integration a name.
- Take note of the Client ID and Client Shared Secret.
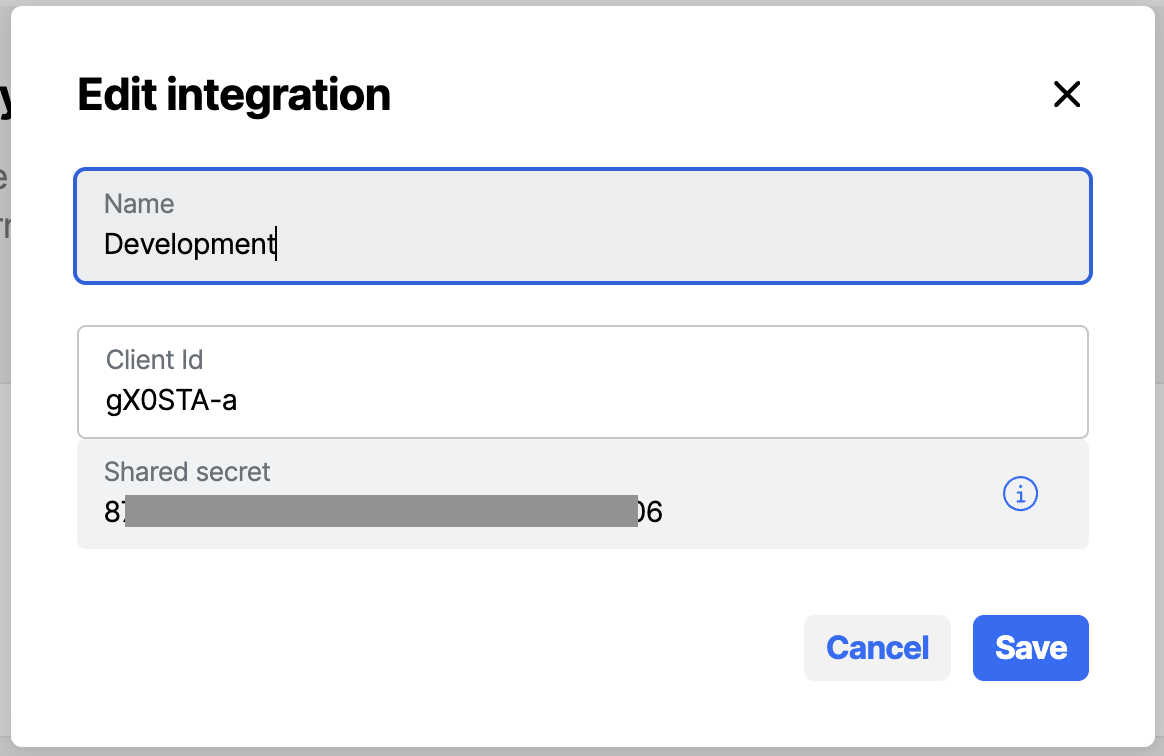
New Microsoft integration configuration in the Workbench - Click
Save - After closing the modal, from the integration list view, also take note of the Service URL
Adding Trigger to an Action Flow
To trigger an Action Flow from Microsoft Dynamics platform you need to add a trigger to an Action Flow
- For an Action Flow, view the Action Flow setup.
- By default an Action Flow will have a single API trigger that can be used to start the Action Flow using the API.
- Click the
Add another trigger, selectMicrosoft Customer Insights & Journeysfrom the context list.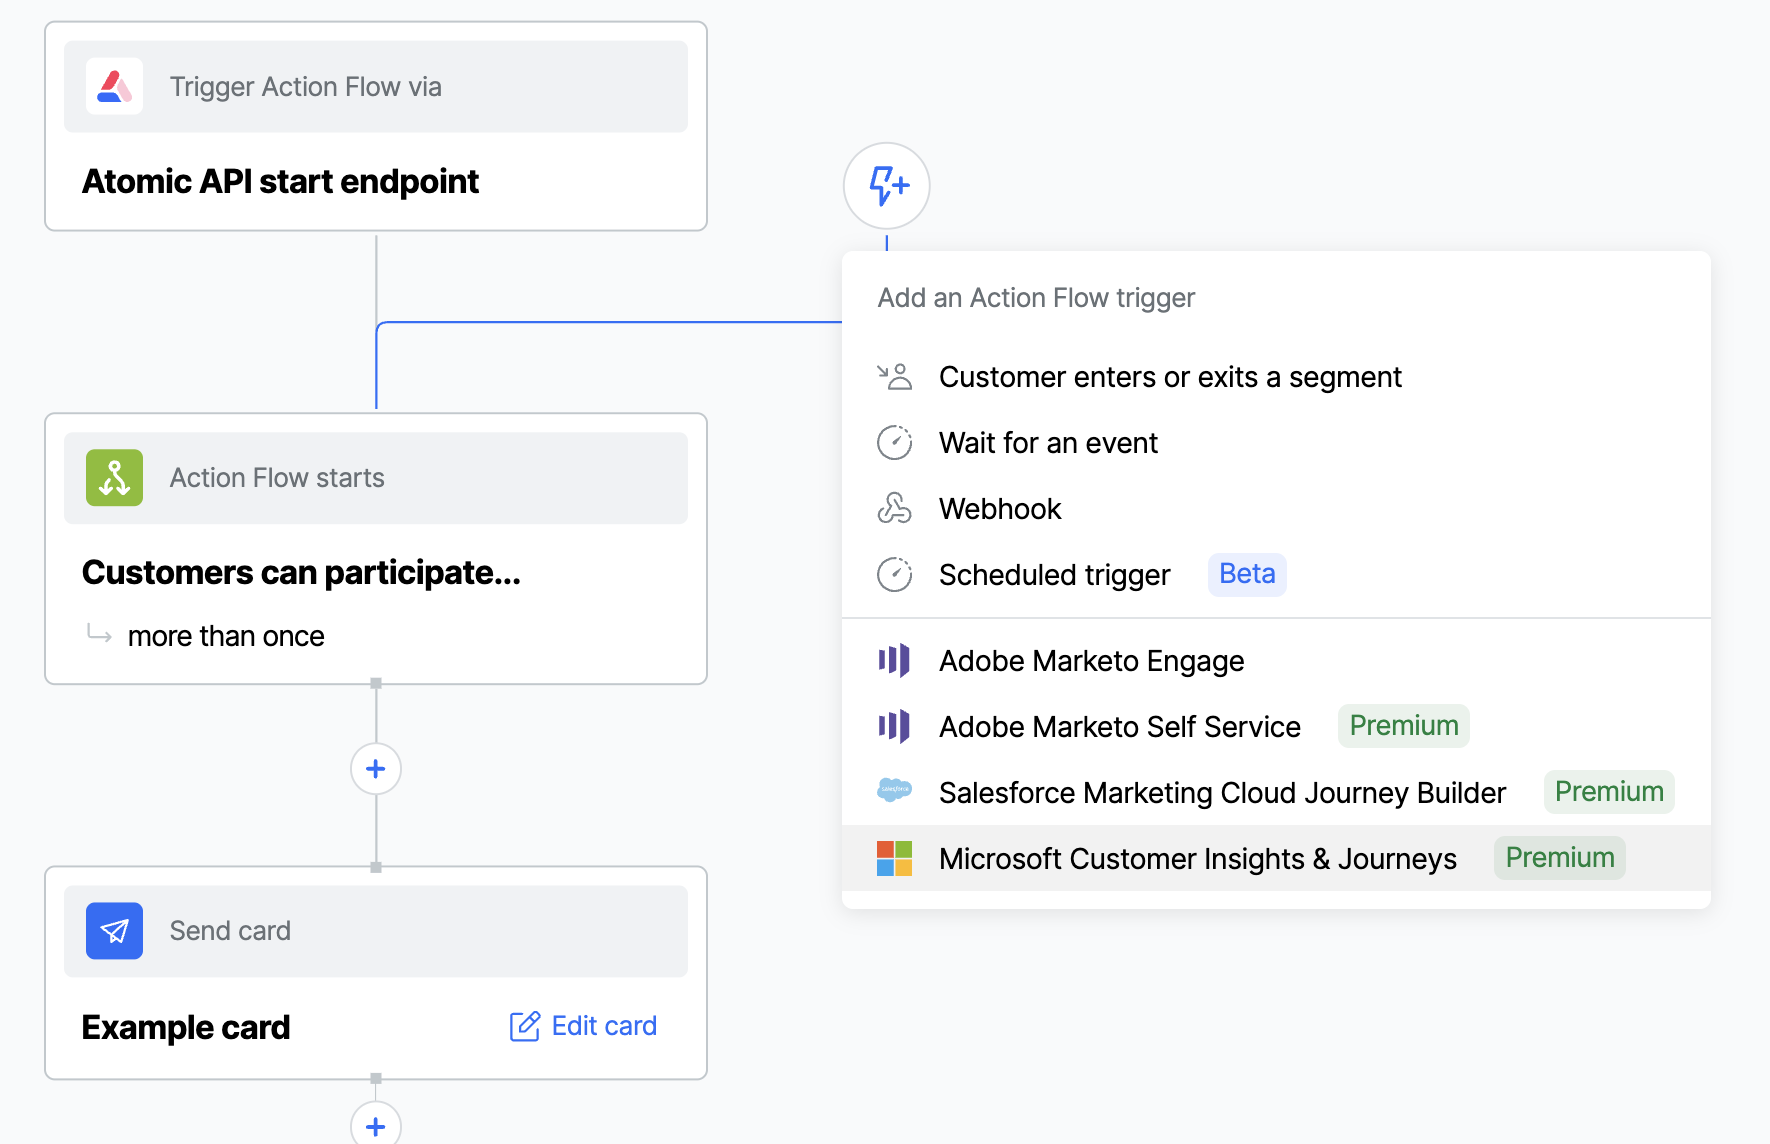
Add Microsoft trigger to an Action Flow in the Workbench - Optionally edit the trigger name.
- If more than one Integration, select the relevant Integration.

Add Microsoft trigger to an Action Flow in the Workbench
Customer Insights & Journeys Setup
Microsoft Dynamics uses Custom Channels to send requests out to external platforms. To do this a custom plugin need to be provided with the information and plugin on how to call the target system before the Dynamics 365 platform can be configure
Plugin Installation
NOTE: The plugin is currently in development. Please request a copy from support@atomic.io
The Plugin is deployed as a solution into the Dynamic 365 platform. This needs to be done by somebody with suitable access. Once installed, the Atomic Send Action Flow Channel will be enabled.
Initial Custom Channel setup
For every Atomic environment you want to target you will need to configure a Custom Channel.
-
In your Customer Insights & Journeys instance, switch to Settings.
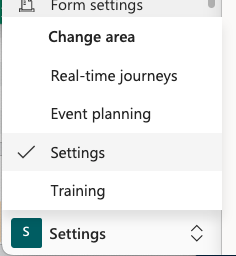
Switch to Customer Insights & Journeys Settings -
Under
Customer Engagementsection, selectCustom Channels -
On the top toolbar, select
New custom channel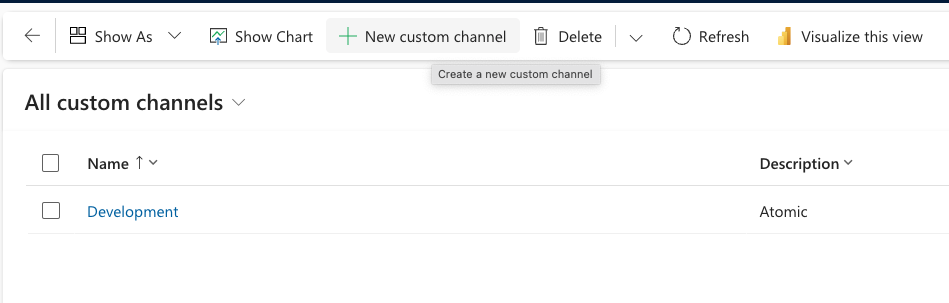
Create new Custom Channel -
In the dialog, select
Start Action Flowfrom the list of options, then clickNext- If prompted, check the box mentioning that data will be sent to external systems.
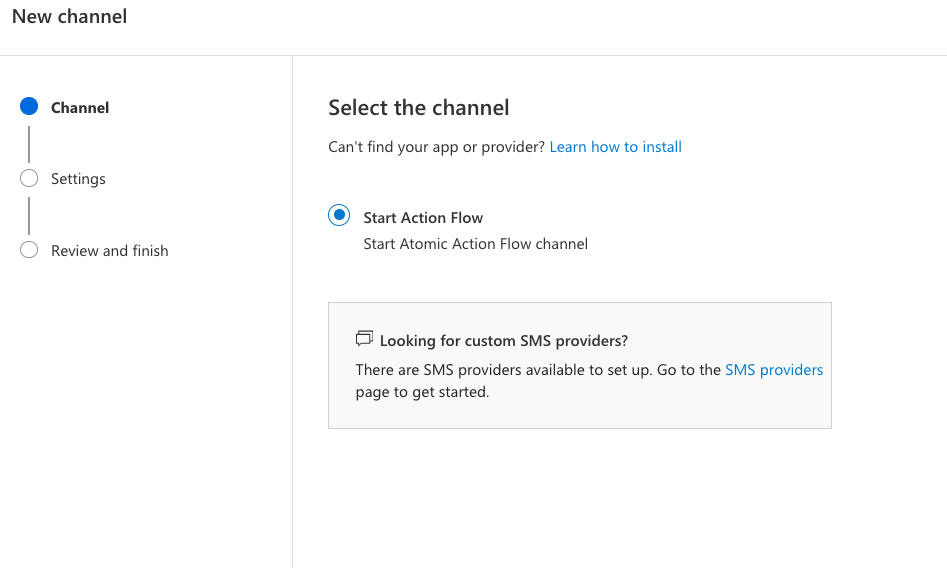
Create new Custom Channel -
Enter out the form with the following
- Name: A meaningful name to describe Custom Channel, for example the target environment (ie.
Development) - Description: Additional info to describe the Custom Channel
- Sender: This is unused for this connector currently, but would represent where the messages are coming from (ie.
Atomic Marketing) - baseTargetUri: The Service URL from the Customer Insights & Journeys Integration setup in the Atomic workbench
- clientId: The Client ID from the Customer Insights & Journeys Integration setup in the Atomic workbench
- clientSecret: The Client Secret from the Customer Insights & Journeys Integration setup in the Atomic workbench
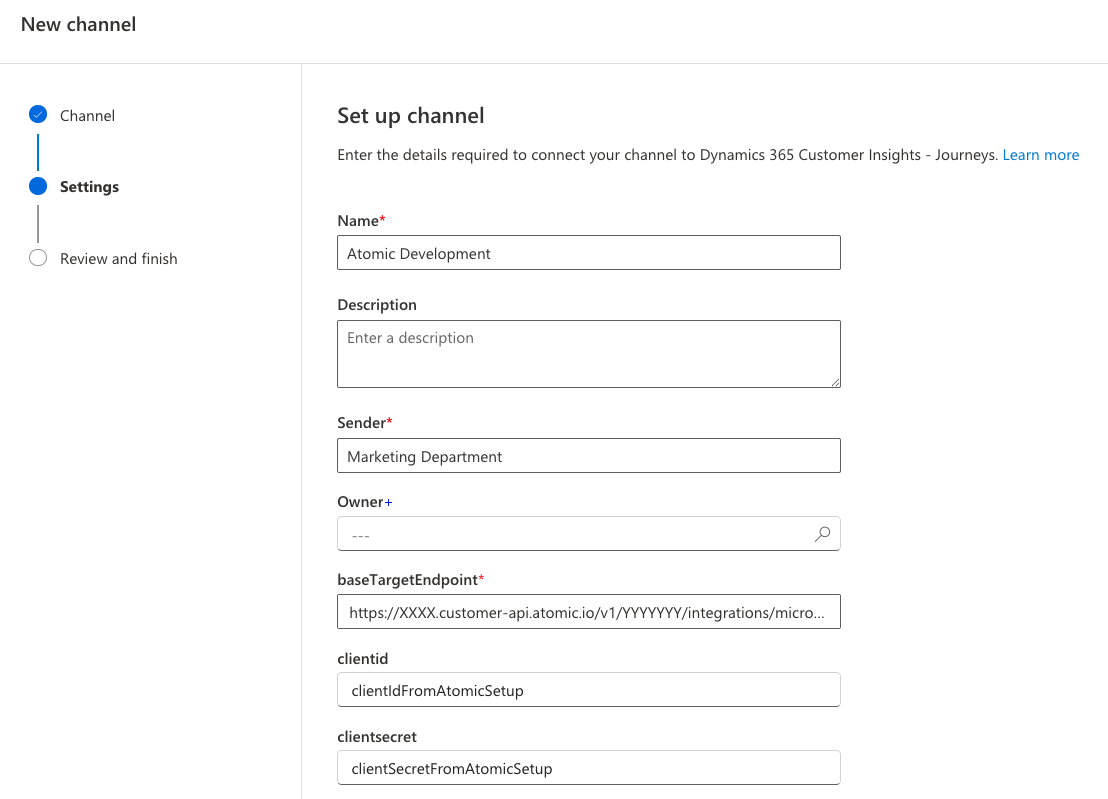
Create new Custom Channel - Name: A meaningful name to describe Custom Channel, for example the target environment (ie.
-
Click
Next. -
Review the settings and click
Done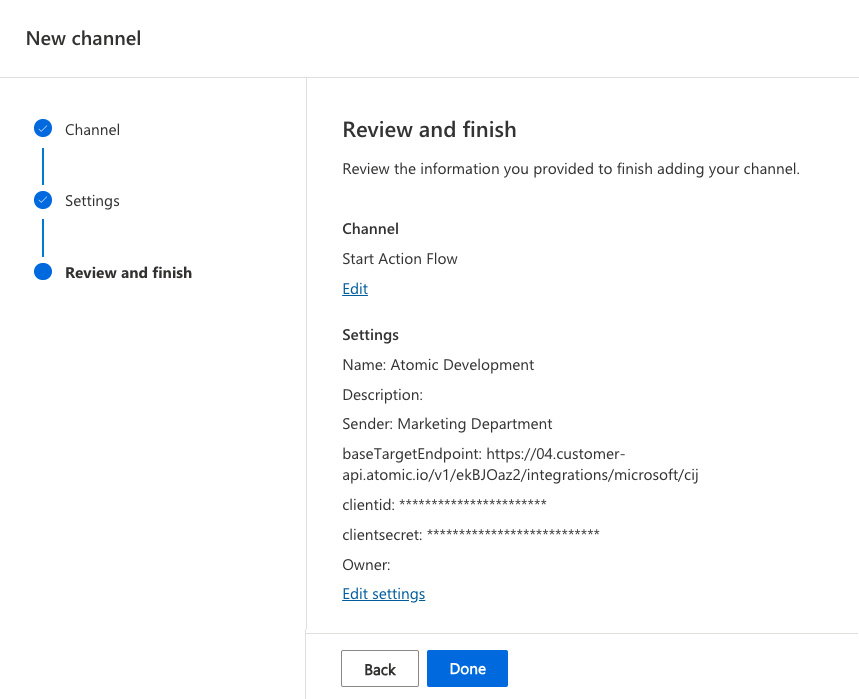
Create new Custom Channel
Configure Audience settings to use Atomic End User ID
To be able to target Contact records with a consistent ID that is not the primary identifier in your system, an additional field Atomic End User ID has been added by the plugin to the Contact record. This is the field the Atomic Action Flow will use to target users.
The Audience configuration for Custom Channels needs to be manually updated to be able to use the new field within a Journey step.
- In your Customer Insights & Journeys instance, switch to Settings.
Switch to Customer Insights & Journeys Settings - Under
Customer Engagementsection, selectAudience Configuration - For the record with Datasource
customand Contact PointContact, select the record to edit.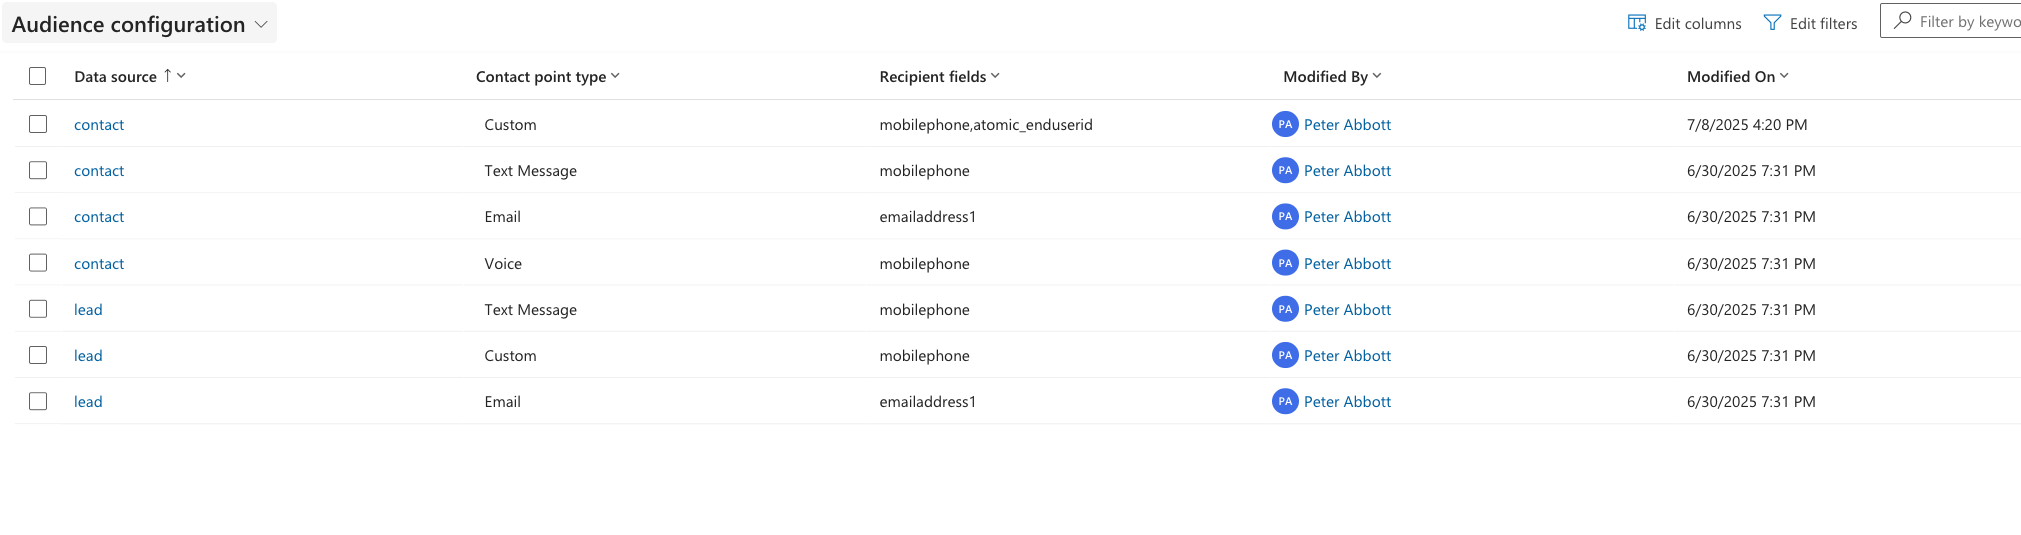
Audience Settings - In the edit dialog, for the config field
Other recipient fieldsselect Atomic End User ID.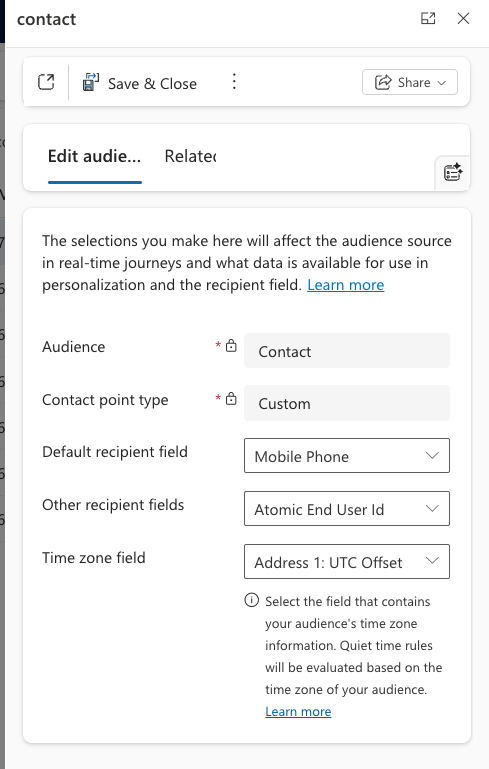
Configure Audience Settings - Click
Save & Close
Custom Channel message setup
Once the Custom Channel has been setup, you can configure Custom Channel messages to be used in a Journey.
- In your Customer Insights & Journeys instance, switch to
Real-time Journeys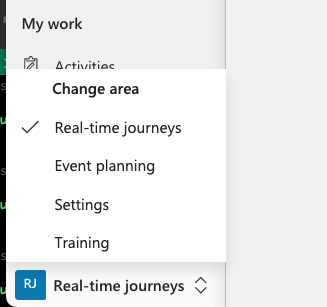
Switch to Real-time journeys - Under
Channels, selectMore Channels.
Custom Message List - In the top toolbar, select
Atomic>Sync with Atomic- If you have any Action Flow's configured with the Customer Insights & Journey trigger, you should now see them in the list
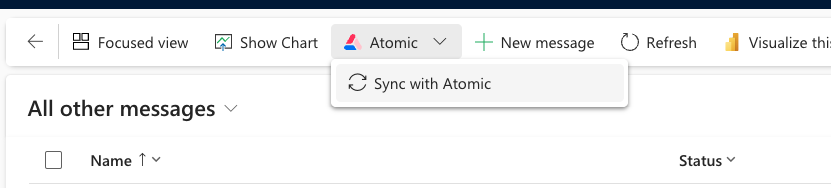
Custom Message List - The Messages pulled in will be in the status Draft. You will need to mark them ready to send to be able to use in a Journey.
- For any messages, confirm the Compliance Profile and Purpose attributes match what you intend for the message (Action Flow).
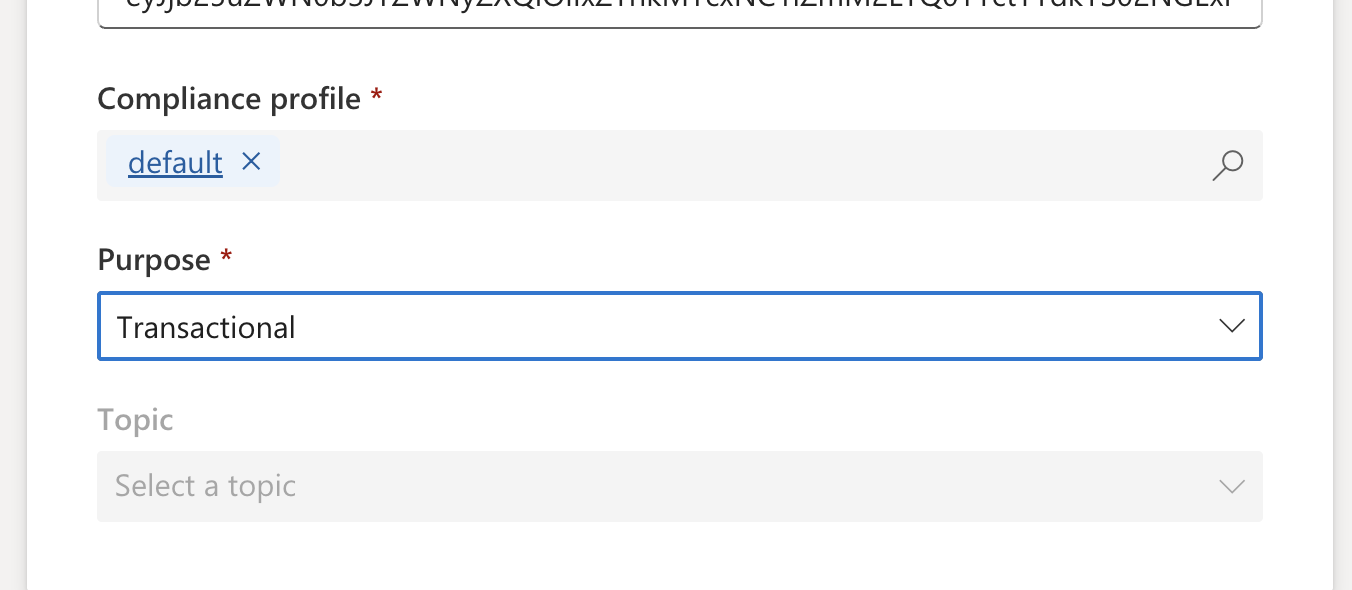
Custom Message List
Test Send
You can trigger test sends of the custom channel to trigger an Action Flow by using the Atomic Shell App and your workbench user Id.
- In the Atomic Workbench, click the profile icon in the left navigation and select
Copy my test user id.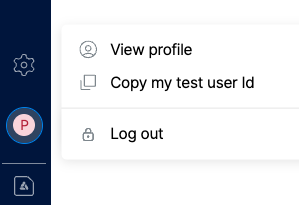
Custom Message List - Switch to Customer Insights & Journeys application, select
Channels>More Channels - Select the message you want to do a test send for.
- On the top toolbar, select the
Test Sendbutton.
Test Send Button - In the
Send Toinput, paste in the user id copied in the first step.
Test Send - Hit
Send
Once the above is completed, the dialog will disappear when the Action Flow has been triggered. If there was an error with the send, there will be a UI notification with some details about the error.
Use Custom Channel Message in a Journey
Once you have Message configured for the Custom Channel you will be able to use them in the Custom Channel step of a Journey
For this section we assume you are familiar with creating Journey's
- In your Customer Insights & Journeys instance, switch to
Real-time Journeys.Switch to Real-time journeys - Either create a new Journey or edit an existing Journey.
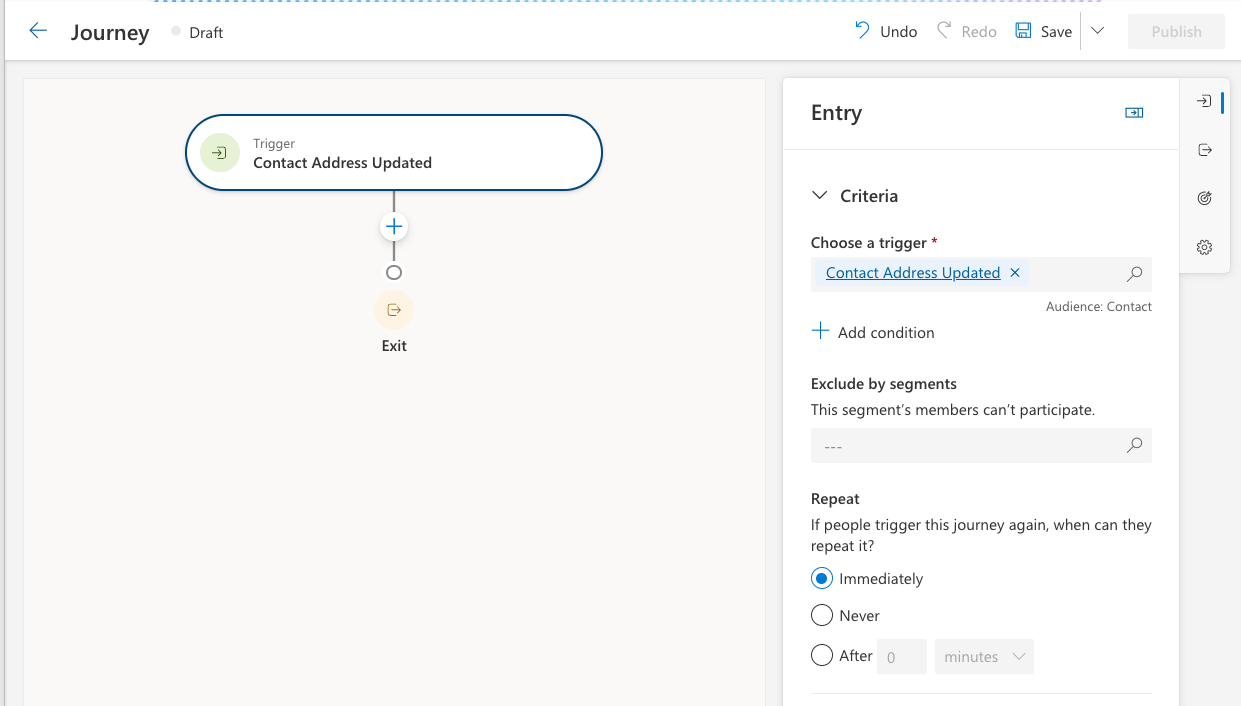
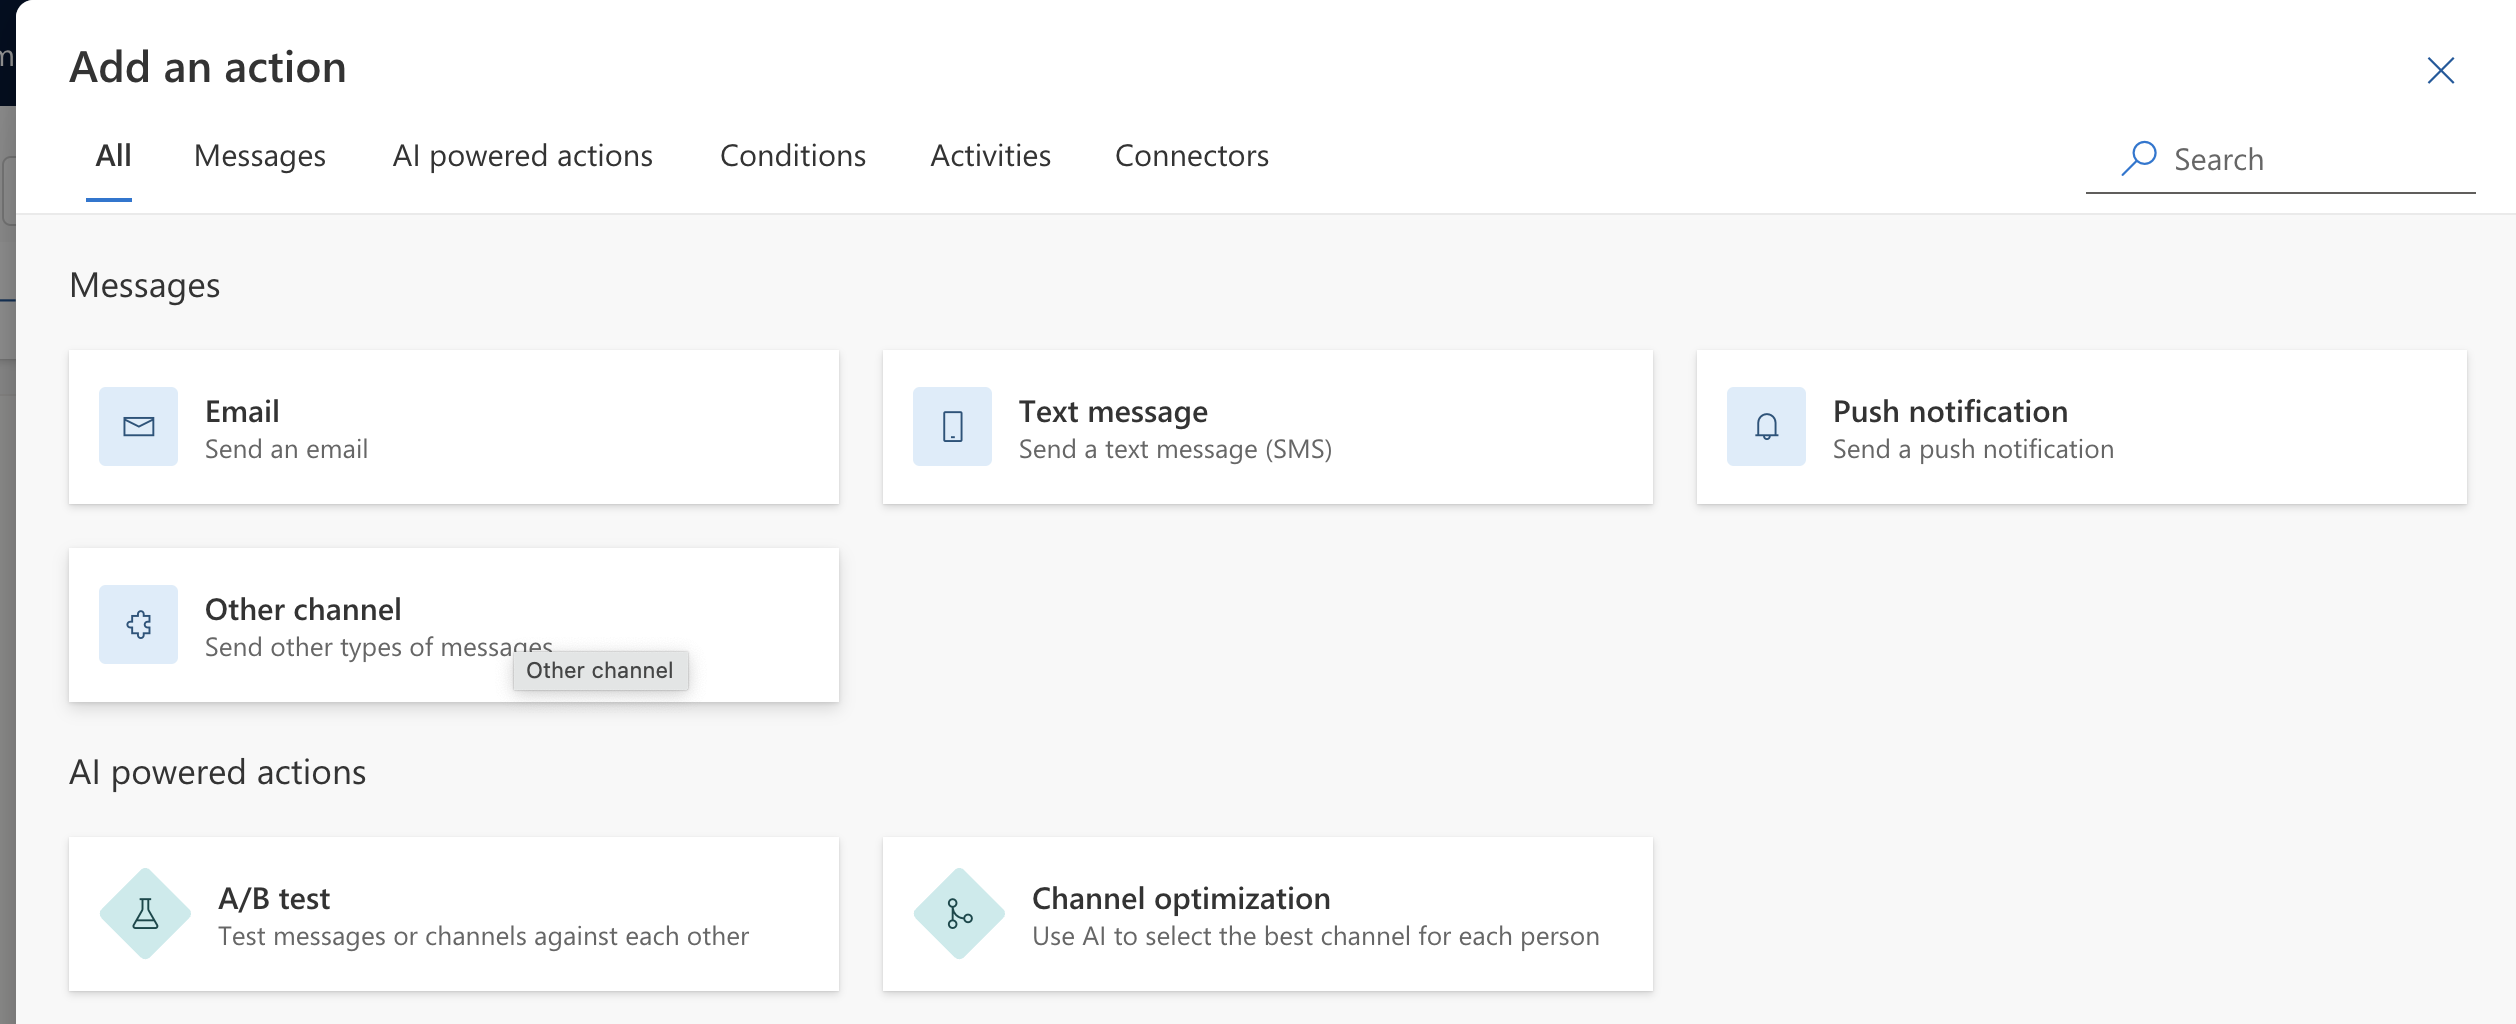
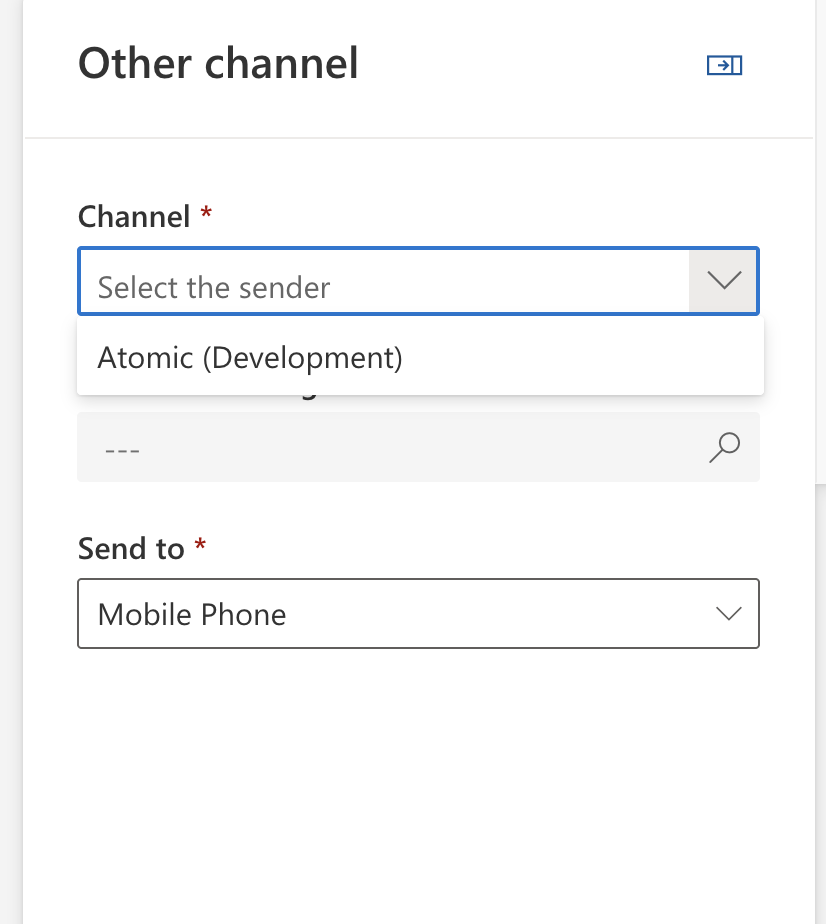
Create a Journey - Select the
Add an Actionicon to display the action options. - From the dialog select Custom Channel.
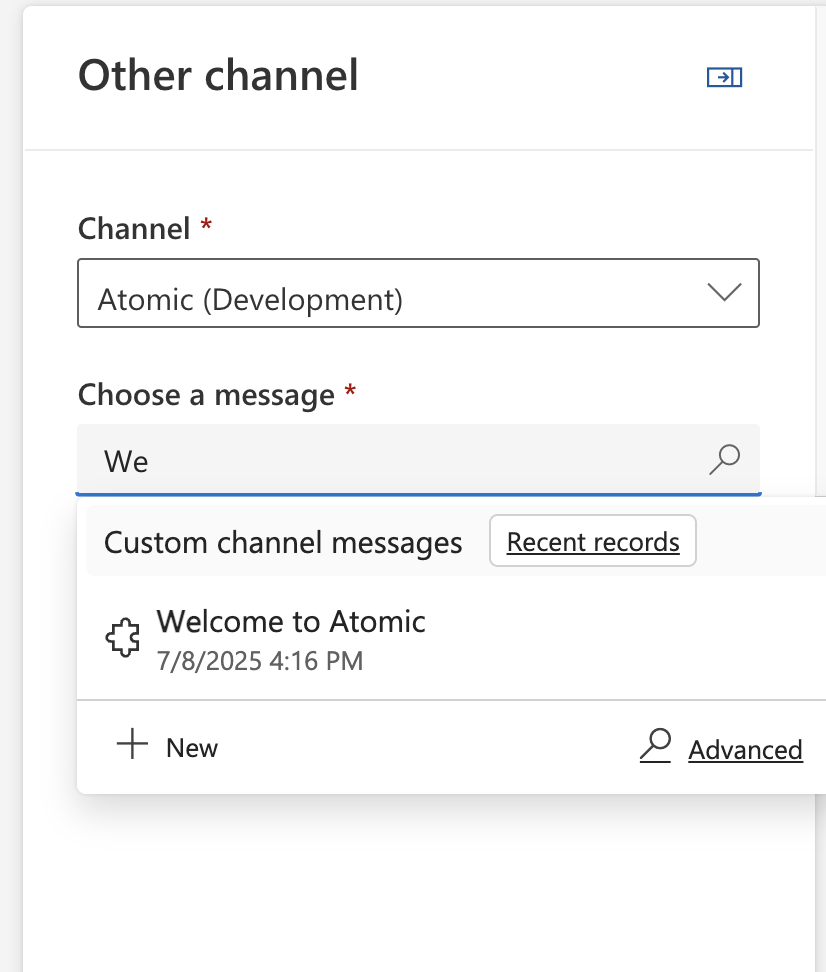
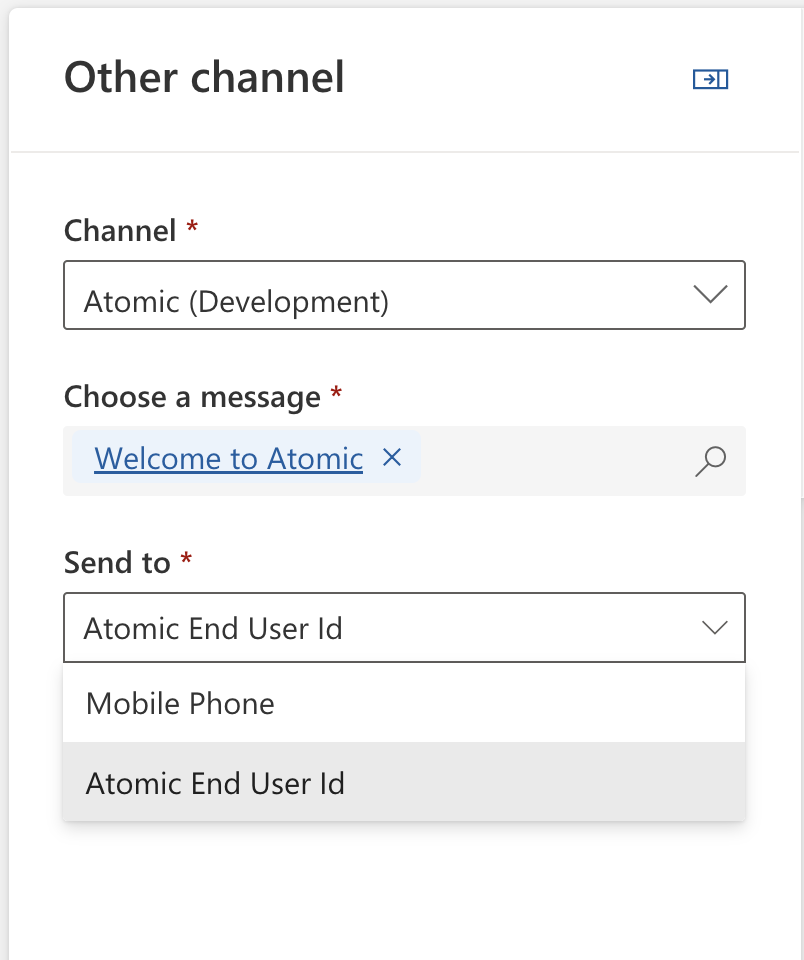
Create a Journey - In the configuration dialog fill out the details,
- Channel: The Atomic sender channel for the environment you want to target.
Create a Journey - Message: The target Message (Action Flow) you want to trigger as part of the action
Create a Journey - Send to: Atomic End User Id.
Create a Journey - When complete you will need to (re)publish the message to start using the Custom Channel in your Journey.
When using Channels, custom or otherwise, to send to external systems. The Contact record needs to have the Send To attribute populated for the action to be triggered.
In addition, the Compliance Profile for the message can also impact whether an Channel is executed for a Contact.
If a trigger of the Action Flow Channel is blocked for a given user, a note will show up in the timeline for that Contact.
Populate Contact records with end user id
For new Contact records the Atomic End User ID will be automatically generated. For existing contact records this field will need to be populated.
This process is still in active development. Please contact support@atomic.io to discuss.