Customers
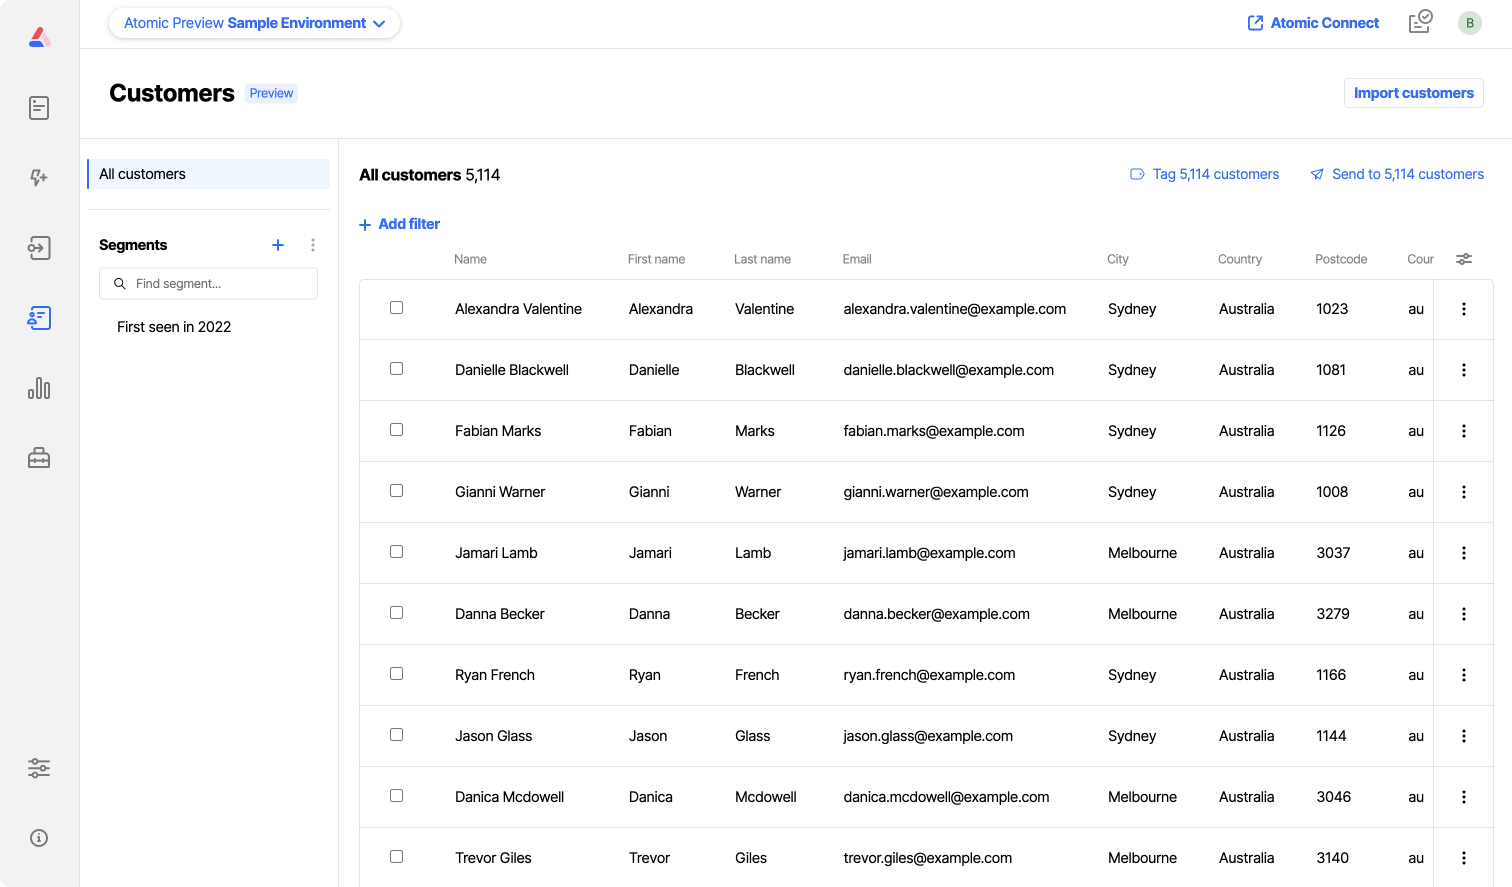
The Customers area provides you with the ability to view and manage your customers, enabling you to send personalized messages to specific groups of customers.
Access it by selecting 'Customers' in the left hand sidebar.
There are three types of fields associated with each customer. The customer's unique ID is the only required field, all other fields are optional.
- Profile: this includes optional personal details such as name, email address, location and an external ID.
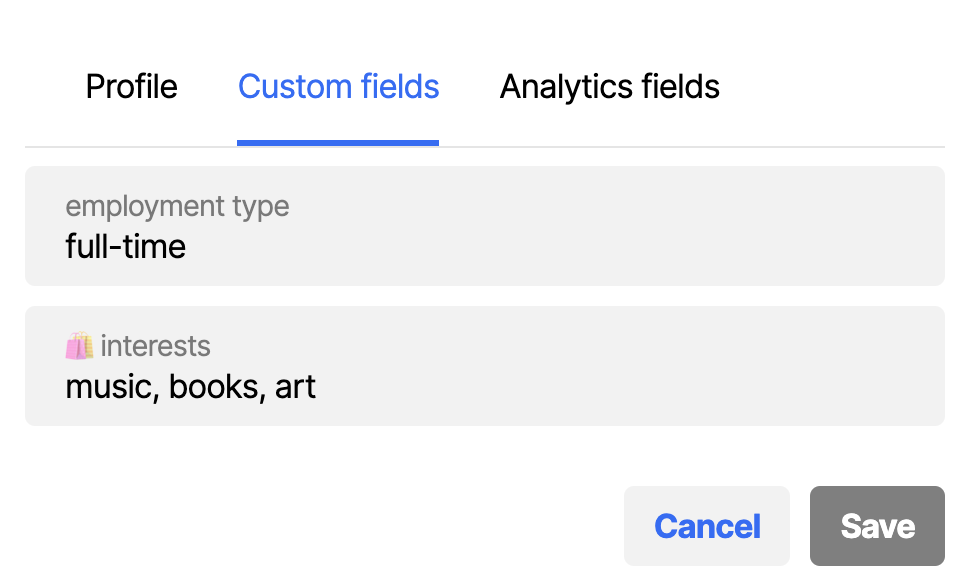
- Custom fields: any other fields you would like to add. E.g. a “churn risk” score, or their preferred name. This field type can accommodate either a date or a string value.
- Analytics fields: this includes your customer’s platform and device related information, as well as event-related data, such as when they were first and last seen and more.
Once added to Atomic, analytics fields will automatically be populated, including data such as the timezone they were last seen in, their operating system, and when they last completed a card.
Managing customers
Customers can be managed via API or manually in the Workbench via a csv upload.
It is not possible to add individual customers, but you can add test accounts for testing purposes, as explained in the Sending cards tutorial.
Add or update customers via CSV
Make sure your CSV file:
- is smaller than 128MB in size
- has less than 100 columns
- has unix line endings
From the Customers screen, follow these steps:
- Click the 'Import' button in the top right. This will open the 'Upload customers from CSV file' window.
- Click the 'information' icon next to the title. This opens an information panel.
- Click the 'Download a sample csv file'. This csv file contains all of your environment's custom profile fields.
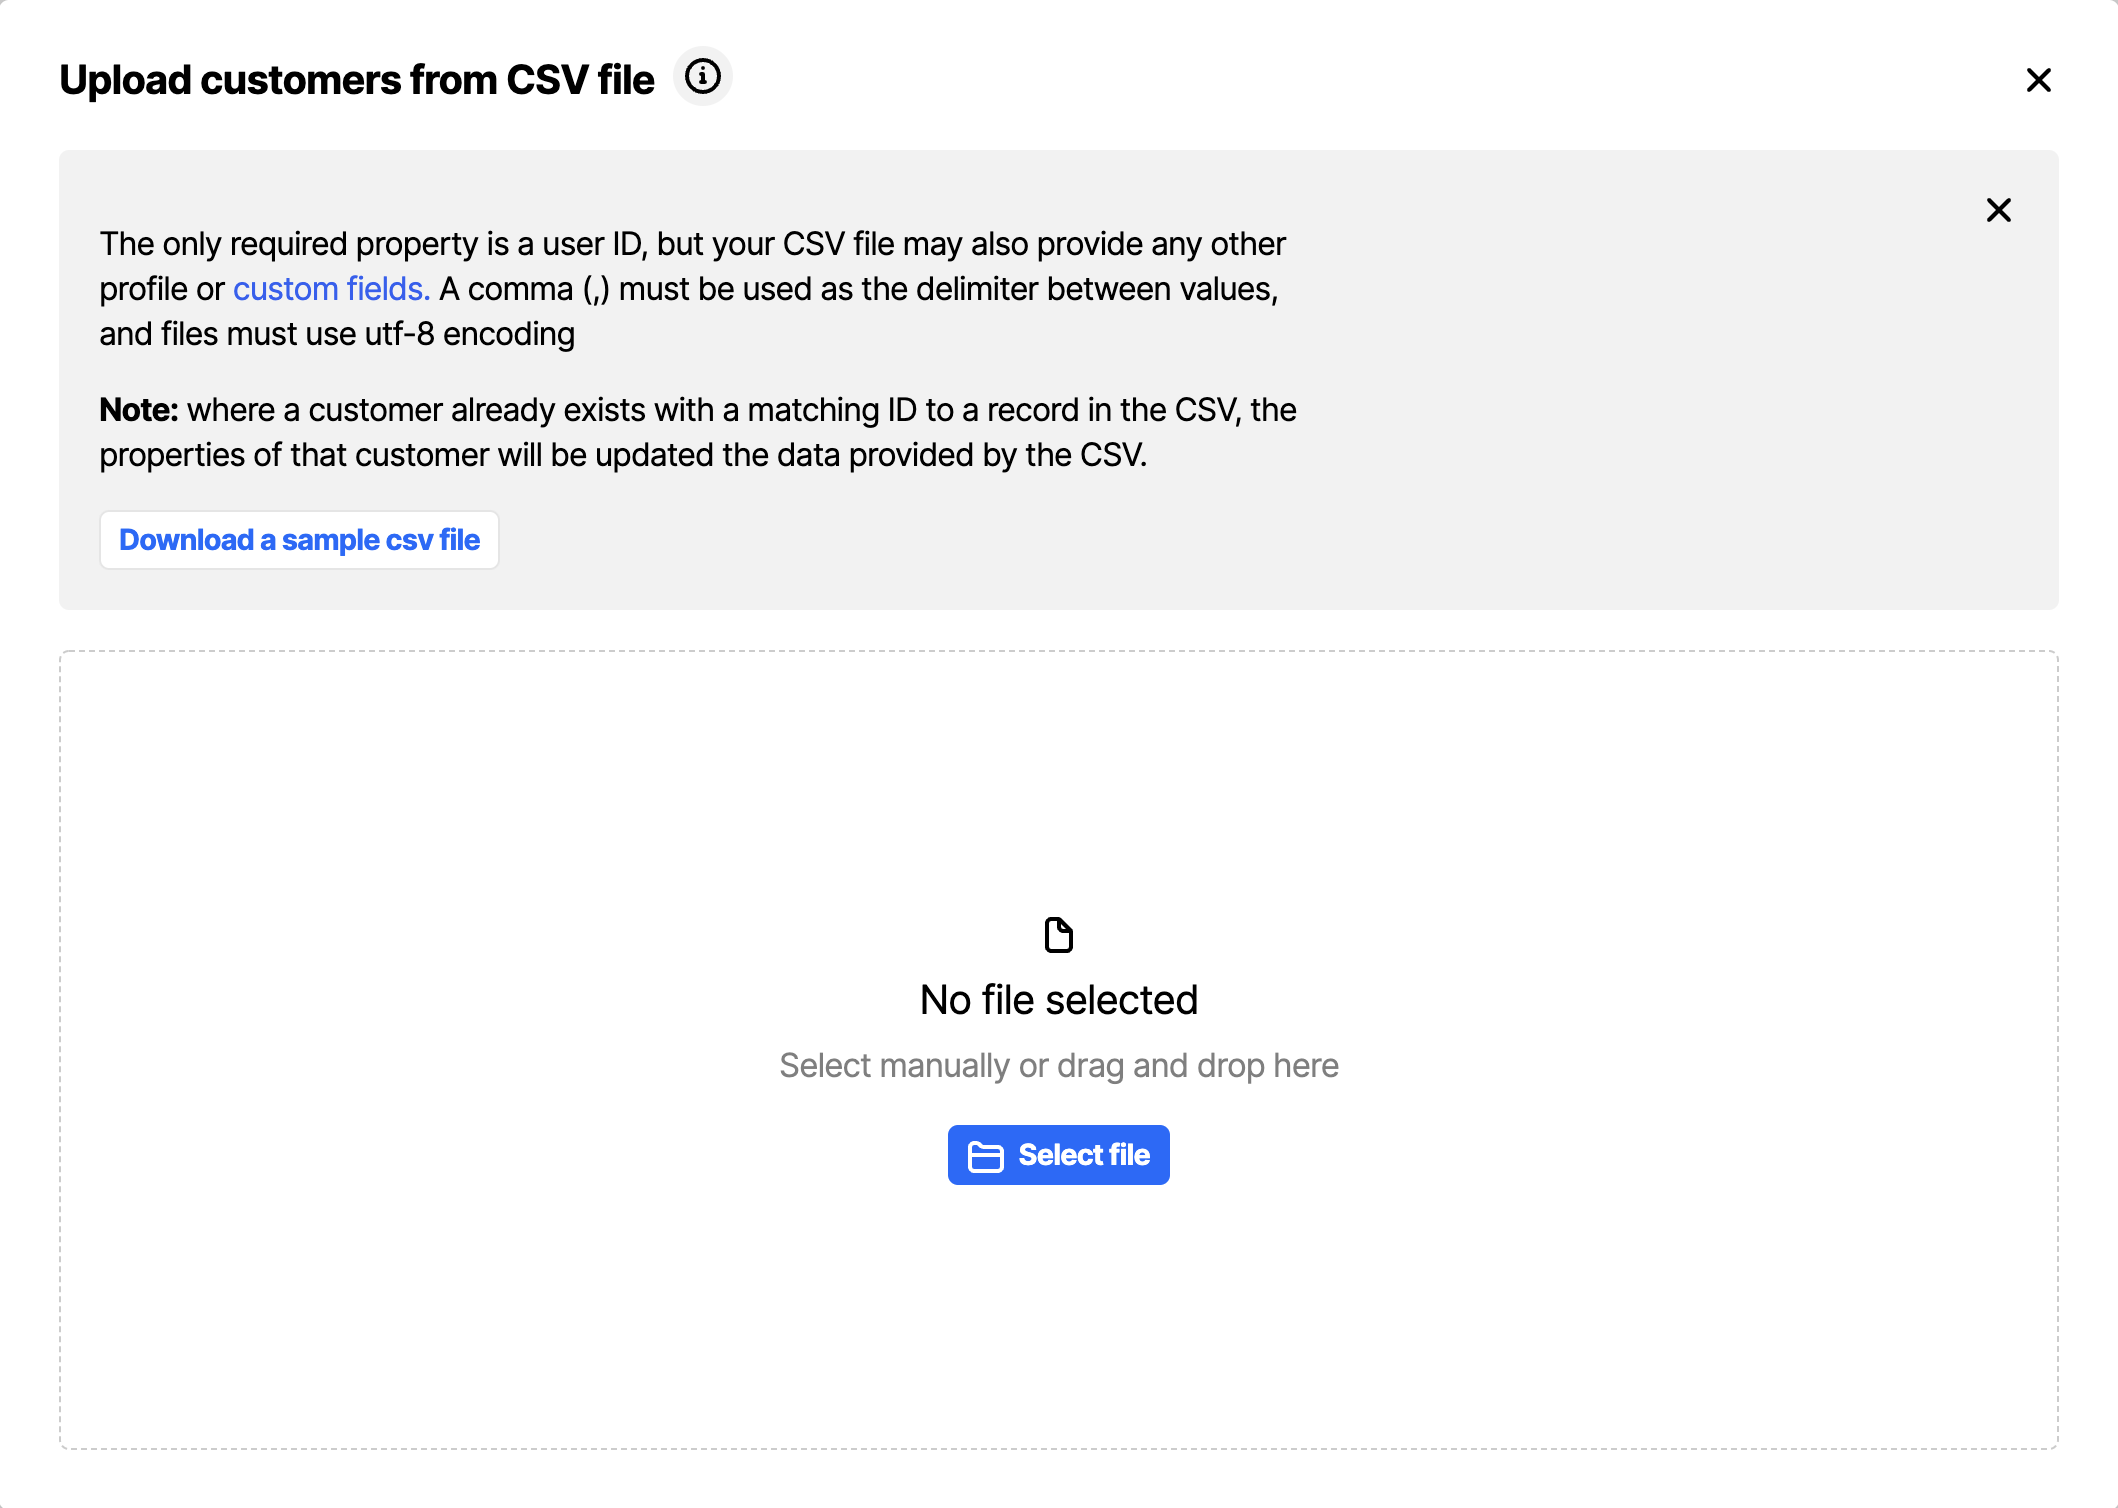
- Update the sample csv file with your customer data. The only required property in the CSV file is the 'id' column, but you can provide any other profile or custom fields. Where a customer already exists (with a matching user ID), the properties of that customer will be updated with the data provided by the CSV.
- Upload the file and check that the fields match your data correctly. If any fields do not match, you can select the correct field from the column header dropdown.
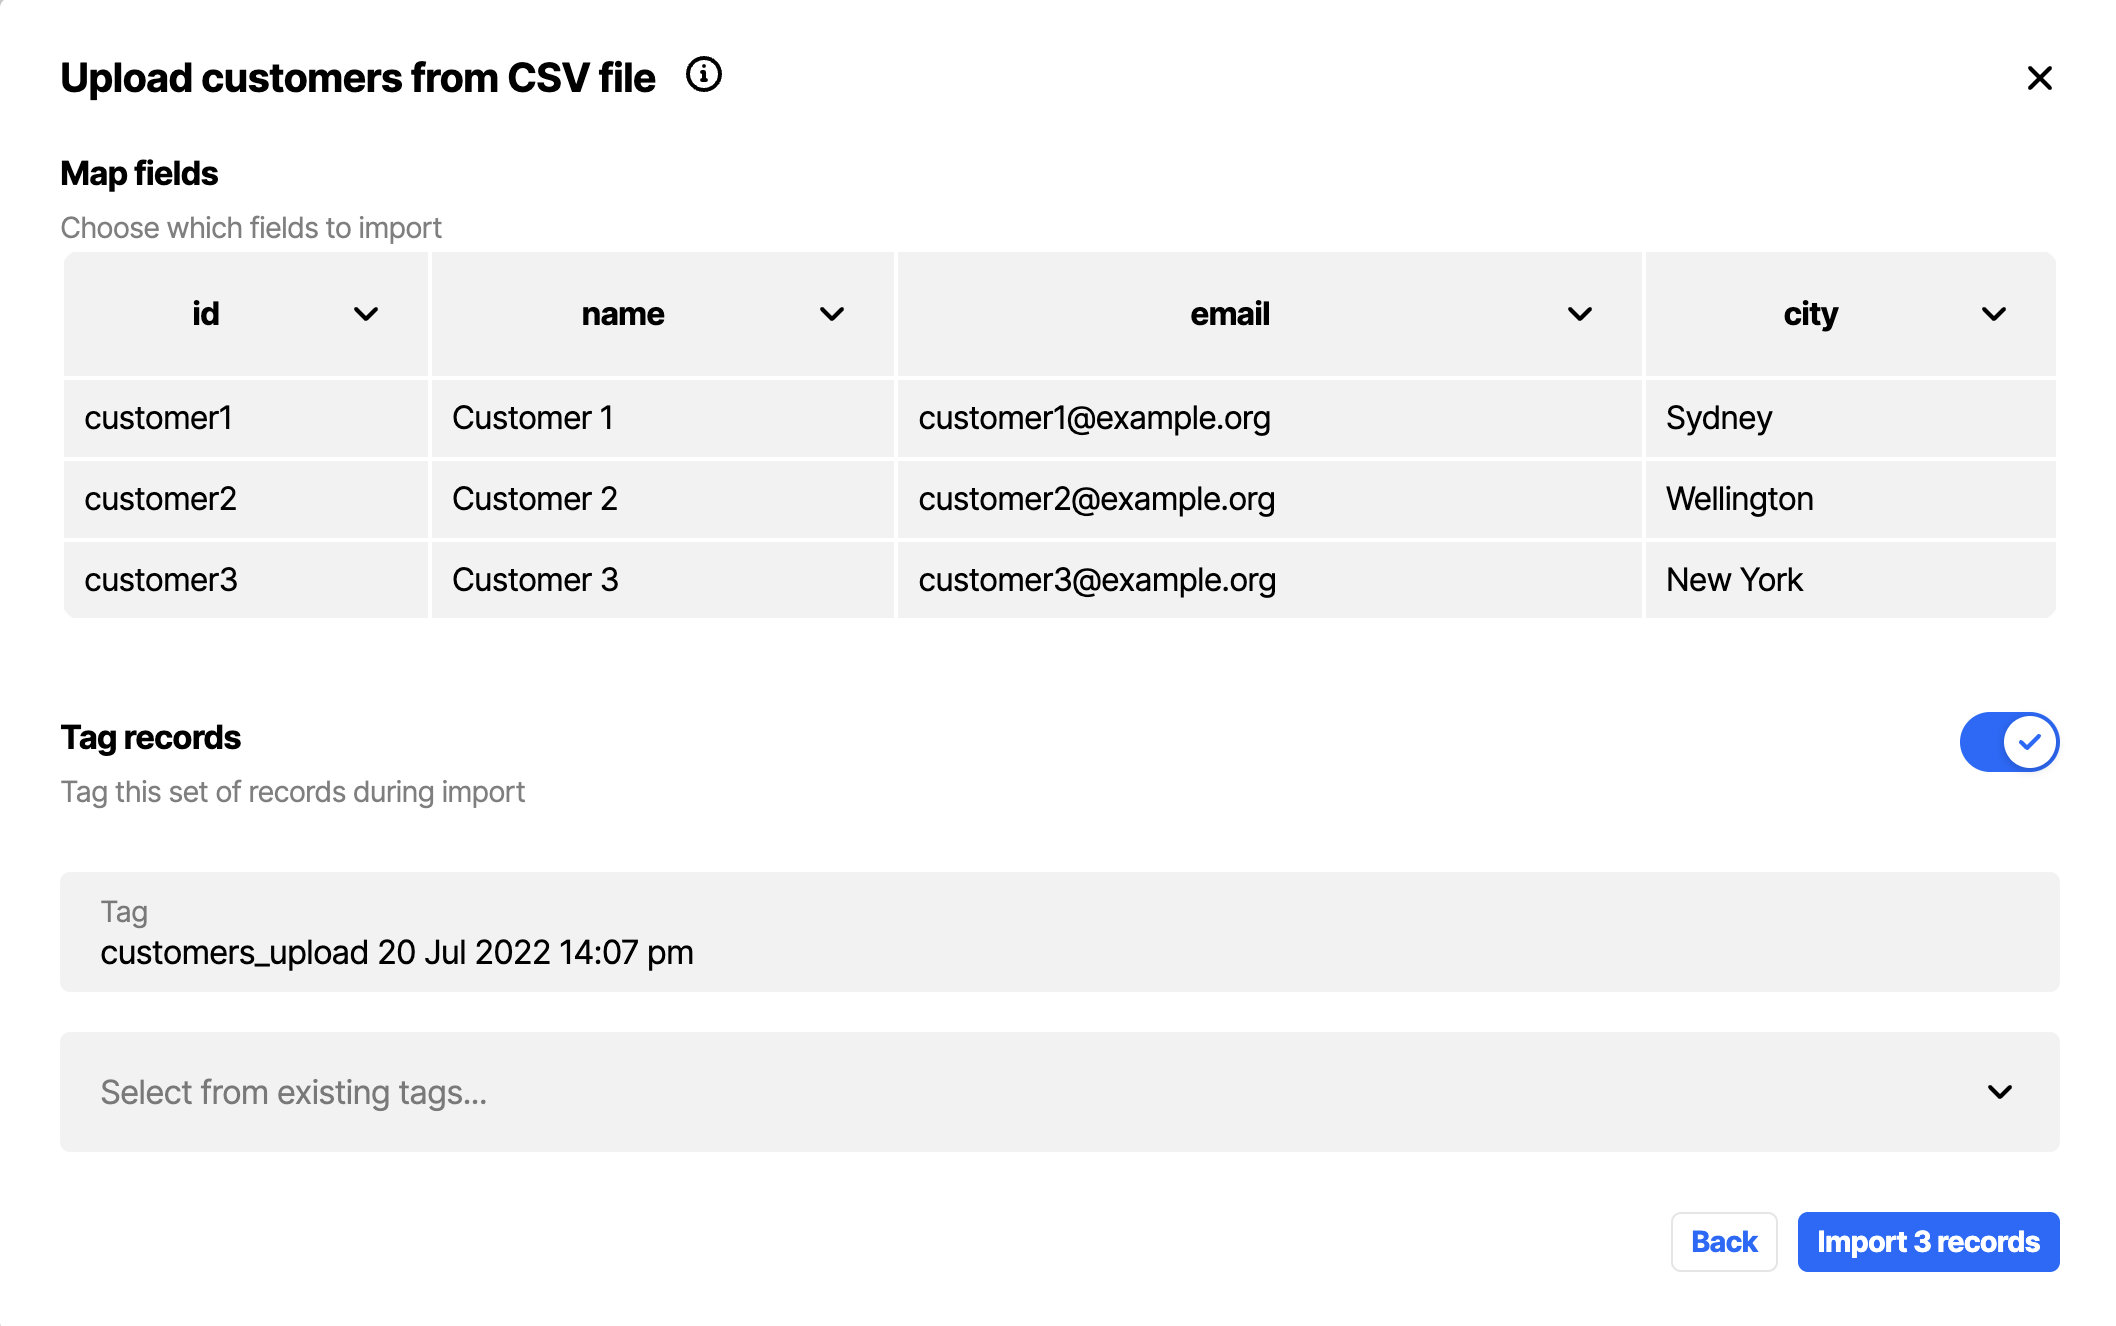
You can edit the name of the tag that will be applied to all customers in this upload, or prevent it being added before uploading by toggling the 'tag records' switch off. Additionally, you have the option to select and apply one or more of the existing tags. Find out more about using tags in the Tags section below.
Once you've configured the fields that will be imported and the tag(s) that will be applied, you click the 'import records' button. This will open the 'Processing your import' dialogue window, which gives you the option to go to the 'Customer data importer' to track progress of the upload, or click the X to return to the Customers screen.
Manage customers via API
Using our Users API you can add new customers, update or delete existing customers, or retrieve a list of all customers. You can find detailed information about this in the Users API guide. This is also where you can read more about passing customer data with the auth token.
Tags
Tags provide a manual way for you to group your customers. They allow you to categorize customers based on criteria you specify, for example – those who joined through a specific event or promotion, VIPs, or customers uploaded in a particular batch.
Adding or removing tags needs to be performed manually, or via API. This is unlike Segments, where customers move in and out of segments dynamically.
In the Workbench, you can create new tags directly when assigning them to a customer(s), or you can create tags in advance, to use later.
Once a tag is created, you can manually assign it to a customer in the Workbench or via API.
Create a tag
There are two ways to create tags in the Workbench. The first is via the Configuration area:
- Go to: Configuration → Customer profiles → Tags. Alternatively, open the command palette and type 'Tag'. Click on 'New Tag'.
- Give the tag a name.
- Select 'Save'.
The second way to create new tags is within the Customers area. This can be done while assigning a tag to a customer as explained in the next section.
Assign a tag to a customer
- Select the customer(s) you want to tag by selecting the checkbox(es) next to the respective customers.
- Click 'Tag customer(s)' located towards the top-right of the screen and select the tag(s) you want to add. Additionally, you have the option to create and assign new tags at the same time.
- Select 'Save'.
Customer tags can also be added, removed, or retrieved via API. See the Users API guide to find out more.
Segments
A segment is a predefined set or combination of filters that enables you to target specific customers.
Unlike tags where customers are added to the group either manually or via API, customers enter and leave a Segment dynamically based on the filter conditions being met (or not). For example, you can create segments based on:
- the timezone a customer last logged in from
- the customer not completing any cards in the last month
- the customer's date of birth being in between two dates
You can create filters based on profile fields (including custom fields and activity fields), events or tags.
Create a Segment
- In the Customers screen, click on the + button next to the word Segments on the left side of your screen.
- In the 'Create a new segment' window, give the segment a name and an optional description before clicking 'Create'.
The new segment is created and opened in edit mode.
- Click 'add filter' to add one or more filters. When adding more than one filter, you can choose whether all these filter conditions need to be true ('match all') or whether meeting one condition ('match any') is sufficient.
- All customers that currently meet the segment criteria are shown on the screen, helping you decide whether the filter conditions have been set up correctly.
- Once the filters are configured correctly, click 'save changes'.
When customers are updated through API or CSV, customers will automatically enter the new segment if they meet the criteria specified. They will likewise leave a segment if they no longer meet the criteria.
Example segment with multiple filters
Example: let's say you want to create a segment for all customers that were 'first seen' in the year 2022.
- Create a segment (by clicking on the + button), give it a name 'first seen in 2022', and click 'Create'.
- Click 'add filter'. In the 'profile field' tab, select 'First seen' (under Activity). Select 'After' as a condition and select '1 January 2022 12:00 AM' as the date and time.
- Click 'Apply'. The view shows all customers that were first seen after 1 January 2022.
- Click 'add filter'. In the 'profile field' tab, select 'First seen' (under Activity). Now select 'Before' as a condition and select '1 January 2023 12:00 AM' as the date and time.
- Click 'Apply'. The view now shows all customers that match all conditions. You can change the 'match all' condition to 'match any' to see how that affects the number of customers.
- Click 'save changes'.
Fields for customer filtering
The table below lists all profile fields that can be used to create filters.
| Field name | Description |
|---|---|
| Atomic created | time when customer profile was created in Atomic |
| Atomic ID | Atomic ID; each customer is assigned one when created in Atomic |
| City | optional free text field |
| Country | optional free text field |
| optional free text field | |
| External ID | optional free text field |
| Name | optional free text field |
| Phone | optional free text field |
| Region | optional free text field |
| Timezone | optional free text field |
| User type | customers can either be "test" or "live" depending on whether they are an internal workbench test user or not |
The table below lists all profile activity fields that can be used to create filters.
| Field name | Description |
|---|---|
| First seen | time when customer first interacted with any of the SDKs, based on time of first analytic event received or first successful authentication |
| Last seen | time of last customer activity based on most recent analytics and successful authentication with the SDK |
| Last seen on iOS | time when customer last interacted with the iOS sdk |
| Last seen on Android | time when customer last interacted with the Android sdk |
| Last seen on Web | time when customer last interacted with the Web sdk |
| Last Android SDK version | version of the Android SDK the customer last interacted with |
| Last Android device | Android version and device model the customer used most recently |
| Last Android OS version | Android version the customer used most recently |
| Last Android device name | Android device model the customer used most recently |
| Last iOS SDK version | version of the iOS SDK the customer last interacted with |
| Last iOS device | iOS version and device model the customer used most recently |
| Last iOS OS version | iOS version the customer used most recently |
| Last iOS device name | iOS device model the customer used most recently |
| Last browser | the user agent string of the last browser used |
| Last browser name | browser name of the last browser used |
| Last browser version | browser version of the last browser used |
| Last browser OS | the operating system the last browser used |
| Last browser OS version | the operating system version the last browser used |
| Last web SDK version | version of the Web SDK the customer last interacted with |
The table below lists all event fields that can be used to create filters.
| Field name | Description |
|---|---|
| Card cancelled | time when customer cancelled a card |
| Card completed | time when customer completed a card |
| Card dismissed | time when customer dismissed a card |
| Card displayed | time when customer displayed a card |
| Card embargoed | time when card was embargoed |
| Card expired | time when card was expired |
| Card published | time when card was sent |
| Card snoozed | time when customer snoozed a card |
| Card subview displayed | time when customer opened a subview |
| Card subview exited | time when customer exited a subview |
| Card unsnoozed | time when card was unsnoozed |
| Card voted-down | time when card was voted-down |
| Card voted-up | time when card was voted-up |
| Notification received | time when customer received a push notification |
| Notification sent | time when a push notification was sent |
| Runtime vars-updated | time when runtime variables were updated for this customer |
| SDK initialized | time when any of the SDKs was initialized for this customer |
| Segment entered | time when customer entered any segment |
| Segment exited | time when customer exited any segment |
| Snooze options cancelled | time when customer cancelled the snooze options |
| Snooze options displayed | time when customer displayed the snooze options |
| Stream displayed | time when any stream was displayed for this customer |
| User redirected | time when customer was redirected after clicking a link |
| Video completed | time when customer completed watching a card video |
| Video played | time when customer started watching a card video |
Timestamps are shown in the workbench member's local timezone. When creating a segment based on time, it gets converted to UTC time in the backend. This means that even organizations with workbench members in different timezones will have consistent segments.
When a customer exits or enters a segment the 'segment-entered' or 'segment-exited' events are emitted. These events are available in the analytics data. It is also possible to configure webhooks to send the event payload data to a URL you specify when the events are emitted.
Edit a segment
- In the Customers area, select the segment you would like to edit. Click on its name to open its detailed view.
- Click on the 'Edit segment' button on the right hand side.
- You can now make changes to the segment name, description or filters.
- Click the 'save changes' button. When the segment is used as a trigger to one or more cards, you will see a warning message such as the one in the screenshot below.
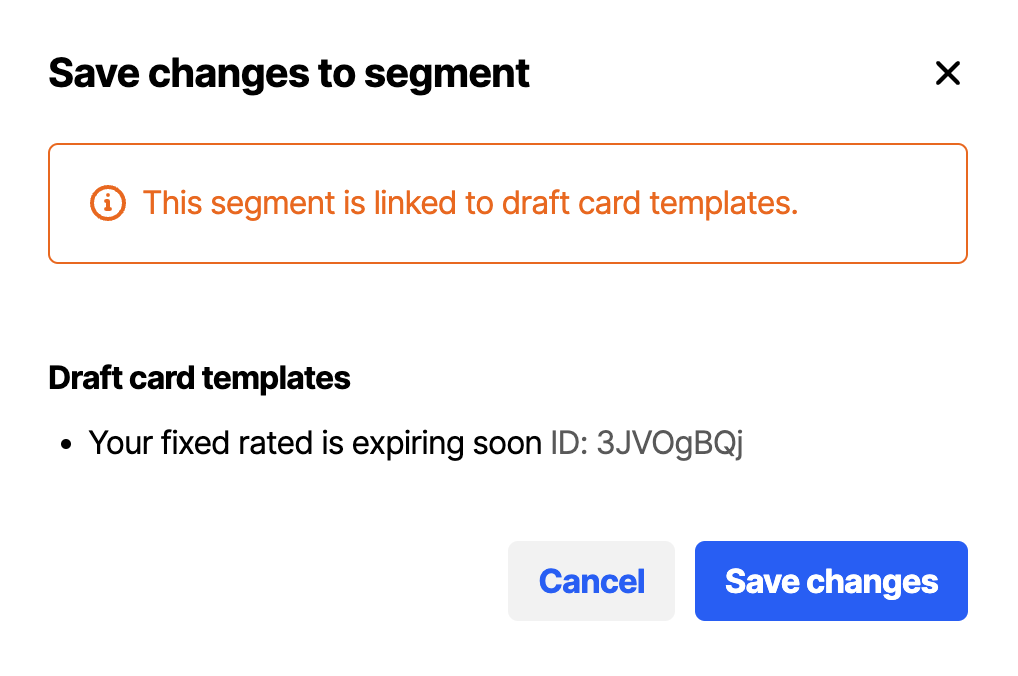
- Confirm again by clicking 'Save changes'.
Delete a Segment
- In the Customers area, select the segment you would like to delete.
- Then click the overflow menu (3 vertical dots) next to 'Edit segment' and select 'Delete segment'.
- When the segment is used as a trigger to one or more cards, you will see a warning message showing what cards the segment is linked to.
- Confirm by clicking the 'Delete segment' button.
Custom fields (Beta)
Custom fields let you add other fields to customers' profiles not contained in user or analytics fields.
Add a Custom field
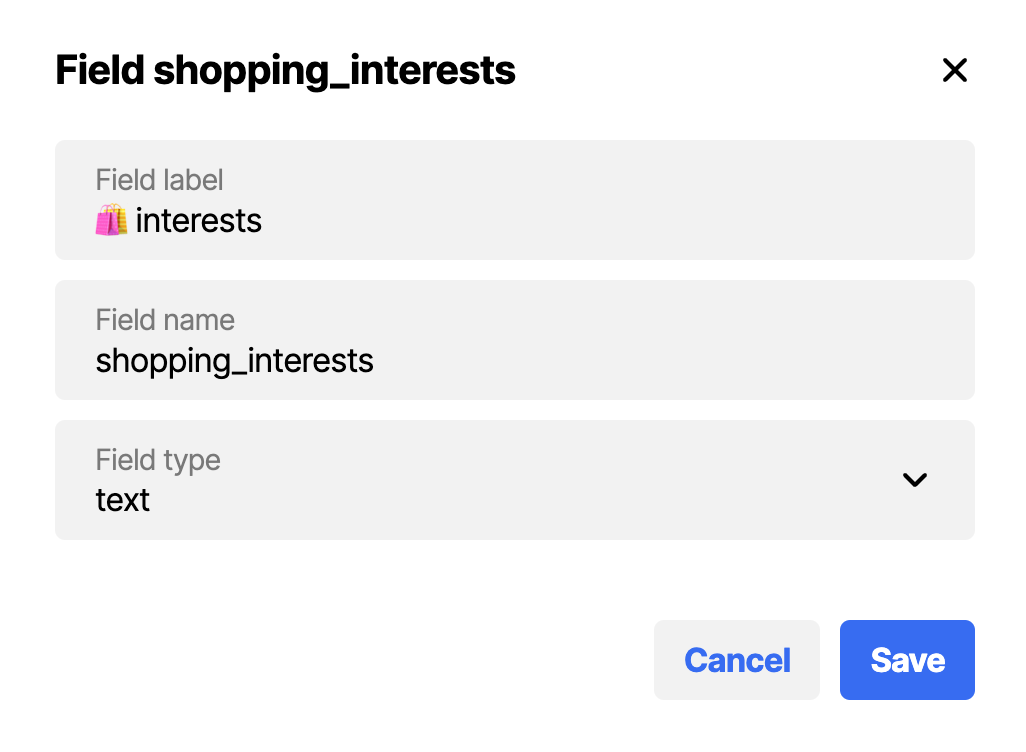
- Go to: Configuration > Customer profiles > Custom fields. Alternatively, open the command palette and type 'Field'. Click 'New Field'.
- Give the Field a label (the name will automatically be generated).
- Give the field a type: either text or a date.
- Select ‘Save’.
- The Field is now created, and so customer profiles can have the field updated manually or via API.
Multiple values in custom fields
A custom field of the type 'text' can have more than 1 value, separated by commas. These values can be used to filter on, and create segments.
Create a segment based on multiple values in a custom field
- Create a custom field as described in the custom fields section.
Example: a custom field describing a customer's shopping interests.
- Update the relevant customers' profile with comma-separated values for this field.
Example: a customer is interested in arts, music and books.
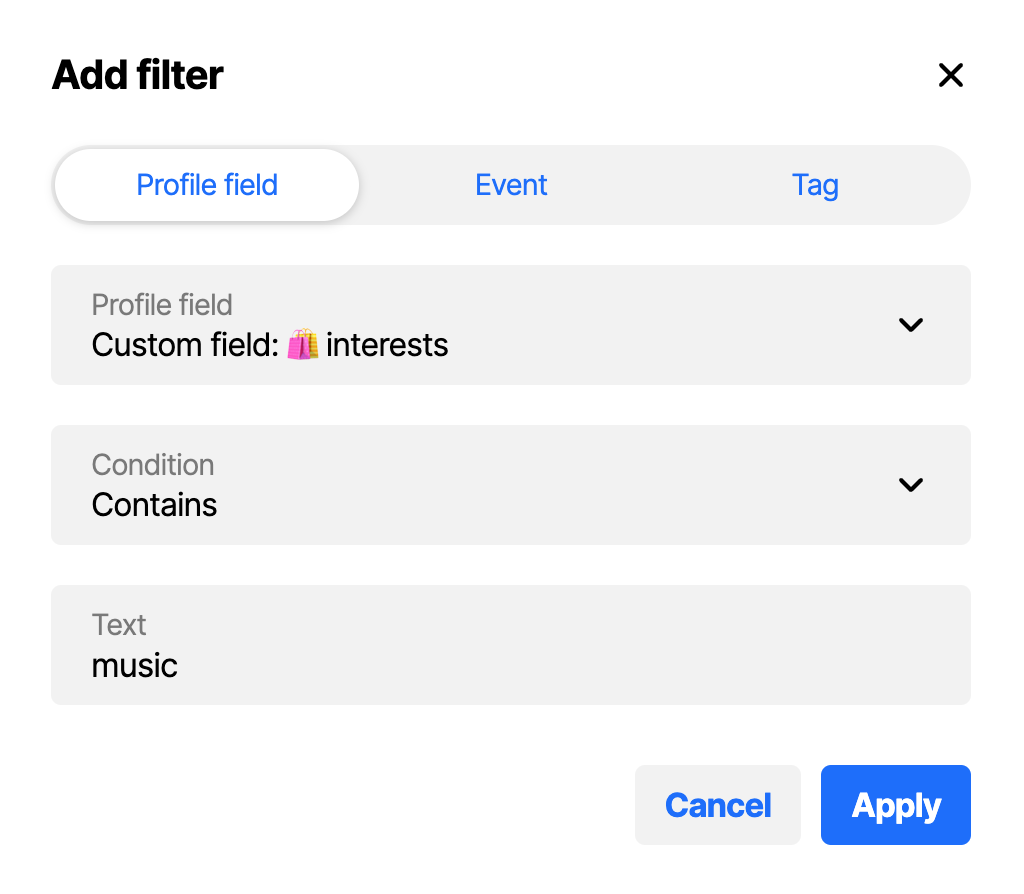
- Create a filter based on the custom field by using the 'contains' condition and one keyword.
Example: a filter for all customer interested in music.
- If you want to include multiple keywords in your segment, you can combine multiple filters using the 'match any' or 'match all' dropdown menu.
Example: a segment containing all customers interested in music or art.
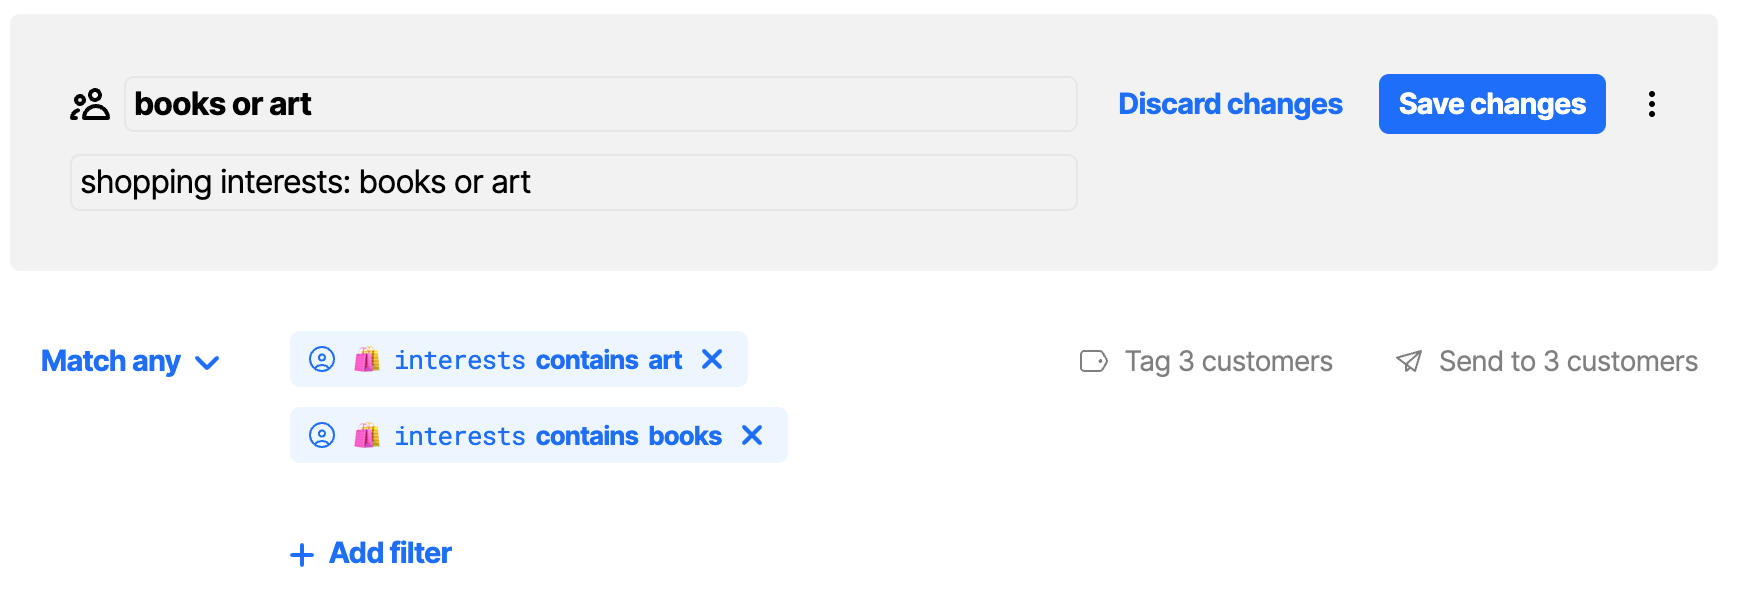
- When you filter on a value that contains (part of) another value, both get returned. When you have two values, 'men' and 'women', filtering on 'men' will also include all values for 'women'. This happens because the text string 'men' is found within the text string 'women'.
- If you use multiple keywords in 1 filter, the results will be limited to cutomers with those values in that exact order. A filter for 'books, art' will not return the same results as 'art, book'. Using a combination of multiple filters (as described in the section above) is the recommended approach.
Send a card
In the Customers screen, you can select one or more customers to send cards to.
Before you send a card to customers you will need to have a card configured. See creating a card template for how to do this.
The Sending cards tutorial describes in detail how to send cards, while the Sending cards advanced guide describes the different card delivery options.